Introduction
There is nothing quite as frustrating as sitting in your driveway with a new remote that refuses to talk to your sleek, space-saving garage door system. If you are struggling to sync your devices, learning how to program a Chamberlain wall mount garage door opener is the essential first step to reclaiming your convenience and security. We understand that technical manuals can be confusing, so we have simplified the process into clear, actionable steps to get your system running smoothly without needing a professional technician.
Understanding Your Chamberlain Wall Mount System
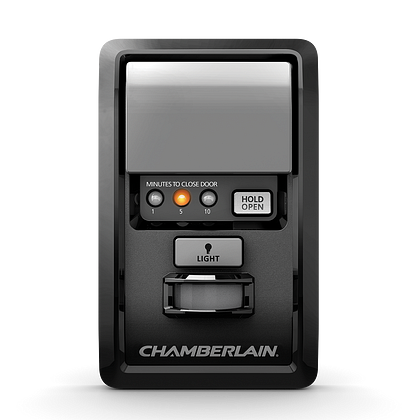
Before diving into button sequences, it is vital to understand what makes the wall mount (often called a jackshaft) opener different from traditional trolley systems. Unlike standard openers that hang from the ceiling center, these units mount on the side of the garage door header, freeing up overhead storage space and reducing noise vibration.
Because the motor location differs, the logic board and learn buttons are positioned differently than on chain-drive models. Most modern Chamberlain wall mount openers utilize the Security+ 2.0 rolling code technology. This means every time you press the button, the code changes, preventing thieves from copying your signal. According to industry standards referenced in Wikipedia’s overview of garage door automation, rolling code technology became a mandatory safety and security standard after 1996, significantly reducing break-in risks associated with fixed-code remotes.
Key Components You Will Need
- The Chamberlain Wall Mount Opener Unit
- Compatible Remote Control or Keyless Entry Pad
- A sturdy stepladder (the unit is mounted high on the wall)
- Fresh batteries for all transmitters
- The owner’s manual (for model-specific LED color codes)
How Do I Program a Remote to My Chamberlain Wall Mount Opener?
This is the most common query homeowners face. The process is generally uniform across the RJO50, RJO70, and RJ020 series, but always verify your specific model number.
Step-by-Step Remote Programming Guide
- Locate the Learn Button: On wall mount models, the learn button is typically located on the bottom or side of the unit housing, near the light lens. It is usually colored yellow, purple, red/orange, or green. The color indicates the frequency and security protocol of your opener.
- Clear Previous Codes (Optional): If this is a used opener or you are troubleshooting, hold the learn button down for 6 seconds until the LED goes out. This wipes all memory. Skip this if you only want to add a new remote.
- Activate Learn Mode: Press and release the learn button quickly. The LED indicator will light up solidly or begin flashing, depending on the model. You now have 30 seconds to complete the next step.
- Sync the Remote: Within that 30-second window, press and hold the button on your remote control that you wish to use. Hold it for 1–2 seconds, then release.
- Confirm Success: Watch the opener’s LED lights. They should flash, or you may hear two distinct clicks. The light on the remote may also blink. This confirms the handshake was successful.
- Test Immediately: Stand clear of the door path and test the remote. If the door moves, you have successfully mastered how to program a Chamberlain wall mount garage door opener for basic access.
Pro Tip: If the LED blinks rapidly during programming, it often indicates a battery issue in the remote or an incompatible frequency. Always start with fresh alkaline batteries before assuming hardware failure.
How to Program a Wireless Keypad for Wall Mount Openers
A wireless keypad is essential for family members who jog, walk dogs, or forget their remotes. Programming it requires a slightly different sequence because there is no physical “button” on the keypad to initiate the handshake initially.
Keypad Sync Instructions
- Enter Learn Mode: Press and release the learn button on the wall mount opener unit.
- Input PIN: Go to your exterior keypad within 30 seconds. Enter your desired 4-digit PIN.
- Press ENTER: After entering the PIN, press and hold the ENTER button until the opener lights flash or click.
- Verify: Wait 5 seconds, then re-enter your PIN and press ENTER to operate the door.
| Feature | Standard Remote | Wireless Keypad | MyQ Smartphone App |
|---|---|---|---|
| Best For | Daily drivers | Guests/Joggers | Remote monitoring |
| Programming Time | < 1 minute | 1–2 minutes | 5–10 minutes |
| Security Level | Rolling Code | Rolling Code + PIN | Encrypted Cloud |
| Battery Dependent? | Yes | Yes | No (WiFi powered) |
Setting Up MyQ Smart Connectivity on Wall Mount Units
Modern Chamberlain wall mount openers are often “MyQ Enabled,” meaning they have built-in WiFi. This eliminates the need for separate hub devices. However, users frequently confuse programming a remote with connecting to WiFi.
Why Connect to MyQ?
Data shows that smart garage adoption has surged, with over 30% of US homes now utilizing some form of connected entry. Connecting your wall mount opener allows you to:
- Receive real-time alerts when the door opens/closes.
- Grant temporary access to delivery drivers or contractors.
- Integrate with Amazon Key for secure in-garage deliveries.
- Monitor status remotely via smartphone.
Quick WiFi Setup Checklist
- Download the myQ app and create an account.
- Tap “Add Device” and select “Garage Door Opener.”
- Put the opener in WiFi pairing mode (usually by pressing the learn button until the blue LED flashes).
- Follow in-app prompts to connect to your 2.4GHz home network. Note: Most openers do not support 5GHz bands.
- Name your device (e.g., “Main Garage”) for voice assistant integration.
Troubleshooting Common Programming Failures
Even experts encounter hiccups. Before calling a pro, run through this diagnostic checklist:
- LED Flashes But Door Doesn’t Move: This usually indicates the safety sensors are misaligned. Check the photo-eye sensors at the floor level; both should show solid lights, not blinking.
- Remote Works Only When Very Close: Weak batteries are the culprit 80% of the time. If batteries are new, check for metal interference near the opener antenna.
- Learn Button Light Won’t Turn On: The logic board may have lost power or suffered a surge. Check the GFCI outlet and circuit breaker first.
- Keypad Accepts Code But Door Reverses: This is rarely a programming issue. It typically means the travel limits or force settings need recalibration via the adjustment screws on the side of the unit.
- Incompatible Remote: Chamberlain has changed learn button colors over decades. A yellow learn button remote will not work with a purple learn button opener. Verify compatibility using the manufacturer’s chart.
Frequently Asked Questions (FAQ)
Can I program multiple remotes to one Chamberlain wall mount opener?
Yes, absolutely. Most Chamberlain wall mount models support up to 30 individual remote controls and 2 wireless keypads simultaneously. Simply repeat the programming sequence for each additional device. There is no need to erase existing codes unless you have reached the maximum capacity or are experiencing security concerns.
What does the color of the learn button mean?
The color indicates the radio frequency and encryption protocol. Yellow typically signifies Security+ 2.0 (most common for wall mounts post-2011). Purple indicates Security+ 1.0 (older models). Red/Orange is often associated with DIP switch era or transitional models. Matching your remote’s internal chip to this color is non-negotiable for successful programming.
Do I need to reprogram my opener after a power outage?
Generally, no. Chamberlain wall mount openers use non-volatile memory that retains remote codes indefinitely. However, you may need to reset the travel limits and force sensitivity if the unit lost power while the door was mid-cycle. If remotes stop working after an outage, try replacing batteries first, as surges can sometimes corrupt transmitter signals.
Is it safe to program the opener myself?
Yes, programming is entirely safe and designed for DIY users. The only risk involves physical safety when accessing the high-mounted unit. Always use a stable ladder and never bypass safety sensors or disable auto-reverse features during testing. If electrical wiring looks damaged or frayed, consult a licensed electrician before proceeding.
Why won’t my universal remote work with my wall mount opener?
Universal remotes require specific compatibility lists. Many budget universals lack the proprietary Security+ 2.0 encryption required by newer Chamberlain wall mounts. Even if the packaging claims compatibility, firmware mismatches occur. We recommend using OEM Chamberlain/LiftMaster remotes for wall mount systems to guarantee reliable performance and full feature access.
How often should I update my garage door codes?
For optimal security, reprogram your devices annually or immediately after losing a remote, moving into a new home, or ending a service relationship with someone who had access. Regular code rotation prevents unauthorized cloning and ensures your rolling code system functions as intended.
Conclusion
Mastering how to program a Chamberlain wall mount garage door opener empowers you to maintain your home’s security and convenience without relying on costly service calls. Whether you are syncing a new remote, setting up a keypad for the kids, or connecting to MyQ for smart home integration, the process is straightforward when broken down into manageable steps. Remember to prioritize safety sensor alignment and battery health, as these solve the majority of programming frustrations.
Your garage should work seamlessly for you, not against you. Now that you have regained full control of your system, why stop here? Share this guide on social media to help fellow homeowners conquer their garage door tech challenges. Tag us with your success stories or lingering questions—we love seeing our community thrive with confidence and safety!
Leave a Reply