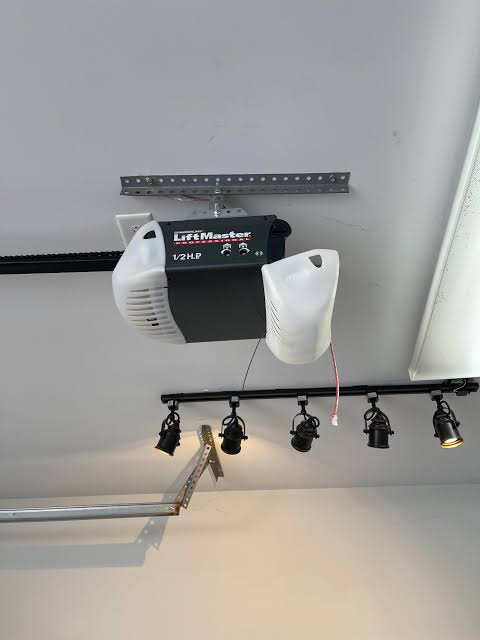
Have you ever pulled into your driveway only to realize you left the garage door open? Or perhaps you’ve worried about whether you closed it before leaving for vacation? You are not alone. Many homeowners struggle with outdated garage systems that lack modern convenience and security features. Fortunately, you do not need to replace your entire system to enjoy modern technology. Learning how to make an old garage door opener smart is a cost-effective solution that brings peace of mind and enhanced control to your daily routine.
Why Upgrade Your Existing Garage Door Opener?
Before diving into the technical steps, it is essential to understand why upgrading is often better than replacing. Most garage door openers installed in the last 20 years are mechanically sound but digitally obsolete. Replacing a fully functional motor unit can cost between $300 and $600, excluding professional installation fees. In contrast, smartening up your existing opener typically costs under $100.
According to industry experts, the average lifespan of a garage door opener motor is 10–15 years. If your unit is still operating smoothly, adding a smart controller extends its usability while integrating it into your modern smart home ecosystem. This approach aligns with sustainable living practices by reducing electronic waste.
Key Benefits of Smart Integration
- Remote Access: Open or close your garage from anywhere using your smartphone.
- Real-Time Alerts: Receive notifications if the door is left open for an extended period.
- Voice Control: Integrate with Amazon Alexa, Google Assistant, or Apple HomeKit.
- Activity Logs: Track who opens and closes the garage and when.
What Do You Need to Make an Old Opener Smart?
To successfully convert your traditional opener, you will need specific hardware and tools. The most popular method involves installing a smart garage door controller. These devices act as a bridge between your existing opener’s wall button circuit and your home Wi-Fi network.
Essential Components
- Smart Garage Controller: Devices like MyQ, Tailwind, or Meross are widely compatible.
- Smartphone: iOS or Android device for setup and control.
- Wi-Fi Network: A stable 2.4 GHz connection (most smart devices do not support 5 GHz).
- Basic Tools: Screwdriver, ladder, and possibly a drill.
- Garage Door Sensor: Often included with the controller, this magnetic sensor detects if the door is open or closed.
Note: Ensure your garage has a strong Wi-Fi signal. If the signal is weak, consider installing a Wi-Fi extender near the garage ceiling.
Step-by-Step Guide: How to Install a Smart Controller
Installing a smart controller is a straightforward DIY project that usually takes less than an hour. Follow these detailed steps to ensure a safe and effective installation.
Step 1: Check Compatibility
Not all old openers are compatible with every smart device. Most controllers work with openers manufactured after 1993 that have standard safety sensors. To verify compatibility, check the manufacturer’s website or consult the user manual of your smart controller. If your opener uses a proprietary security protocol, you may need a specific adapter.
Step 2: Power Down the System
Safety is paramount. Locate the power source of your garage door opener and unplug it. If it is hardwired, turn off the circuit breaker. Wait for 30 seconds to ensure all residual power is discharged.
Step 3: Mount the Smart Controller
Choose a location on the ceiling or wall near the opener motor unit. The device should be within reach of the opener’s terminal connections but away from moving parts. Use the provided screws or adhesive mounts to secure the controller. Ensure it is positioned so that the Wi-Fi antenna is not obstructed by metal beams.
Step 4: Connect the Wires
Locate the terminals on your garage door opener where the wall button wires are connected. These are usually labeled “Wall Console” or “Button.”
- Disconnect the existing wall button wires.
- Connect the two wires from the smart controller to these same terminals. Polarity typically does not matter for these low-voltage connections.
- Reconnect the original wall button wires in parallel if you wish to keep the physical button functional. Most controllers allow this daisy-chain configuration.
Step 5: Install the Door Sensor
Attach the magnetic sensor to the garage door track. One part goes on the stationary frame, and the other on the moving door section. They must align perfectly when the door is closed. Use the included adhesive or screws for mounting. Connect the sensor wires to the designated port on the smart controller.
Step 6: Restore Power and Configure
Plug the opener back in or restore the circuit breaker. Download the companion app for your smart controller on your smartphone. Follow the in-app instructions to connect the device to your Wi-Fi network. You will likely need to enter your Wi-Fi password and create an account.
Step 7: Test the System
Use the app to open and close the garage door. Verify that the status updates correctly in the app. Test the physical wall button to ensure it still works. If the door does not respond, double-check the wire connections and sensor alignment.
Comparing Popular Smart Garage Controllers
Choosing the right device can be overwhelming. Below is a comparison of three leading options to help you decide.
| Feature | MyQ Smart Garage Hub | Tailwind Smart Garage Controller | Meross Smart Garage Door Opener |
|---|---|---|---|
| Price Range | $30–$50 | $80–$100 | $25–$40 |
| Voice Assistant | Alexa, Google | Alexa, Google, HomeKit | Alexa, Google, HomeKit |
| Installation | Moderate | Easy | Easy |
| Subscription | Free (basic) | None | None |
| Compatibility | Wide | Wide | Wide |
For more detailed technical specifications, you can refer to general smart home standards documented on Wikipedia.
Troubleshooting Common Issues
Even with careful installation, you might encounter minor issues. Here are solutions to common problems.
- Wi-Fi Connectivity Loss: Ensure your router broadcasts a 2.4 GHz signal. Move the router closer or use a Wi-Fi extender.
- Door Status Incorrect: Recalibrate the magnetic sensor. Ensure the gap between the magnet and sensor is less than 1 inch when closed.
- App Not Responding: Restart the smart controller by unplugging it for 10 seconds. Check for firmware updates in the app.
- Interference with Other Devices: Keep the controller away from large metal objects or other wireless devices that may cause signal interference.
Frequently Asked Questions
Can I make any old garage door opener smart?
Most openers manufactured after 1993 with standard terminal connections can be made smart. However, very old models or those with proprietary security systems may require specialized adapters or professional assistance. Always check compatibility before purchasing a controller.
Is it safe to connect a smart device to my garage opener?
Yes, provided you follow the manufacturer’s instructions and use reputable brands. Smart controllers operate on low voltage and do not interfere with the safety sensors of your garage door. Ensure your Wi-Fi network is secured with a strong password to prevent unauthorized access.
Do I need a professional to install a smart garage controller?
No, most smart garage controllers are designed for DIY installation. The process involves basic wiring and mounting, which most homeowners can handle with minimal tools. However, if you are uncomfortable working with electrical components, hiring a professional is a viable option.
Will smartening my garage door opener increase my home value?
While it may not significantly increase the appraisal value, it enhances the appeal of your home to tech-savvy buyers. Smart home features are increasingly considered desirable amenities that can speed up the selling process.
What happens if my internet goes down?
Your garage door will still function normally using the physical wall button or remote control. The smart features, such as remote access and alerts, will be unavailable until the internet connection is restored. Some devices offer local control options that may still work via Bluetooth.
Conclusion
Learning how to make an old garage door opener smart is a practical and rewarding project that enhances both convenience and security. By investing in a smart controller, you transform an outdated appliance into a modern, connected device without the high cost of replacement. You gain the ability to monitor and control your garage from anywhere, receive real-time alerts, and integrate your garage into your smart home ecosystem.
Take the first step today by choosing a compatible smart controller and following the installation guide. Your future self will thank you for the added peace of mind. If you found this guide helpful, please share it with friends and family on social media who might benefit from upgrading their garage doors.
Leave a Reply