How To Fix The Spring On A Garage Door Safely
Is your car trapped inside because your door refuses to open? Dealing with a broken spring can be incredibly frustrating, especially when you are rushing to work. Fortunately, learning how to fix the spring on a garage door is a manageable DIY project if you respect the mechanics involved. In this comprehensive guide, we will walk you through the exact steps to safely diagnose, repair, and replace your broken springs to get your home back on track.
How To Fix The Spring On A Garage Door: Safety First
Before you even think about grabbing your toolbox, you must understand the severe risks involved. Garage door springs hold a massive amount of mechanical tension to counterbalance a door that can weigh over 300 pounds.
According to the International Door Association (IDA), improperly handled springs cause thousands of severe injuries every year, ranging from deep lacerations to broken bones. Never attempt to remove a spring without fully releasing the tension first. Always wear shatter-proof safety goggles and heavy-duty leather gloves. If the spring feels too tight or you feel unsure at any point, step back and call a certified professional.
Identifying Your Spring Type: Torsion vs. Extension
To properly repair your door, you need to know exactly which spring system you have. There are two main types found in residential US homes, and they operate on entirely different physics.
- Torsion Springs: These are mounted horizontally on a metal shaft directly above the closed door. They twist (torque) to lift the heavy door and are generally considered the modern standard.
- Extension Springs: These are mounted vertically on both sides of the door tracks. They stretch (extend) to provide lifting power and are typically found on older homes or smaller single-car garages.
Text Infographic: Torsion vs. Extension Springs
| Feature | Torsion Springs | Extension Springs |
|---|---|---|
| Average Lifespan | 15,000 – 20,000 cycles | 10,000 cycles |
| Safety Profile | Safer (contained in a metal tube) | Less safe (can snap back violently) |
| Operation Quality | Smoother, quieter, more balanced | Can be jerky, noisy, and less stable |
| Replacement Cost | More expensive to install | Cheaper, slightly easier for DIY |
| Common Location | Above the garage door opening | Parallel to the horizontal tracks |
Pro Tip: When ordering a replacement, you must measure the old spring. Note the wire size, inside diameter (IOD), and the overall length to ensure you buy the exact match for your specific door weight.
Essential Tools You Need Before You Start
Preparation is half the battle. Using the wrong tools is the leading cause of DIY injuries. Gather these specific items before heading into your garage:
- Steel Winding Bars: Never use screwdrivers! You need specialized 1/2-inch steel bars to safely wind torsion springs.
- Adjustable Wrenches & Socket Sets: For loosening bolts on the center bracket and track brackets.
- Cordless Drill: To speed up removing and replacing lag bolts.
- Vise Grips (Locking Pliers): Essential for clamping the door to the track so it doesn’t shoot open.
- Stepladder: A sturdy, A-frame ladder to safely reach the springs.
- Safety Gear: Shatter-proof goggles and thick work gloves.
Step-by-Step Guide: Replacing a Torsion Spring
Warning: Torsion springs store immense energy. If you lack confidence, hire a pro.
- Secure the Door: Close the door completely. Clamp vise grips onto the tracks just below the bottom rollers. This prevents the door from violently shooting up once the spring tension is released.
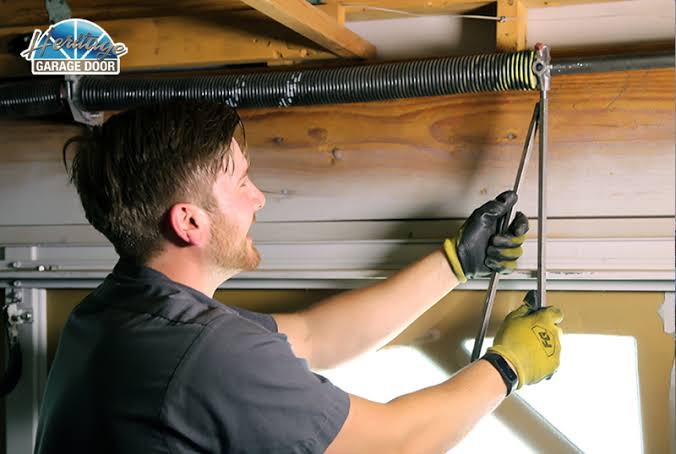
- Release the Tension: Insert a winding bar into the winding cone. Loosen the set screws carefully. Use a second bar to slowly and steadily unwind the spring. Expect to make about 30 quarter-turns to fully unwind a standard 7-foot door.
- Remove the Old Spring: Unbolt the spring anchor from the center bracket. Slide the old spring, winding cone, and cable drum off the torsion tube.
- Install the New Spring: Slide the new spring onto the tube. Ensure the winding cone faces the correct direction (left-wound springs usually have red winding cones, right-wound have black). Bolt the anchor securely back to the center bracket.
- Wind the New Spring: Use your winding bars to add tension. A standard 7-foot door requires exactly 30 quarter-turns (7.5 full turns). Listen for the clicks on the winding cone to keep track of your turns.
- Finalize and Test: Tighten the set screws on the winding cone. Remove the track clamps. Lift the door halfway by hand. If it stays in place, the tension is perfect. If it falls, add a quarter turn. If it shoots up, release a quarter turn.
Step-by-Step Guide: Replacing an Extension Spring
Extension springs are generally safer for DIYers because they don’t require winding bars. However, you must still prioritize eye protection.
- Open the Door Fully: Open the garage door completely to release the stretching tension from the extension spring. Secure the door in the open position using C-clamps on the tracks below the rollers.
- Disconnect the Old Spring: Unhook the safety cable from the track bracket. Unhook the broken spring from the rear hanger and carefully detach the pulley system.
- Install the Safety Cable: This is a crucial safety step! Thread a new steel safety cable through the center of the new extension spring. This cable prevents the spring from flying across your garage like a missile if it ever snaps in the future.
- Attach the New Spring: Hook the front end of the spring to the track bracket. Hook the rear end to the angle iron or rear hanger.
- Reconnect the Pulley System: Reattach the pulley and the lifting cable to the bottom door bracket.
- Test and Adjust: Remove the C-clamps and slowly lower the door. Adjust the S-hook on the rear bracket to different holes to increase or decrease tension until the door balances perfectly halfway up.
When to Call a Professional
While DIY repairs save money, they aren’t for every situation. A certified technician possesses the specialized tools and training to handle high-tension components safely.
Expert Insight: “I always tell homeowners that a torsion spring is like a loaded firearm. If you don’t respect the tension, it will hurt you,” says Mark Davis, a veteran garage door technician with over 20 years of experience in Texas.
Furthermore, according to a detailed breakdown on the mechanics of torsion springs, the elastic potential energy stored in a single spring can exceed hundreds of foot-pounds. You should absolutely call a professional if your door has a severely frayed lifting cable, bent steel tracks, or if your system uses dual torsion springs that require perfect synchronization.
Frequently Asked Questions (FAQ)
Q1: How do I know if my garage door spring is actually broken? A broken spring usually makes a loud, gunshot-like bang inside the garage. You will also notice a door that feels incredibly heavy to lift manually, a crooked door when opening, or a visible two-inch gap in the spring coil directly above your door.
Q2: Can I replace just one spring if my door has two? It is highly recommended by professionals to replace both springs at the exact same time. If one breaks due to metal fatigue, the other has experienced the exact same wear and is likely close to failing. Replacing both ensures your door remains perfectly balanced and prevents premature wear on your garage door opener motor.
Q3: How much does it typically cost to fix a garage door spring? For confident DIYers, a high-quality replacement spring costs between $30 and $100 online. Hiring a licensed professional usually ranges from $150 to $350, which includes the parts, labor, disposal of the old spring, and a standard service warranty.
Q4: How long do garage door springs actually last? Standard springs are rated for about 10,000 cycles (one open and close equals one cycle). If you open and close your door four times a day, you can expect your springs to last roughly 6 to 7 years before needing a replacement. Upgraded high-cycle springs can last up to 25 years.
Q5: Does WD-40 fix a squeaky garage door spring? No, it does not. WD-40 is primarily a solvent and degreaser, not a long-term lubricant. Instead, use a white lithium-based grease or a specialized garage door silicone spray to keep your springs, hinges, and rollers running quietly and smoothly.
Conclusion
Learning how to fix the spring on a garage door empowers you to save hundreds of dollars and avoid the stress of being trapped in your own driveway. By carefully identifying your spring type, gathering the right tools, and strictly following safety protocols, you can successfully restore your door’s smooth operation. Remember, if the tension feels too overwhelming, there is no shame in calling a professional to ensure your family’s safety.
Did this comprehensive guide help you solve your garage door issues? Share this article on your favorite social media platforms like Facebook, X (Twitter), or Pinterest to help your friends and family tackle their home repair projects safely and confidently!
Leave a Reply