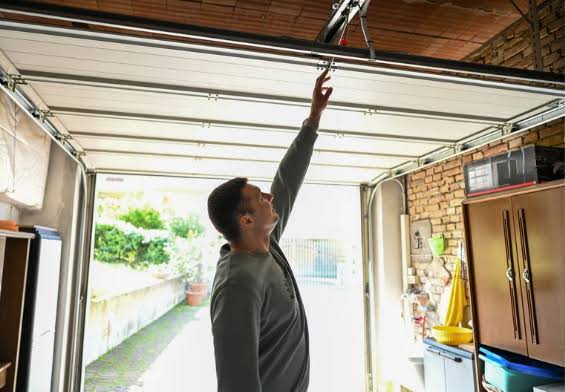
It is incredibly frustrating when you just want to park your car after a long day, but your garage door refuses to cooperate. If you are wondering how to fix garage door not closing all the way, you are definitely not alone in this struggle. This common issue is usually caused by a few simple, easily fixable problems rather than a broken motor. Let us walk through the practical solutions together so you can get your garage secured and functioning perfectly in no time.
How To Fix Garage Door Not Closing All The Way: 4 Easy Steps
Before you call an expensive repair service, grab your stepladder and a basic toolkit. Most of the time, the solution is right in front of you. Here is a detailed, step-by-step tutorial to get your door closing smoothly.
Step 1: Clean and Align the Safety Sensors
The most common culprit for a door that reverses before hitting the floor is the photo-eye safety sensors. These small black boxes are located near the floor on both sides of the door. They shoot an invisible infrared beam across the bottom of the doorway. If the beam is broken or misaligned, the door will refuse to close.
- Wipe the Lenses: Use a clean, dry microfiber cloth to gently wipe the sensor lenses. Dust, spiderwebs, or mud can easily block the beam.
- Check the LED Lights: Look at the small LED lights on the sensors. Usually, one has a green light (sending) and the other has a red or amber light (receiving). If the receiving light is blinking or completely off, they are misaligned.
- Adjust the Brackets: Gently loosen the wing nut on the bracket. Slowly move the sensor until the LED light turns solid. Ensure both sensors are exactly 6 inches above the ground and perfectly level with each other.
Step 2: Clear and Align the Metal Tracks
Your garage door rolls on metal tracks. If these tracks are dirty, bent, or misaligned, the friction will cause the door to stall and reverse.
- Inspect for Debris: Look inside the tracks for hardened dirt, leaves, or small rocks. Wipe the inside of the tracks thoroughly with a damp rag.
- Check the Alignment: Place a carpenter’s level against the vertical and horizontal tracks. The tracks must be perfectly plumb (vertical) and level (horizontal).
- Tighten the Hardware: If the track is loose, it will shift when the door moves. Use a 7/16-inch socket wrench to tighten all the bolts securing the track brackets to the wall and ceiling. If the track is bent, you may need to gently tap it back into shape with a rubber mallet.
Step 3: Adjust the Travel Limit Settings
The travel limit switch tells the motor how far to move the door before it stops. If the “down limit” is set incorrectly, the door will stop in mid-air or reverse before touching the ground.
- Locate the Limit Screws: Find the motor head unit hanging from the ceiling. Look for two adjustment screws on the side or back, usually labeled “Up” and “Down” (or “Open” and “Close”).
- Make Concrete Adjustments: Identify the “Down” limit screw. Using a flathead screwdriver, turn it clockwise by a quarter-turn (1/4 inch). This increases the downward travel distance.
- Test the Door: Press the wall button to close the door. If it still reverses, turn the screw another quarter-turn. Repeat this process until the door closes fully and the rubber seal compresses slightly against the concrete floor.
Step 4: Examine the Weather Stripping and Force Settings
Sometimes, the door is mechanically fine, but it hits an obstruction that triggers the auto-reverse feature.
- Check the Bottom Seal: Inspect the rubber weather stripping at the bottom of the door. If it is old, stiff, or folded over, it creates too much resistance when it hits the floor. Replace it if it looks cracked or brittle.
- Adjust the Force Setting: If the tracks are clean and the limits are correct, the motor might not be pushing hard enough. Locate the “Down Force” adjustment knob or screw on the motor. Turn it slightly clockwise to increase the closing force. Note: Do not increase this too much, or the door will become dangerous.
Expert Insight and Data
According to industry data from the International Door Association (IDA), nearly 60% of garage door service calls stem from simple sensor misalignments or track obstructions rather than broken mechanical parts.
As certified technicians often note, “A garage door is the largest moving object in your home; treating it with regular maintenance ensures both safety and longevity.”
Understanding the basic mechanics of your system can make troubleshooting much easier. For a deeper dive into the history and mechanical components, you can read the comprehensive overview of the garage door on Wikipedia.
DIY vs. Professional Repair: Quick Comparison
Not sure if you should handle this yourself or call a pro? Here is a quick breakdown to help you decide.
| Feature | DIY Troubleshooting | Professional Repair Service |
|---|---|---|
| Cost | Free to $20 (for basic tools/cloths) | $150 – $250 (service call fee) |
| Time Required | 30 to 60 minutes | Depends on technician availability |
| Best For | Sensor alignment, track cleaning, limit adjustments | Broken springs, snapped cables, motor failure |
| Safety Risk | Very Low (if you avoid touching springs) | Zero (handled by trained experts) |
Frequently Asked Questions
To help you further, we have answered some of the most common questions homeowners ask about this frustrating issue.
1. Why does my garage door start to close but then reverse?
This is almost always a safety feature being triggered. The most common reasons are misaligned safety sensors (the infrared beam is broken), an obstruction in the tracks causing excess friction, or the down-limit switch needing adjustment. The system is designed to reverse to prevent injury or property damage.
2. How do I know if my garage door sensors are actually broken?
Look closely at the LED lights on the sensor units. If the light is completely dark, check your power source and wiring. If the light is blinking, the sensors are misaligned or dirty. If you have cleaned them, aligned them perfectly, and the light still will not stay solid, the internal photocell might be fried and the sensor unit will need replacement.
3. Can cold weather affect my garage door closing?
Yes, absolutely. Extreme cold weather can cause metal tracks to contract slightly and old lubricant to thicken, which increases friction. Additionally, cold temperatures can make the rubber bottom weather seal stiff and rigid, causing it to bounce off the concrete floor rather than compressing, which tricks the door into thinking it hit an obstacle.
4. How much does it cost to fix a garage door that won’t close?
If the issue is just dirty sensors or misaligned tracks, your DIY fix will cost absolutely nothing. However, if you need to hire a professional to adjust the limit settings, replace faulty sensors, or repair the motor logic board, you can expect to pay anywhere between $150 and $250, depending on your local labor rates and the price of replacement parts.
Conclusion
Learning how to fix garage door not closing all the way is a highly rewarding DIY skill that can save you a significant amount of time and money. By simply checking the safety sensors, cleaning the tracks, and adjusting the limit switches, you can restore your garage door to perfect working condition. Regular maintenance not only keeps your vehicle secure but also extends the lifespan of your entire garage door system.
If you found this guide helpful and managed to get your door working again, please share this article on your social media to help out your friends and family who might be dealing with the exact same problem!
Leave a Reply