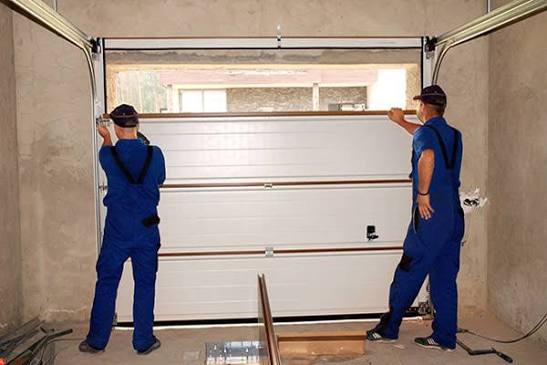
There is nothing more stressful than rushing to leave your house, only to find your garage door jammed, crooked, and completely stuck. If you are currently searching for exactly how to fix a garage door that came off track, you are in the right place, and fixing it yourself is often much easier than you might think. Let’s explore the problem together and get your home secure again!
Understanding How To Fix A Garage Door That Came Off Track
Before grabbing your toolbox, it is essential to understand the mechanics behind the problem. A standard residential garage door relies on a highly precise system of tension, steel tracks, and heavy-duty rollers to move smoothly. When one component fails or shifts, the entire system is thrown out of balance. According to the basic structural mechanics outlined on Wikipedia’s comprehensive Garage Door overview, a sectional door relies on a precise guiding pathway; if the tracks are bent or obstructed, the door will immediately bind or jump the rails.
Attempting to force the door open with the automatic opener when it is misaligned can severely damage the motor or snap the lifting cables, which are under extreme tension. Therefore, learning the proper way to address this issue not only saves you money but also prevents potentially dangerous accidents in your garage.
What Causes a Garage Door to Jump the Track?
To prevent future issues, you need to know what triggered the derailment in the first place. Here are the most common culprits that force US homeowners to deal with this frustrating issue:
- Accidental Vehicle Impacts: Backing into the door, even slightly, can bend the lower tracks and knock the bottom rollers out of alignment.
- Worn Out Rollers: Over time, nylon rollers can crack, and metal rollers can lose their bearings, causing them to slip out of the guiding channel.
- Loose Track Brackets: The vibrations from daily use can slowly loosen the lag bolts securing the tracks to the wooden garage framing.
- Obstructions in the Track: Dirt, hardened grease, or small rocks trapped inside the track act as speed bumps, forcing the rollers out of their path.
Case Study: The “Winter Freeze” Effect
In colder US climates, ice can build up on the bottom weather seal, freezing the door to the concrete driveway. When the automatic opener pulls upward, it cannot lift the frozen door. Instead, the kinetic force bypasses the bottom and violently pops the top garage door rollers out of the track. Always clear snow and ice from your driveway threshold before operating the door in winter!
Essential Tools You Will Need for the Job
Before you begin your repair, gather the following items. Having everything within reach will make the process safer and much faster:
- Safety glasses and heavy-duty work gloves: Protect your eyes from falling debris and your hands from sharp steel edges.
- Locking pliers (Vise-Grips): Essential for clamping the track to prevent the door from moving unexpectedly.
- Rubber mallet: Used to reshape bent steel without damaging the paint or metal finish.
- Socket wrench set: Needed for tightening and loosening track mounting bolts.
- Carpenter’s level: Ensures your tracks are perfectly plumb (vertically straight) after realignment.
- Flathead screwdriver or crowbar: Helpful for gently prying the track open.
- White lithium grease: The best lubricant for garage doors (avoid standard WD-40).
Step-by-Step Guide: How To Fix A Garage Door That Came Off Track
Now, let us dive into the practical tutorial. Please follow these steps carefully to ensure your safety and the longevity of your door.
Step 1: Disconnect the Opener and Secure the Door
First, locate the red emergency release cord hanging from the opener carriage and pull it firmly to disconnect the door from the motorized unit. Once disconnected, manually lower the door as much as possible. Crucial Safety Measure: Clamp a pair of locking pliers onto the metal track directly below the bottom roller on the side that is still intact. This prevents the heavy door from violently shooting upward while you are working on the derailed side.
Step 2: Inspect the Rollers and Track
Carefully examine the derailed section. Look closely for shattered nylon wheels or rusted metal bearings. If a roller is completely destroyed, it must be replaced before you can proceed. Next, inspect the steel track for any visible bends, dents, or gaps where the track separates from the wall brackets.
Step 3: Realign the Bent Track
If the metal track has been pushed outward, you need to reshape it. Place a small block of wood against the bent section of the steel. Using your rubber mallet, gently tap the wood to slowly bend the steel back into its original, straight position. Check your work using a carpenter’s level to ensure the track is perfectly plumb. A misaligned track will cause the door to jump the rails again within a week.
Step 4: Guide the Rollers Back Into the Track
This is the most hands-on part of the repair. Using your socket wrench, loosen the track mounting bolts exactly 2 full turns. Do not remove them completely. Gently pry the track outward by about 1/4 inch using a flathead screwdriver or a crowbar (protect the wall with a woodblock). Carefully guide each derailed roller back into the channel. Once all rollers are seated inside the track, remove the pry bar and let the track snap back into its flush position against the brackets.
Step 5: Tighten and Lubricate
With the rollers securely inside, use your socket wrench to re-tighten the mounting bolts. Aim for a torque of about 15-20 ft-lbs to ensure the track is rigid but not stripped. Finally, apply exactly 2 to 3 drops of white lithium grease to the stem of each roller. Wipe away any excess drips with a clean rag to prevent dust accumulation.
Step 6: Test the Balance
Remove the locking pliers, reconnect the emergency release cord, and test the door manually by lifting it halfway. If it glides smoothly and stays in place, plug your automatic opener back in and test the motor. If it feels incredibly heavy, your torsion springs may need professional adjustment.
DIY Repair vs. Hiring a Professional
Is tackling this project yourself worth the effort? Let’s look at the numbers. According to recent data from HomeAdvisor, the national average cost for professional garage door track realignment ranges from $150 to $300, depending on your local labor rates.
Here is a quick comparison to help you decide:
| Feature | DIY Repair | Professional Service |
|---|---|---|
| Estimated Cost | $0 – $40 (Tools/Lubricant) | $150 – $300 (Labor/Parts) |
| Time Required | 1 to 2 Hours | 45 Minutes to 1 Hour |
| Skill Level | Beginner to Intermediate | Certified Technician |
| Warranty | None | 6 to 12 Months on Labor |
Note: If your torsion springs (the heavy springs above the door) are involved or broken, do not attempt a DIY fix. Spring replacement requires specialized winding bars and carries a high risk of severe injury. Always call a professional for spring-related issues.
Preventive Maintenance to Keep Your Door on Track
Once you have successfully fixed the issue, a little routine maintenance goes a long way. Every six months, take a damp cloth and wipe out the inside of the tracks to remove built-up grime. Check all the track brackets and tighten any loose lag bolts. Finally, test the auto-reverse safety feature by placing a 2×4 piece of wood on the ground under the door; if the door hits the wood, it should immediately reverse.
Frequently Asked Questions (FAQ)
Is it safe to manually open a garage door that is off track?
No, it is highly discouraged. Forcing a derailed door open manually can cause the door panels to buckle, the tracks to bend further, or the heavy lifting cables to snap. Always secure the door and perform the track realignment steps first.
Can I use WD-40 to lubricate my garage door tracks?
You should avoid standard WD-40. While it is a great solvent and rust remover, standard WD-40 is not a long-term lubricant. It tends to attract dirt, dust, and grime, which will eventually turn into a thick paste that causes your rollers to stick. Always use a dedicated garage door lubricant or white lithium grease.
How often should I inspect my garage door tracks?
For optimal performance and safety, you should visually inspect your tracks and rollers every six months. Look for loose bolts, accumulated debris, and signs of wear. A quick wipe-down with a damp cloth and a fresh application of lubricant once a year will significantly extend the lifespan of your entire system.
What tools do I need to fix an off-track garage door?
At a minimum, you will need a socket wrench set, locking pliers (Vise-Grips), a rubber mallet, a level, and safety gloves. If your rollers are damaged and need replacing, you may also need standard wrenches to unbolt the door hinges.
Can a power outage cause my garage door to come off track?
A power outage itself will not derail your door. However, if you pull the emergency release cord during an outage and let the heavy door drop too quickly to the floor, the sudden impact can easily knock the bottom rollers out of the track. Always lower the door slowly and manually when the power is out.
Why is my garage door so loud after I fixed the track?
If your door is still making excessive noise, the issue might not be the track. Worn metal rollers, loose hinges, or a lack of lubrication on the torsion spring coils can all cause loud squeaking and grinding sounds. Ensure every moving metal-on-metal part is properly greased.
Conclusion
Dealing with a derailed garage door can feel overwhelming, but as you can see, learning how to fix a garage door that came off track is a highly manageable DIY project for most homeowners. By following these step-by-step instructions, you not only save hundreds of dollars on professional service calls but also gain a deeper understanding of how your home’s mechanical systems work. Remember to prioritize safety, take your time during the realignment process, and keep your tracks clean and lubricated year-round.
Did you find this guide helpful? Share this article with your friends, family, and neighbors on your favorite social media platforms like Facebook, X (Twitter), or Pinterest so they can tackle their own garage door issues with confidence!
Leave a Reply