Introduction
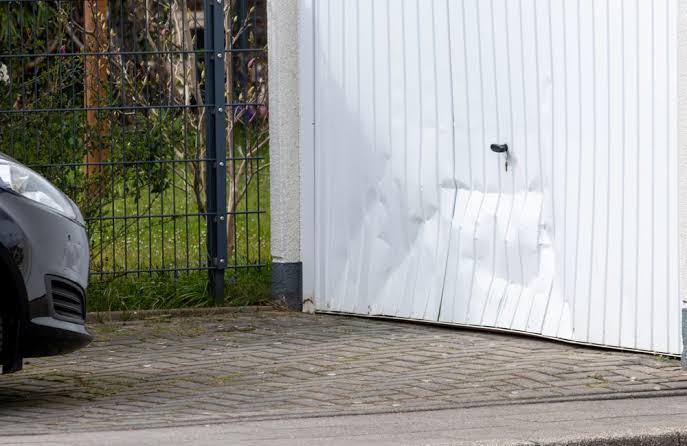
Backing into your garage door is a sinking feeling that every homeowner dreads, but accidents happen to the best of us. If you are searching for how to fix a garage door after backing into it, you need a safe, systematic approach to assess structural integrity before attempting any repairs. This guide will walk you through evaluating the damage, performing minor adjustments safely, and recognizing the critical warning signs that require professional intervention to protect your home and family.
How Do I Assess Garage Door Damage After an Impact?
Before you pick up a wrench or try to operate the opener, you must conduct a thorough safety assessment. The force of a vehicle impact can compromise the door’s structural balance, making it potentially dangerous. According to industry safety standards, garage doors are under extreme tension, and mishandling damaged components can lead to severe injury.
Visual Inspection Checklist
- Panel Integrity: Look for deep creases, cracks, or separated seams. Steel panels may bend, while wood or fiberglass can splinter.
- Track Alignment: Check if the vertical and horizontal tracks are bent, loose, or separated from the wall brackets. Even a 1/8-inch misalignment can cause derailment.
- Roller Condition: Inspect nylon or steel rollers for chips, flat spots, or dislodgement from the track.
- Spring System: Never touch the springs. Look for gaps in torsion springs or stretched extension springs, which indicate catastrophic failure.
- Opener and Sensors: Verify if the safety reversal sensors are aligned and if the motor housing shows signs of stress.
⚠️ Critical Safety Warning: If the torsion spring is broken, the cable is snapped, or the door is hanging unevenly, do not attempt DIY repair. These components store lethal amounts of kinetic energy. Contact a certified technician immediately.
Can You Repair a Bent Garage Door Panel Yourself?
The answer depends entirely on the severity of the dent and the material of the door. Minor cosmetic dents in steel doors can sometimes be addressed, but structural bends usually require panel replacement.
DIY vs. Professional Panel Repair
| Damage Level | Description | Recommended Action | Estimated Cost (USD) |
|---|---|---|---|
| Minor Cosmetic | Shallow dent (<2 inches), no crease, paint intact | DIY plunger/suction method or paintless dent repair | $0 – $150 |
| Moderate Dent | Visible crease, panel still functional, insulation exposed | Professional PDR or single panel replacement | $250 – $450 |
| Severe Structural | Panel buckled, hinges torn, door won’t close flush | Full panel replacement or new door installation | $500 – $1,200+ |
| Frame/Track Damage | Bent track, damaged jamb, compromised header | Professional structural repair mandatory | $300 – $800 |
For minor dents, some homeowners successfully use a standard toilet plunger or suction cup dent puller to pop out shallow depressions. However, this only works on smooth, uncreased steel. For insulated doors, internal foam compression often makes DIY popping ineffective, necessitating professional garage door service to maintain thermal efficiency and security.
How to Realign Garage Door Tracks After an Accident
If your visual inspection reveals that the tracks are slightly bent or shifted—but the springs and cables are intact—you may be able to perform a careful realignment. This step is only appropriate for minor track displacement.
Step-by-Step Track Realignment Tutorial
- Disconnect Power and Secure the Door: Unplug the garage door opener. Manually lower the door completely and clamp locking pliers onto the track below the bottom roller on both sides to prevent accidental movement.
- Loosen Track Bolts: Using a socket wrench, loosen (do not remove) the bolts securing the affected track section to the wall brackets and ceiling hangers. This allows the track to shift freely.
- Measure and Align: Use a 4-foot level to check vertical plumb. The track should be perfectly vertical with consistent spacing (typically 1/4 inch) between the track and the door edge. Gently tap the track back into position using a rubber mallet—never use a steel hammer directly on the track, as this creates new deformations.
- Tighten Sequentially: Starting from the top bracket, tighten bolts to manufacturer torque specifications (usually 25–30 ft-lbs for residential tracks). Re-check alignment after each bolt is tightened, as tightening one bracket can shift adjacent sections.
- Test Manually First: Remove the locking pliers and slowly lift the door by hand. It should move smoothly with minimal resistance. If binding occurs, re-loosen and readjust. Only reconnect the opener after confirming smooth manual operation.
Required Tools: Socket set, 4-foot level, rubber mallet, locking pliers, safety glasses, work gloves. Time Estimate: 45–90 minutes for minor realignment.
When Should You Replace the Entire Garage Door Instead of Repairing?
Not every impact is salvageable. Understanding the tipping point between repair and replacement saves money long-term and prevents recurring failures.
Signs You Need a Full Replacement
- Multiple Adjacent Panels Damaged: Replacing three or more panels often exceeds 60% of a new door’s cost, making replacement more economical.
- Header or Jamb Damage: If the vehicle impact transferred force to the structural framing, the entire opening may be compromised. Repairs here involve carpentry and potentially permitting.
- Age of Existing Door: If your door is over 15 years old and lacks modern safety features (photoelectric eyes, auto-reverse), an accident is the ideal catalyst for upgrading to current safety standards.
- Insulation Failure: Impact damage to insulated doors often breaks the thermal seal. Patched panels create cold bridges that increase heating costs by 10–15% in attached garages.
- Repeated Derailments Post-Repair: If the door continues to bind or derail after professional realignment, the underlying geometry is permanently distorted.
Industry data suggests that approximately 40% of post-impact assessments result in full replacement recommendations due to hidden structural compromise. Investing in a new, properly rated door restores curb appeal, energy efficiency, and most importantly, safety.
Frequently Asked Questions (FAQ)
Q1: Is it safe to open my garage door after backing into it?
No, not without inspection. Operating a damaged door risks complete derailment, spring failure, or opener burnout. Always perform the visual inspection checklist above first. If there is any doubt about structural integrity, leave the door closed and call a professional. The convenience of testing is never worth the risk of catastrophic component failure.
Q2: Will my homeowner’s insurance cover garage door damage from backing into it?
Coverage varies significantly by policy. Most standard HO-3 policies cover accidental damage to structures, including garage doors, but deductibles typically range from $500 to $2,500. If repair costs are below your deductible, filing a claim may not be financially prudent and could affect future premiums. Document all damage with photos before contacting your insurer, and obtain at least two written estimates to support your claim.
Q3: How much does professional garage door repair cost after a car impact?
National averages for post-impact repairs range from $200 to $600 for track realignment and single-panel replacement. Severe damage involving springs, cables, and multiple panels can exceed $1,200. Always request itemized quotes that separate parts, labor, and emergency service fees. Reputable companies provide free on-site assessments and transparent pricing before beginning work.
Q4: Can I temporarily secure a damaged garage door until repairs arrive?
Yes, but prioritize safety over convenience. Disconnect the opener, manually close the door as far as possible without forcing it, and install heavy-duty padlocks through the interior track holes or use C-clamps on both tracks below the bottom rollers. This prevents unauthorized entry and accidental movement. Never prop up a damaged door with lumber or rely on the opener to hold it in position.
Q5: How long does a typical post-impact garage door repair take?
Minor realignments and single-panel replacements usually require 1–3 hours of on-site labor. Multi-panel replacements or track reconstruction may take 4–6 hours. Custom-ordered panels can add 3–7 business days for delivery. Emergency same-day service is often available at premium rates, but scheduling during normal business hours typically reduces costs by 20–30%.
Conclusion
Knowing how to fix a garage door after backing into it empowers you to make informed decisions, but safety must always come before savings. Start with a thorough damage assessment, attempt only minor cosmetic or track adjustments within your skill level, and recognize when professional expertise is non-negotiable. A properly repaired or replaced garage door protects your home’s security, energy efficiency, and your family’s wellbeing.
Found this guide helpful? Share it on Facebook, X (Twitter), or Pinterest to help fellow homeowners navigate this stressful situation safely. Tag a friend who might need these tips, and don’t forget to bookmark this page for future reference. Your safe garage starts with informed action—spread the knowledge! 💪🏡
Leave a Reply