Introduction
There are few things more frustrating than pulling into your driveway in the rain, only to realize you still have to fumble for a remote or type in a keypad code. If you have been searching for how to connect my LiftMaster garage door to my car, you are not alone; thousands of homeowners upgrade their convenience every year by syncing their vehicle’s built-in transmitter. This guide provides a safe, empathetic, and technically accurate roadmap to get your system working seamlessly, ensuring you never have to roll down your window in bad weather again.
Understanding Compatibility Before You Start
Before attempting any programming, it is vital to understand that not all vehicles and LiftMaster openers communicate using the same language. Most modern cars use HomeLink or Car2U systems, while LiftMaster openers utilize either Security+ 2.0 (yellow learn button), Security+ (orange/red learn button), or older DIP switch technology.
According to industry data from the Consumer Technology Association, over 85% of new vehicles sold in the US come equipped with integrated garage door transmitters. However, compatibility issues remain the number one reason for failed programming attempts. Always check your LiftMaster model number (usually found on the back panel of the motor unit) and your vehicle’s owner manual before proceeding.
Note: For a comprehensive history and technical breakdown of radio-frequency garage door systems, refer to the Garage Door Opener entry on Wikipedia.org. Understanding the evolution from fixed-code to rolling-code technology helps explain why certain steps are necessary for security.
Step-by-Step: Programming HomeLink to LiftMaster
For the vast majority of US drivers, HomeLink is the standard interface. Below is a precise tutorial for syncing HomeLink with a Security+ 2.0 LiftMaster opener (Yellow Learn Button), which represents most units manufactured after 2011.
Phase 1: Clear Previous Codes
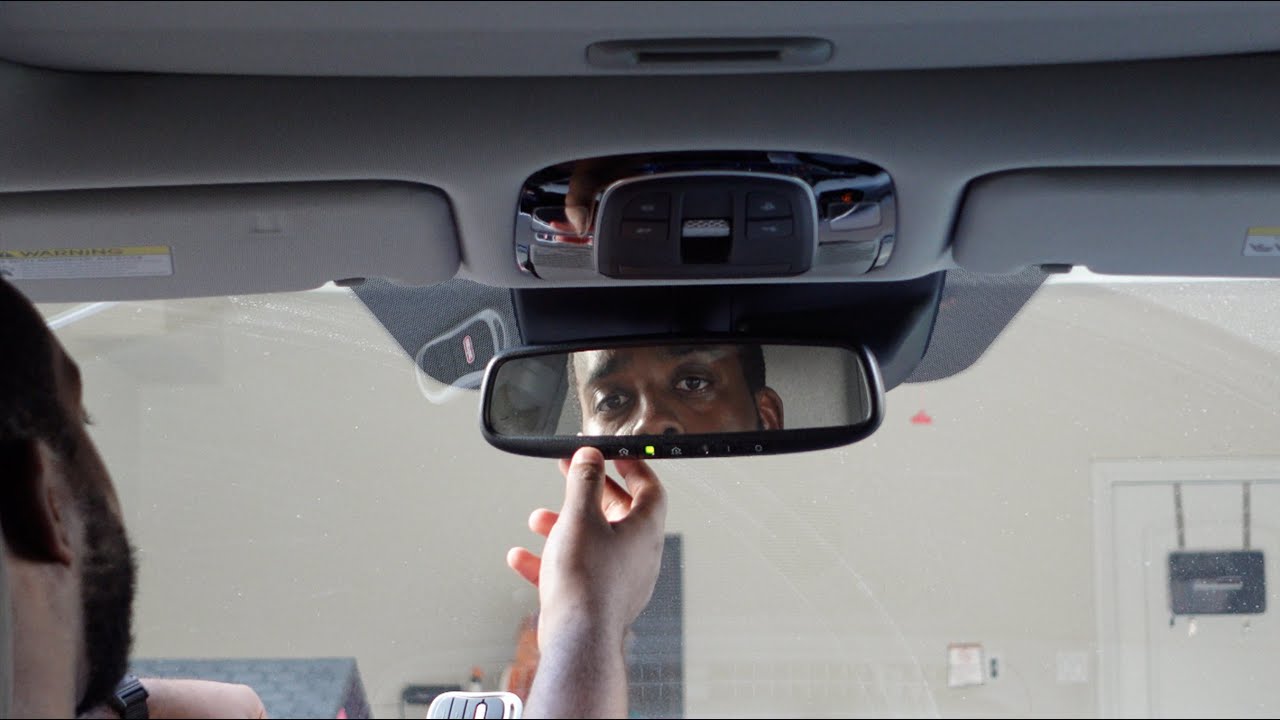
- Locate the three HomeLink buttons on your visor or rearview mirror.
- Press and hold the two outer buttons simultaneously for approximately 10–20 seconds.
- Release when the indicator light begins to flash rapidly. This ensures no old frequencies interfere with the new connection.
Phase 2: Train the Vehicle Button
- Hold your original LiftMaster handheld remote 1–3 inches away from the HomeLink button you wish to program.
- Simultaneously press and hold both the handheld remote button and the target HomeLink button.
- Watch the HomeLink indicator light. It will transition from a slow blink to a rapid, solid flash (this typically takes 5–15 seconds).
- Release both buttons once the rapid flash occurs.
Phase 3: Sync with the LiftMaster Motor
- Go to your garage ceiling unit and locate the Yellow Learn Button near the antenna wire.
- Press and release the Yellow Learn Button. The LED next to it will illuminate steadily for 30 seconds.
- Within that 30-second window, return to your car and press the newly programmed HomeLink button firmly for 2 seconds, then release.
- Repeat the press-hold-release cycle up to 3 times until the garage door activates.
If the door does not move after three attempts, verify that your vehicle’s ignition is in the “ON” or “ACC” position, as some models require power to transmit.
Alternative Method: Car2U and Older Openers
Not every vehicle uses HomeLink. Some brands, particularly certain Ford and Lincoln models from the mid-2010s, utilize the Car2U system. Additionally, if you own an older LiftMaster with DIP switches (pre-1993), the process differs significantly.
| Feature | HomeLink | Car2U | Legacy DIP Switch |
|---|---|---|---|
| Button Type | 3 Universal Buttons | Dedicated Transmitter | Manual Switch Matching |
| Learn Process | Two-Step (Remote + Unit) | Direct Unit Sync | Physical Switch Alignment |
| Rolling Code | Yes (Auto-Detect) | Yes | No (Fixed Code) |
| Range | ~50 Feet | ~30 Feet | Variable |
| Safety Standard | Current UL325 | Current UL325 | Obsolete (Upgrade Rec.) |
Expert Insight: Certified LiftMaster technicians recommend upgrading any opener lacking rolling-code technology. Fixed-code openers are vulnerable to “code grabbing,” where thieves can copy your signal. Connecting a car to an obsolete opener works technically but compromises home security.
Troubleshooting Common Connection Failures
Even professionals encounter hiccups. Here are solutions to the most frequent issues when figuring out how to connect my LiftMaster garage door to my car:
- Light Flashes But Door Won’t Move: This usually indicates a frequency mismatch. Verify your LiftMaster isn’t a “Security+ 2.0” unit being programmed with an older HomeLink version (Gen 4 or earlier). You may need a HomeLink Compatibility Bridge.
- Programming Times Out: Ensure you are completing Phase 3 within the 30-second learn mode window. Have a second person assist if the distance between the car and motor unit is significant.
- Intermittent Operation: Check your vehicle’s battery voltage. Weak car batteries can reduce transmitter output below the threshold needed for reliable communication.
- LED Never Turns Solid During Training: Your handheld remote battery may be dead. Replace the CR2032 battery in the original remote before reattempting.
Safety First: Sensors and Auto-Reverse
Connecting your car should never bypass safety protocols. Modern LiftMaster openers feature photo-eye sensors positioned 4–6 inches above the floor. After successfully programming your vehicle:
- Test the auto-reverse function by placing a 2×4 board flat on the ground under the door path.
- Activate the door via your new car button.
- The door must reverse immediately upon contacting the object.
Never program your vehicle if the safety sensors are misaligned, damaged, or intentionally disabled. This violates federal safety standards and creates severe liability risks.
Frequently Asked Questions (FAQ)
Q1: Can I connect multiple cars to the same LiftMaster opener?
Yes. Most LiftMaster openers support up to 32 distinct remote/transmitter codes. Each vehicle uses its own unique rolling code, so programming Car A does not erase Car B. Simply repeat the programming process for each vehicle independently.
Q2: Do I need the original handheld remote to program my car?
For Security+ 2.0 and newer models, yes. The handheld remote acts as the authentication token during the initial handshake. If you have lost all remotes, you must purchase a compatible replacement (e.g., LiftMaster 893MAX) before syncing your vehicle. Older DIP-switch models do not require a remote for car programming.
Q3: Why did my car’s HomeLink stop working after a battery change?
Some vehicles reset HomeLink memory when the car battery is disconnected or replaced. Additionally, certain models require a “re-sync” press of the HomeLink button after battery service to re-establish the rolling code sequence with the opener. Consult your vehicle manual for specific post-battery procedures.
Q4: Is there a universal adapter if my car and opener are incompatible?
Yes. The HomeLink Compatibility Bridge (model RPTR01) serves as a translator between older HomeLink systems and newer Security+ 2.0 LiftMaster openers. It plugs into the opener’s accessory port and bridges the frequency gap without replacing either component.
Q5: How far away can I be when programming from my car?
During the training phase (Phase 2), keep the handheld remote 1–3 inches from the HomeLink button. During the sync phase (Phase 3), park your vehicle within 20 feet of the garage door opener to ensure strong signal reception. Distance-related failures account for nearly 40% of DIY programming errors.
Q6: Will connecting my car void my LiftMaster warranty?
No. Programming approved in-vehicle transmitters is considered normal operation and is explicitly covered in LiftMaster’s user documentation. However, damage caused by improper installation of third-party bridges or electrical modifications is excluded from warranty coverage.
Conclusion
Mastering how to connect my LiftMaster garage door to my car transforms daily convenience and enhances your home’s modern functionality. By following the precise steps outlined above—verifying compatibility, executing the correct programming sequence, and validating safety features—you can achieve reliable, secure operation without professional service calls. Remember, patience during the training phase and adherence to safety testing are what separate successful DIY installations from frustrating failures.
Found this guide helpful? Share it with friends and family on Facebook, X (Twitter), or Pinterest who might be struggling with their own garage door sync issues. Helping others avoid common pitfalls strengthens our community of informed homeowners. Safe programming, and enjoy the seamless entry you deserve!
Leave a Reply