Introduction
There is nothing quite as frustrating as upgrading your home internet only to realize your smart devices have been left offline. If you are currently searching for how to change wifi network on myQ garage door opener, you are likely staring at a disconnected app and a non-responsive garage door. We understand that this disruption breaks the convenience of modern living, but rest assured, reconnecting your device is a straightforward process that requires no professional technician. This guide will walk you through every step to get your smart garage back online safely and quickly.
Understanding Why You Need to Reconnect Your myQ Device
Before diving into the technical steps, it is helpful to understand why this process is necessary. Unlike smartphones or laptops that automatically switch between known networks, IoT (Internet of Things) devices like garage door openers typically store credentials for a single SSID (Service Set Identifier). When you change your router, update your password, or install a mesh system with a new name, the myQ hub loses its handshake with the internet.
According to smart home industry data, nearly 30% of smart device support tickets are related to Wi-Fi migration issues. The good news is that Chamberlain Group has streamlined the reconnection protocol for myQ devices. However, because these devices operate on specific radio frequencies, understanding the prerequisites is vital before you begin.
Critical Prerequisite: 2.4GHz vs. 5GHz Networks
This is the most common point of failure. myQ garage door openers and hubs are exclusively compatible with 2.4GHz Wi-Fi networks. They cannot connect to 5GHz bands.
| Feature | 2.4GHz Network | 5GHz Network |
|---|---|---|
| Range | Excellent (penetrates walls) | Limited (line-of-sight preferred) |
| Speed | Slower | Faster |
| myQ Compatibility | ✅ Yes | ❌ No |
| Interference | Higher (microwaves, baby monitors) | Lower |
Note: If you have a dual-band router that combines both frequencies under one name, you may need to temporarily separate them in your router settings or move far enough away from the router that your phone switches to 2.4GHz during setup.
Step-by-Step: How to Change Wifi Network On Myq Garage Door Opener
Follow this precise tutorial to re-establish connectivity. Ensure you have your new Wi-Fi password ready and that Bluetooth is enabled on your smartphone.
Step 1: Prepare Your Environment
Stand within 5–10 feet of your garage door opener or Wi-Fi hub. Proximity is crucial during the pairing phase to ensure a strong signal handshake. Open the myQ app on your iOS or Android device and log in to your account.
Step 2: Navigate to Device Settings
Tap the Device Settings gear icon associated with the disconnected garage door opener. Select “Wi-Fi” or “Network” from the menu. The app should detect that the device is offline and prompt you to reconnect. If it does not, select “Remove Device” and choose “Re-add Device” to force the setup wizard.
Step 3: Initiate Learn Mode
This is the physical interaction required to put the hardware into pairing mode. The method varies slightly by model:
- For Wi-Fi Garage Door Openers (e.g., B970T, C870): Press and release the Learn button (usually yellow, red, or purple) on the motor head twice. The LED light should begin flashing blue, indicating it is ready for Wi-Fi configuration.
- For myQ Internet Gateway/Hubs: Press and hold the Setup button until the blue LED starts blinking rapidly.
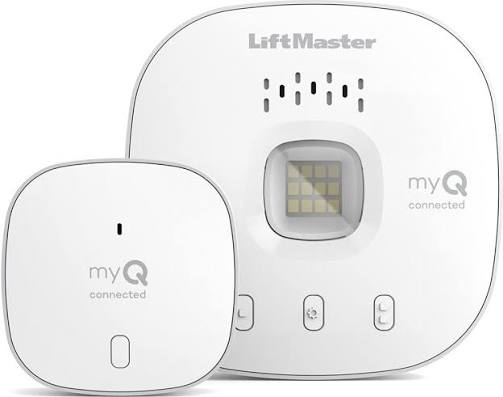
- For myQ Smart Garage Control: Press and hold the Settings button on the hub for 6 seconds until you hear a beep and see the blue light flash.
Important: You typically have a 3-minute window to complete the next steps before the device exits learn mode.
Step 4: Connect via the App
Return to your phone. The app should now display available myQ devices. Select your unit and enter your new 2.4GHz Wi-Fi network name and password. Double-check for capitalization errors; Wi-Fi passwords are case-sensitive.
Step 5: Verify Connection
Wait approximately 30–60 seconds. The flashing blue light on the device should turn solid blue, then eventually settle to a steady green or white light (depending on the model). The app will confirm “Device Connected.” Test the connection by opening and closing the garage door remotely once while still on-site.
Troubleshooting Common Connectivity Issues
Even when following the correct procedure for how to change wifi network on myQ garage door opener, hiccups can occur. Here are expert-backed solutions:
- Bluetooth Interference: Temporarily disable Bluetooth after the initial handshake if the app stalls during Wi-Fi credential transfer.
- Router Security Protocols: Ensure your router is not using WPA3-only security. Most myQ devices require WPA2-Personal (AES). For more information on wireless security standards and compatibility, refer to Wikipedia’s Wi-Fi Protected Access page.
- Signal Strength: If the device connects but frequently drops, your garage may be a dead zone. Consider installing a Wi-Fi extender specifically positioned halfway between your router and the garage.
- App Cache: Clear the myQ app cache or reinstall the app entirely if it repeatedly fails to recognize the device in learn mode.
Frequently Asked Questions (FAQ)
1. Do I need to delete my myQ account to change Wi-Fi networks?
No. You do not need to delete your account or lose your user history. Simply removing the specific device from the app and re-adding it preserves your account settings, shared access permissions, and activity logs. Only the local network credentials are reset.
2. Can I use a mobile hotspot to set up my myQ device?
Technically yes, but it is highly discouraged for permanent use. Mobile hotspots often lack the stability and consistent IP addressing required for reliable IoT operation. Use a hotspot only for initial testing, then immediately switch to a dedicated home 2.4GHz network.
3. What happens if my power goes out during the Wi-Fi change process?
The myQ device will retain its last known state. Once power is restored, simply restart the setup process from Step 3. The device does not store partial or corrupted network configurations, so there is no risk of bricking the unit.
4. Why does my myQ app say “Unsupported Network” even though I’m on 2.4GHz?
This usually occurs when your router uses band steering (combining 2.4GHz and 5GHz under one SSID). Log into your router admin panel and create a dedicated guest network or IoT network that broadcasts only on 2.4GHz. Connect your phone to this isolated network during setup.
5. How often should I update my myQ firmware after changing Wi-Fi?
After successfully changing networks, check for firmware updates immediately. Manufacturers often release patches that improve Wi-Fi stability and security. Navigate to Device Settings > Firmware Update in the app. Make this a quarterly habit regardless of network changes.
6. Is it safe to change Wi-Fi networks remotely?
No. You must be physically present at the property. The setup process requires pressing the physical Learn button on the motor or hub and relies on Bluetooth proximity. There is no remote method to change Wi-Fi credentials for security reasons.
Conclusion
Mastering how to change wifi network on myQ garage door opener empowers you to maintain uninterrupted smart home functionality without costly service calls. By ensuring you are on a 2.4GHz network, following the precise learn-mode sequence, and verifying your connection on-site, you can restore full remote access in under ten minutes. Remember, a stable connection isn’t just about convenience—it’s about the security and peace of mind that comes with knowing your home is always accessible.
If this guide helped you get back online, please share it with friends or family who might be struggling with their own smart garage setups! Tag us on social media or leave a comment below with your specific model number if you encountered unique challenges. Your experience helps us build better resources for the entire smart home community. Stay connected, stay secure, and enjoy the seamless automation you deserve.
Leave a Reply