Introduction
Is your garage letting in cold drafts, rainwater, or unwanted pests? A worn-out bottom seal is often the culprit, compromising your home’s energy efficiency and comfort. If you are searching for how to change weather stripping on bottom of garage door, you have come to the right place for a practical, homeowner-friendly solution. This guide will walk you through the process safely and effectively, helping you restore your garage’s protection without hiring a professional.
Why Is My Garage Door Weather Stripping Important?
Before diving into the replacement process, it is crucial to understand why this component matters. The bottom weather seal, often called a threshold seal or astragal, creates an airtight barrier between your garage floor and the door panel. According to the U.S. Department of Energy, air leaks can account for 25%–40% of heating and cooling energy loss in homes. Since garages often share walls with living spaces, a compromised seal directly impacts your utility bills.
Furthermore, a damaged seal invites moisture, which can lead to mold growth and rust on stored items. It also provides easy entry for rodents and insects. Understanding weatherization principles helps homeowners realize that this small rubber or vinyl part is actually a critical defense system for your property’s structural integrity and indoor air quality.
What Tools Do I Need to Replace Garage Door Bottom Seal?
Gathering the correct tools before starting prevents frustration and ensures safety. You do not need expensive equipment, but precision matters.
- Flathead Screwdriver: For prying out old fasteners.
- Cordless Drill with Socket Set: Typically 1/4-inch or 5/16-inch sockets for removing retainer bolts.
- Pliers or Vise-Grips: Essential for pulling stubborn rubber seals from metal channels.
- Utility Knife: For trimming the new seal to exact length.
- Tape Measure: To verify door width accurately.
- Silicone Spray or Soapy Water: Lubricant to help slide the new seal into place.
- Safety Glasses and Gloves: Protect against rust flakes and sharp metal edges.
Pro Tip: Always disconnect your garage door opener and lock the door in the open position using C-clamps on the tracks before beginning any work. Safety must always be your priority.
How Do I Identify the Correct Replacement Weather Seal?
Not all garage door seals are universal. Buying the wrong type is the most common mistake DIYers make. There are four primary types used in US residential garages:
| Seal Type | Best For | Key Feature |
|---|---|---|
| T-Style | Steel doors with single channel | T-shaped ends slide into retainer |
| Bead Style | Wood or custom doors | Round bead fits into groove |
| U-Shape / Bulb | Uneven concrete floors | Compressible bulb absorbs gaps |
| Threshold Seal | Floor-mounted (not door) | Adheres directly to driveway |
Measure your existing seal’s width and the retainer channel size precisely. Most US standard doors use a 3-inch or 4-inch wide seal. Check the manufacturer label on your door panel if possible; matching the OEM specification guarantees the best fit and longevity.
Step-by-Step: How To Change Weather Stripping On Bottom Of Garage Door
Follow these detailed instructions to complete the replacement in under an hour.
1. Remove the Old Weather Seal
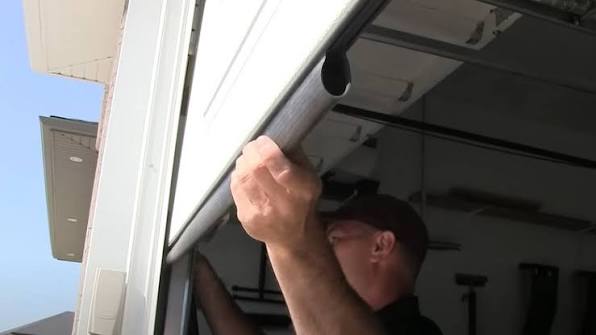
Open the door fully and secure it. Locate the end caps or screws holding the retainer bracket at each side of the door bottom. Remove these fasteners. Grip the old rubber seal firmly with pliers and pull it horizontally out of the channel. Note: Old seals often become brittle and may tear; take your time to avoid leaving fragments inside the retainer.
2. Clean and Inspect the Retainer Channel
Use a wire brush or compressed air to remove rust, dirt, and debris from the metal channel. Inspect for bent aluminum or stripped screw holes. If the retainer itself is corroded beyond repair, replace it now—installing a new seal into a damaged retainer will fail within months. Wipe the channel clean with a damp cloth and let it dry completely.
3. Prepare the New Seal
Unroll the new weather stripping and let it relax for 15 minutes to reduce curling. Apply a light coat of silicone spray or soapy water to the T-ends or beads. This lubrication reduces friction by up to 70%, making installation significantly easier and preventing the rubber from bunching or tearing during insertion.
4. Insert the New Weather Stripping
Align the seal’s edge with the channel opening. Push the first few inches in by hand, then gently tap along the length using a rubber mallet if needed. Do not stretch the seal as you feed it; stretching causes shrinkage later, leaving gaps at the ends. Have a helper support the middle section to prevent sagging. Slide it completely through until equal lengths protrude from both sides.
5. Trim and Secure
Close the door partially to check alignment. Measure twice, then cut the excess rubber flush with the door edges using a sharp utility knife. Reinstall the end caps or screws to lock the seal in place. Ensure no rubber extends beyond the door frame, as this can catch on tracks during operation.
6. Test the Seal Integrity
Lower the door completely onto the floor. Visually inspect from inside the garage with lights off outside—you should see zero daylight beneath the door. Place a dollar bill under the seal and close the door; if you cannot pull the bill out easily, the compression is adequate. Run the opener through one full cycle to confirm smooth operation without binding.
Common Mistakes to Avoid During Installation
Even experienced DIYers encounter issues. Avoid these pitfalls:
- Forcing the Seal: Excessive force damages the retainer. Use more lubricant instead.
- Ignoring Floor Irregularities: If your concrete is uneven, choose a thicker bulb seal rather than a flat T-style.
- Skipping Safety Clamps: An unsecured door can fall unexpectedly, causing severe injury.
- Using Wrong Fasteners: Always use corrosion-resistant stainless steel screws; standard screws rust quickly in garage environments.
- Rushing Measurement: A seal that is even ½ inch too short leaves vulnerable gaps at corners.
FAQ: Your Top Questions Answered
How often should I replace my garage door bottom seal?
Most quality seals last 5–8 years depending on climate and usage. Inspect annually for cracks, brittleness, or visible gaps. In regions with extreme temperature swings or high UV exposure, replacement every 3–5 years is advisable.
Can I install a new seal without removing the old retainer?
Yes, if the retainer is intact and compatible with your new seal type. However, if switching seal styles (e.g., T-style to bead), you will likely need a new retainer bracket designed for that specific profile.
Why does my new seal still leak after installation?
Common causes include improper sizing, stretched installation, or an uneven garage floor. Try adding a floor threshold seal as a secondary barrier. Also verify that your door’s travel limits are correctly adjusted so it applies sufficient downward pressure.
Is it better to hire a professional for this job?
For standard residential doors, this is a manageable DIY project costing $30–$60 in materials. Professional installation typically runs $150–$300. Hire a pro only if your door is unusually heavy, the retainer is welded, or you lack physical ability to safely handle the door.
What is the best material for garage door weather stripping?
EPDM rubber outperforms vinyl in durability and temperature resistance (-40°F to 240°F). Vinyl is cheaper but becomes brittle in cold climates. For US homeowners in northern states, EPDM is worth the modest price premium for long-term performance.
Conclusion
Learning how to change weather stripping on bottom of garage door empowers you to protect your home from energy waste, moisture damage, and pest intrusion—all with basic tools and under an hour of work. By following this guide, you’ve invested in your home’s efficiency and your family’s comfort.
Did this tutorial save you a service call? Share it on Facebook, Pinterest, or X (Twitter) to help fellow homeowners tackle this essential maintenance task! Tag us with your before-and-after photos—we love seeing successful DIY wins. Stay safe, stay sealed, and keep your garage working for you year-round.
Leave a Reply