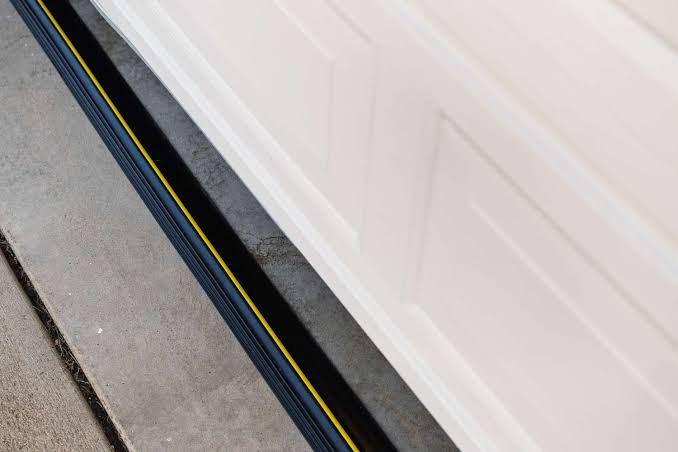
Introduction
Is your garage letting in cold drafts, rainwater, or unwanted pests? A worn-out bottom seal is often the culprit, compromising your home’s energy efficiency and security. Learning how to change the rubber seal on a garage door is a manageable weekend project that can save you hundreds of dollars in professional service fees while protecting your stored belongings from moisture and debris. In this comprehensive guide, we will walk you through every step of the replacement process safely and effectively.
Why Is My Garage Door Seal Failing?
Before diving into the replacement, it is crucial to understand why seals fail. According to the U.S. Department of Energy, air leaks through gaps in garage doors can account for significant heat loss in attached garages, directly impacting household utility bills. Rubber seals typically degrade due to UV exposure, extreme temperature fluctuations, and mechanical friction against concrete driveways.
Common signs your seal needs replacement include:
- Visible cracks, tears, or brittleness in the rubber.
- Water pooling inside the garage after rainstorms.
- Noticeable light gaps under the door when closed.
- Increased dust accumulation or pest entry.
- Higher heating or cooling costs in adjacent living spaces.
Understanding these failure points helps you select the right replacement material and prevents premature wear on your new installation. For more background on building envelope integrity and weatherization standards, you can refer to general construction principles outlined on Wikipedia.
What Tools and Materials Do I Need?
Preparation is half the battle. Gathering the correct supplies before starting ensures a smooth workflow without frustrating interruptions. Below is a checklist of essential items for this project.
Essential Tool List
- Flathead Screwdriver or Cordless Drill: For removing old retainer screws.
- Pliers or Vise Grips: Helpful for pulling out stubborn rubber or bent metal.
- Tape Measure: Accurate measurement prevents ordering the wrong size.
- Utility Knife: For trimming excess rubber to exact length.
- Rubber Mallet: To gently tap the new seal into the aluminum retainer.
- Silicone Spray or Dish Soap: Lubricant to ease installation.
- Safety Glasses and Gloves: Protect eyes from rust particles and hands from sharp metal edges.
Choosing the Right Seal Type
Not all seals are identical. Selecting the correct profile is critical for a watertight fit.
| Seal Type | Best For | Durability | Cost Range |
|---|---|---|---|
| T-Bulb | Standard residential doors with aluminum retainers | High | $15–$25 |
| U-Shaped | Doors with dual-channel steel retainers | Medium-High | $20–$30 |
| Beaded | Commercial or heavy-duty residential doors | Very High | $25–$40 |
| Nail-On Flap | Older wooden doors without metal retainers | Low-Medium | $10–$18 |
Always measure your existing seal’s width and the retainer channel dimensions before purchasing.
Step-by-Step: How To Change The Rubber Seal On A Garage Door
Follow these detailed instructions to ensure a professional-grade result. This tutorial assumes you have a standard sectional garage door with an aluminum bottom retainer.
Step 1: Measure and Purchase the Correct Replacement
Measure the exact width of your garage door opening, not just the old seal. Most residential doors are 8, 9, 10, 12, 14, 16, or 18 feet wide. Also, measure the retainer channel width (typically 1.5″ to 2″) to confirm compatibility. Purchase a seal that matches both dimensions; buying a slightly longer seal is acceptable as you can trim it, but a short seal leaves gaps.
Step 2: Remove the Old Rubber Seal
Open the garage door fully and secure it with locking pliers on the track below the bottom roller to prevent accidental movement. Locate the end caps or screws securing the rubber at each side of the retainer. Remove these fasteners using your screwdriver or drill. Once unsecured, grip the rubber firmly and pull it horizontally out of the channel. If the rubber is stuck due to age or paint buildup, use pliers to work it loose gradually. Do not force it violently, as this can bend the aluminum retainer.
Step 3: Clean and Inspect the Retainer Channel
With the old seal removed, inspect the aluminum retainer for dents, corrosion, or bent lips. Use a wire brush to remove rust and debris. Wipe the channel clean with a damp cloth. If the retainer is severely damaged, replace it now—installing a new seal into a compromised retainer will lead to immediate failure. Straighten any minor bends carefully with pliers to ensure the new seal slides in smoothly.
Step 4: Lubricate the Channel and New Seal
Apply a generous amount of silicone spray or diluted dish soap solution inside the retainer channel and along the top edge of the new rubber seal. This lubrication reduces friction by up to 70%, making insertion significantly easier and preventing the rubber from bunching or tearing during installation. Avoid petroleum-based lubricants like WD-40, as they can degrade certain rubber compounds over time.
Step 5: Insert the New Seal
Align the T-bulb or bead of the new seal with the retainer channel opening. Starting at one end, push the seal into the channel using your thumbs. Work in 12-inch increments, ensuring the bulb seats fully before moving forward. For tighter fits, use a rubber mallet to tap the seal gently into place. Never use a metal hammer directly on the rubber, as this causes permanent deformation. If the seal binds, back it out slightly, reapply lubricant, and continue.
Step 6: Trim and Secure the Ends
Once the seal is fully inserted across the entire width, check for evenness on both sides. Use a utility knife to trim any excess rubber flush with the retainer ends. Reinstall the end caps or screws to lock the seal in position. Some retainers require crimping the metal lips at the ends with pliers to prevent the seal from sliding out during operation.
Step 7: Test the Seal and Door Operation
Remove the locking pliers from the track. Close the garage door slowly and observe the seal’s contact with the floor. The rubber should compress evenly across the entire width without gaps. Open and close the door 3–4 times to verify smooth operation and that the seal doesn’t catch or drag excessively. Adjust the door’s travel limits via the opener settings if the seal compresses too aggressively or insufficiently.
Pro Tips for Extending Seal Lifespan
Maximize your investment with these maintenance practices:
- Apply UV Protectant: Treat the rubber annually with a silicone-based protectant to resist sun degradation.
- Keep the Threshold Clean: Sweep debris regularly to prevent abrasive wear on the seal’s contact surface.
- Adjust Door Balance: An unbalanced door exerts uneven pressure on the seal. Have springs serviced biannually.
- Avoid Harsh Chemicals: Never use bleach or solvent cleaners near the seal; mild soap and water suffice.
Frequently Asked Questions (FAQ)
How often should I replace my garage door rubber seal?
Most quality rubber seals last 5 to 8 years under normal conditions. However, harsh climates, frequent use, or poor maintenance can reduce lifespan to 3–4 years. Inspect your seal twice yearly—in spring and fall—to catch early signs of wear before they cause water damage or energy loss.
Can I replace the seal without removing the garage door?
Yes, absolutely. The bottom seal is designed to be replaced while the door remains installed and operational. Simply open the door fully, secure it safely, and follow the removal and installation steps outlined above. Removing the door is unnecessary and adds significant complexity and risk.
What if my new seal is too tight to insert?
First, verify you purchased the correct profile and size. If dimensions match, increase lubrication with silicone spray and work in smaller sections. You can also try chilling the rubber in a freezer for 30 minutes before installation; cold rubber contracts slightly and becomes stiffer, sometimes easing insertion. If problems persist, the retainer may be damaged or incompatible.
Is it better to hire a professional for seal replacement?
For most homeowners, this is a straightforward DIY task requiring basic tools and 1–2 hours. However, if your retainer is corroded beyond repair, the door is unbalanced, or you lack physical ability to safely work overhead, hiring a certified technician is advisable. Professional installation typically costs $150–$300 including materials, offering peace of mind and warranty coverage.
Will a new seal fix water leaking under my garage door?
A new seal resolves leaks caused by worn rubber, but not those stemming from improper door alignment, cracked thresholds, or negative grading outside the garage. After replacing the seal, test with a garden hose. If water still enters, consult a foundation or drainage specialist to address underlying structural issues.
Can I use a universal seal on any garage door brand?
“Universal” seals fit many standard retainers but are not guaranteed to work with every manufacturer. Brands like Clopay, Amarr, Wayne Dalton, and Overhead Door often use proprietary profiles. Always cross-reference your door’s model number or retainer dimensions with the seal specifications before purchasing to avoid returns and delays.
Conclusion
Mastering how to change the rubber seal on a garage door empowers you to protect your home, improve energy efficiency, and maintain curb appeal—all with minimal investment. By following this detailed guide, selecting quality materials, and performing regular inspections, your new seal will provide reliable performance for years to come. Remember, a well-sealed garage isn’t just about comfort; it’s about safeguarding one of your largest assets.
Found this guide helpful? Share it with fellow homeowners on Facebook, Pinterest, or Nextdoor who might be battling drafty garages! Tag us in your DIY success photos—we’d love to see your results and celebrate your handiwork. Together, we can build safer, more efficient homes one seal at a time. 🏡🔧
Leave a Reply