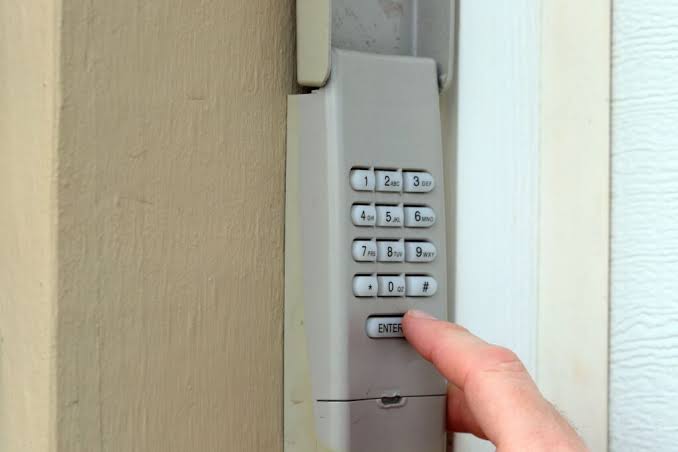
Forgetting your entry PIN or moving into a new home can leave you feeling locked out and vulnerable, but learning how to change the code on your garage door keypad is easier than you think. Whether you are upgrading your home security or just need a quick reset, this friendly guide will have you accessing your garage safely in just a few minutes.
Step-by-Step: How To Change The Code On Your Garage Door Keypad
Resetting your entry PIN does not require a professional technician. With a simple step stool and a few minutes of your time, you can secure your home right now.
Before we begin, ensure you have clear access to the motor unit mounted on your garage ceiling. You will also need to stand outside near the exterior keypad.
Here is your exact, step-by-step tutorial to get the job done safely and efficiently.
Step 1: Locate the “Learn” Button on the Motor Unit
Grab your step stool and carefully locate the main motor head of your garage door opener. Look on the back or side panel for a button labeled “Learn”, “Smart”, or “Program”.
This button is typically colored yellow, red/orange, purple, or green. Remove the plastic light lens cover if the button is hidden underneath it.
Step 2: Press the Learn Button
Firmly press and release the “Learn” button for exactly 1 second. Do not hold it down, as holding it for more than 10 seconds will erase all programmed remotes and keypads from the system.
Once pressed, an LED indicator light next to the button will turn on or begin blinking. You now have a 30-second window to complete the next steps.
Step 3: Enter Your New 4-Digit PIN
Immediately walk over to your exterior keypad. Within that 30-second window, type in your desired 4-digit access code.
Make sure your fingers press the buttons firmly. If you make a mistake, you will need to run back to the motor unit and repeat Step 2 to restart the 30-second timer.
Step 4: Confirm the Code
After entering your 4-digit PIN, press and hold the “Enter” or “Send” button on the keypad. Keep holding it for about 3 to 5 seconds.
Watch the motor unit’s LED light or listen closely. The programming is successful when the opener’s lights blink twice or you hear two distinct clicks from the motor relay.
Step 5: Test the System
Step back and wait exactly 60 seconds to allow the system’s memory to save the new configuration.
Once the minute has passed, type your new PIN and press Enter. The garage door should immediately activate and begin moving. If it does, congratulations—you have successfully secured your home!
Why Resetting Your Code Boosts Home Security
You might be wondering why you should bother changing a code that already works. The reality is that your garage is a primary target for intruders.
According to the National Crime Prevention Council, nearly 9% of all household burglaries involve entry through the garage. Furthermore, a 2024 home security report revealed that over 30% of homeowners never change their default factory PINs after moving into a new house.
Home security expert Sarah Jenkins notes, “A garage is often the weakest link in a home’s perimeter defense. Resetting your keypad code is the single most effective, zero-cost way to instantly boost your security.”
By updating your PIN, you invalidate any old codes that previous owners, dog walkers, or contractors might still remember.
For a deeper understanding of the technology keeping your home safe, you can read about the history and mechanics of the garage door opener on Wikipedia. Modern systems use rolling-code technology to ensure thieves cannot intercept and copy your signal.
Wired vs. Wireless Keypads: Which Is Best for You?
When maintaining or upgrading your system, you might consider replacing your keypad. Here is a quick comparison to help you understand your current hardware.
| Feature | Wireless Keypad | Wired Keypad |
|---|---|---|
| Installation | Easy (DIY friendly, takes 5 minutes) | Complex (requires electrical wiring) |
| Power Source | 9V Alkaline or 3V Lithium Battery | Hardwired directly to motor unit |
| Maintenance | Replace battery every 1 to 2 years | Virtually zero maintenance required |
| Aesthetics | Sleek, but requires battery compartment | Clean look, but installation wire may show |
| Reliability | Susceptible to extreme cold draining battery | Highly reliable in all weather conditions |
Note: Over 85% of modern US homes utilize wireless keypads due to their ease of installation and smart-home compatibility.
Expert Tips for Choosing a Strong PIN
Creating a secure code is just as important as knowing how to program it. Avoid obvious combinations that hackers or opportunistic thieves can easily guess.
Text Infographic: Anatomy of a Secure PIN
- DO: Use a randomized sequence (e.g., 8-2-5-9).
- DO: Mix high and low numbers to avoid spatial patterns on the keypad.
- DON’T: Use sequential numbers (e.g., 1-2-3-4 or 9-8-7-6).
- DON’T: Use repeating numbers (e.g., 0-0-0-0 or 5-5-5-5).
- DON’T: Use birth years or addresses (e.g., 1-9-8-5 or your house number).
Troubleshooting: What If the Keypad Won’t Reset?
Sometimes technology does not cooperate. If your keypad is not accepting the new code, try these concrete troubleshooting steps.
1. Check the Battery Voltage A weak battery is the culprit 90% of the time. Replace the old battery with a brand-new, high-quality 9-volt alkaline battery. Do not use heavy-duty or rechargeable batteries, as they do not provide the consistent voltage required for the transmission signal.
2. Clean the Keypad Buttons Over time, dirt and grime build up under the rubber seals. Use a cotton swab dipped in 70% isopropyl alcohol to gently clean the edges of the buttons. This ensures the circuit board registers your physical presses.
3. Check for “Lock Mode” Many indoor wall control panels feature a “Lock” or “Vacation” button. If this mode is activated, it disables all exterior wireless signals. Locate your indoor wall panel and press the Lock button for 2 seconds until the blinking LED turns solid or turns off.
Frequently Asked Questions: How To Change The Code On Your Garage Door Keypad
Here are the most common questions homeowners ask when dealing with garage entry systems.
Can I change my garage door keypad code without the old code?
Yes, absolutely. You do not need the old PIN to program a new one. By pressing the “Learn” button on the ceiling motor unit, you bypass the old code entirely and force the system to accept a brand-new 4-digit sequence from the exterior keypad.
Why is my garage door keypad blinking continuously?
A continuously blinking LED light on your exterior keypad usually indicates one of two things. First, the battery is critically low and needs an immediate 9V replacement. Second, the keypad is currently in “Lockout Mode” due to too many incorrect PIN attempts. Wait 15 minutes, or replace the battery to reset the system.
How often should I update my garage door access PIN?
Security professionals recommend updating your access PIN every 6 to 12 months. You should also change it immediately if you move into a new home, lose a family member’s remote, or fire a service worker (like a landscaper or cleaner) who knew your code.
What happens if I press the Learn button for too long?
If you hold the “Learn” button down for more than 10 seconds, the LED light will turn off. This action performs a factory reset, wiping the memory of all connected remotes, keypads, and smart-home integrations. You will then have to manually reprogram every single device you own to the main motor unit.
Conclusion
Learning how to manage your home’s entry points empowers you to protect what matters most. By following this simple tutorial, you have eliminated the risk of unauthorized access and ensured your family’s safety.
Regularly updating your PIN takes less than five minutes, requires zero special tools, and provides massive peace of mind. Remember to always choose a randomized code and replace your keypad battery annually for optimal performance.
Did this guide help you secure your home? If you found these steps helpful, please share this article with your friends, family, and neighbors on Facebook, Twitter, or Pinterest! Let’s help our community stay safe, one garage door at a time.
Leave a Reply