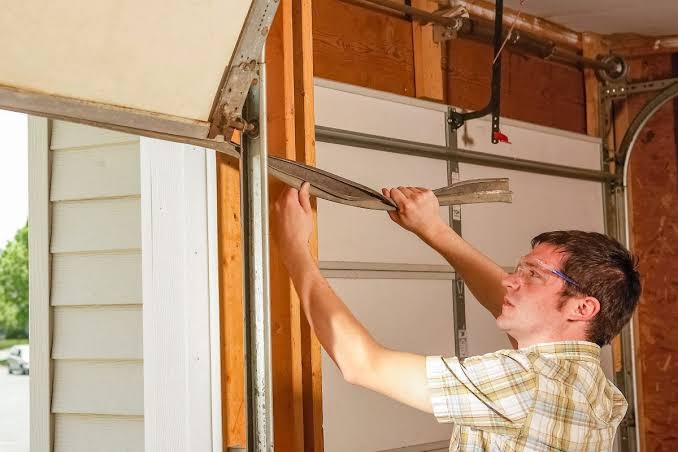
A drafty, wet, or pest-prone garage often points to one culprit: a worn-out bottom seal. If you are searching for how to change the bottom seal on a garage door, you are likely dealing with water intrusion, rising energy bills, or unwanted critters entering your home. The good news is that this is a straightforward weekend project that requires minimal tools and can save you hundreds of dollars in professional service fees.
Replacing your garage door threshold seal not only protects your stored belongings but also improves your home’s overall energy efficiency. In this comprehensive guide, we will walk you through every step of the process, from identifying the right seal type to securing it perfectly for long-lasting performance.
Why Is My Garage Door Bottom Seal Failing?
Before diving into the replacement process, it helps to understand why seals fail. According to the U.S. Department of Energy, air leaks through gaps like garage doors can account for significant energy loss in residential buildings. Rubber and vinyl seals are constantly exposed to UV radiation, extreme temperature fluctuations, and mechanical friction against concrete.
Over time, these environmental stressors cause the material to become brittle, crack, or flatten permanently. When the seal loses its elasticity, it no longer conforms to the uneven surface of your driveway, creating gaps. Recognizing these signs early prevents more severe issues like water damage to drywall or mold growth inside attached garages.
What Tools Do I Need to Replace a Garage Door Seal?
Gathering the correct tools before starting ensures a smooth workflow. You do not need specialized equipment, but having the right items makes the difference between a frustrating afternoon and a satisfying repair.
- Flathead screwdriver or cordless drill: For removing old fasteners.
- Pliers or locking pliers: Essential for pulling out stubborn nails or staples.
- Utility knife: For trimming the new seal to length.
- Tape measure: Accurate measurement prevents waste.
- Rubber mallet: Helps seat the seal without damaging it.
- Safety glasses and gloves: Protect against rusted metal and debris.
- Silicone spray or soapy water: Lubricant for sliding the new seal into the retainer channel.
Having a helper is also highly recommended. Garage door bottoms can be heavy and awkward to maneuver alone, making two sets of hands safer and more efficient.
How Do I Choose the Right Replacement Seal?
Not all garage door bottom seals are universal. Selecting the wrong profile is the most common mistake DIYers make. There are four primary types of retainers used in North American garage doors:
| Seal Type | Profile Shape | Best For | Common Brands |
|---|---|---|---|
| T-Style | T-shaped ends | Steelcraft, Overhead Door | Universal T-Bulb |
| U-Shaped | Channels on both sides | Clopay, Amarr | Double-Channel |
| Bead Style | Circular bead ends | Wayne Dalton | Foam Bead |
| Nail-On | Flat strip with holes | Older wood doors | Vinyl Flap |
Pro Tip: Before purchasing, remove a small section of your existing seal and take it to a hardware store for matching. Alternatively, check the manufacturer label on your garage door sections. As noted in general construction standards referenced on Wikipedia, proper material selection based on climate and door type is critical for achieving an effective thermal barrier. Using the wrong seal type will result in immediate failure regardless of installation quality.
Step-by-Step: How to Change the Bottom Seal on a Garage Door
Follow these seven detailed steps to ensure a watertight, secure installation. Take your time; precision matters more than speed.
1. Disconnect the Opener and Secure the Door
Safety first. Unplug your automatic garage door opener to prevent accidental activation. Manually lower the door completely and lock it in place using C-clamps on the tracks just above the bottom roller. This prevents the door from shifting while you work.
2. Remove the Old Seal
Locate the end caps or fasteners holding the old seal in the aluminum retainer channel. Use your screwdriver or drill to remove screws. If nails are present, use locking pliers to extract them. Slide the old seal out of the channel from one end. If it is stuck, apply penetrating oil and let it sit for 10 minutes before trying again.
3. Clean the Retainer Channel Thoroughly
This step is often skipped but is vital for longevity. Use a wire brush and vacuum to remove rust, dirt, and old adhesive from the channel. Wipe down with a degreaser. A clean channel allows the new seal to slide in smoothly and seat properly against the metal.
4. Measure and Cut the New Seal
Measure the exact width of your garage door bottom panel. Transfer this measurement to your new seal, adding 1 inch for overlap. Use a sharp utility knife and a straight edge to make a clean, square cut. Frayed edges can catch during installation and compromise the seal.
5. Lubricate and Insert the New Seal
Spray silicone lubricant or apply soapy water generously inside the retainer channel and along the seal’s mounting edges. Starting from one end, feed the seal into the channel. Have your helper guide it from the opposite side to prevent bunching. Use a rubber mallet to gently tap stubborn sections into place—never use a steel hammer, as this can deform the aluminum retainer.
6. Trim Excess and Secure Ends
Once fully inserted, trim any excess material flush with the door edges. Reinstall end caps or add new screws/nails every 6–8 inches to prevent the seal from sliding out over time. Ensure fasteners are snug but not overtightened, which can distort the seal profile.
7. Test the Seal and Reconnect Power
Remove the C-clamps and manually raise the door halfway to verify smooth operation. Lower it completely and inspect the seal contact across the entire width. Pour a thin line of water along the outside threshold; if no water enters after 5 minutes, your seal is working. Reconnect the opener and test the auto-reverse safety feature.
Common Mistakes to Avoid During Installation
Even experienced DIYers encounter pitfalls. Avoid these errors to ensure your repair lasts:
- Forcing the seal dry: Always use lubrication. Dry insertion causes tearing and premature wear.
- Using incorrect fastener size: Too-long screws can puncture the seal bulb; too-short ones won’t hold. Match OEM specifications.
- Ignoring floor unevenness: If your concrete is significantly warped, consider installing an adjustable threshold ramp alongside the new seal.
- Skipping the safety clamp: An unsecured door can drop unexpectedly, causing serious injury.
- Buying cheap vinyl in cold climates: Low-grade vinyl hardens below freezing. Invest in EPDM rubber or reinforced vinyl rated for your region’s temperature range.
FAQ: Your Top Questions About Garage Door Seals Answered
How often should I replace my garage door bottom seal?
Most quality seals last 5–8 years depending on climate and usage frequency. Inspect annually each fall; replace immediately if you see cracks, flattening, or light visible beneath the closed door.
Can I install a new seal without removing the garage door?
Yes. The bottom seal slides into a retainer channel attached to the lowest door panel. You only need to disconnect the opener and secure the door in the down position—no full door removal required.
Why does my new seal still leak water?
Common causes include incorrect seal profile, insufficient fastening allowing lateral movement, or an uneven concrete threshold. Verify seal type matches your door, tighten all fasteners, and consider adding a concrete threshold sealant for persistent leaks.
Is EPDM rubber better than vinyl for garage door seals?
Generally, yes. EPDM rubber maintains flexibility in temperatures from -40°F to 250°F, resists UV degradation, and typically outlasts vinyl by 3–5 years. Vinyl is less expensive but becomes brittle in cold weather and may require more frequent replacement.
How much does professional seal replacement cost versus DIY?
Professional service averages $150–$300 including labor and materials. DIY costs range from $30–$80 for a quality seal kit. The savings are substantial, and the skill level required is beginner-friendly.
Will a new bottom seal reduce my energy bills?
Absolutely. Sealing the largest gap in your garage envelope reduces air infiltration, which directly impacts heating and cooling loads—especially if your garage is attached or has living space above it. Many homeowners report noticeable comfort improvements within days.
Final Thoughts: Protect Your Home One Seal at a Time
Learning how to change the bottom seal on a garage door empowers you to maintain your home’s integrity, improve energy efficiency, and prevent costly water or pest damage. With the right tools, correct seal type, and careful attention to detail, this repair delivers immediate and lasting benefits.
Don’t wait until the next storm exposes a failing seal. Take 30 minutes this weekend to inspect yours—and if replacement is needed, tackle it with confidence using this guide.
Found this helpful? Share it on Facebook, Pinterest, or Nextdoor to help fellow homeowners protect their garages too! Tag us with your before-and-after photos—we’d love to celebrate your DIY success. 💪🏡
Leave a Reply