Introduction
There is nothing quite as frustrating as standing in your driveway, pressing buttons frantically, only to realize you have forgotten your entry PIN or suspect someone else has learned it. Your garage is often the primary entry point to your home, making security a top priority for any homeowner. If you are wondering how to change keypad code on Genie garage door opener systems, you have come to the right place for a safe, accurate, and stress-free solution.
This guide is designed to walk you through the process with empathy and precision, acknowledging that dealing with garage door electronics can feel intimidating. Whether you have an older fixed-code model or a newer Intellicode system, we will break down every step so you can regain secure access to your home without calling a technician. Let’s get your garage secured and your peace of mind restored.
Understanding Your Genie Keypad Model
Before you begin pressing buttons, it is critical to identify which type of Genie keypad you own. Using the wrong instructions can lock you out or desynchronize your remote controls. Genie primarily uses two technologies, and distinguishing between them is the first step in learning how to change keypad code on Genie garage door opener units correctly.
Intellicode vs. Fixed Code Systems
Most Genie openers manufactured after 1995 utilize Intellicode® rolling code technology. This system changes the access code with every use, preventing code grabbing. Older models may use a fixed DIP switch or binary code system.
| Feature | Intellicode (Rolling Code) | Fixed Code (Legacy) |
|---|---|---|
| Security Level | High (Code changes per use) | Low (Static code) |
| Manufacture Date | Post-1995 | Pre-1995 |
| Programming Method | Learn Button + PIN Entry | DIP Switch Matching |
| Indicator Light | Usually Red/Blue LED | No LED or Simple Bulb |
| Compatibility | Modern Genie Openers | Vintage Genie Openers |
Expert Note: According to industry safety standards referenced in Wikipedia’s Garage Door Opener documentation, rolling code technology became a mandatory safety and security benchmark in the mid-1990s to prevent unauthorized duplication. If your keypad lacks a “Learn” button on the motor head, you likely have a legacy system requiring manual switch matching rather than digital reprogramming.
Preparation: Safety and Tools Required
Changing a code involves interacting with electrical components and moving machinery. Safety must precede convenience. Before attempting to change your keypad code, ensure you have completed the following checklist:
- Clear the Area: Ensure no people, pets, or objects are in the path of the garage door.
- Locate the Learn Button: Find the square or round button on the motor head unit (usually near the antenna wire).
- Check Batteries: Weak batteries are the #1 cause of programming failure. Replace with fresh alkaline batteries before starting.
- Have Your Manual Ready: Model numbers vary; having the specific PDF or physical manual prevents guesswork.
- Ladder Stability: Use a non-conductive fiberglass ladder if working near electrical wiring.
Taking these 60 seconds to prepare can save you hours of troubleshooting later. Remember, when researching how to change keypad code on Genie garage door opener, preparation is just as important as the programming sequence itself.
Step-by-Step: Changing Code on Intellicode Keypads
This is the most common procedure for modern Genie owners. Follow these steps precisely. Do not rush the timing between button presses, as the receiver has a specific window for accepting commands.
Step 1: Access the Motor Head Unit
Safely position your ladder beneath the garage door opener motor. Locate the Learn Button. On most Genie Intellicode units, this is a square button labeled “LEARN” or “SET,” often accompanied by a small LED light. The color of this LED (red, blue, or purple) indicates your specific frequency series.
Step 2: Initiate Programming Mode
Press and release the Learn Button on the motor head. The LED indicator will begin to flash or stay solid, indicating the unit is in “learning mode.” You typically have 30 seconds to complete the next steps before the system times out. If the light goes off, simply press the Learn Button again.
Step 3: Enter Your New PIN at the Keypad
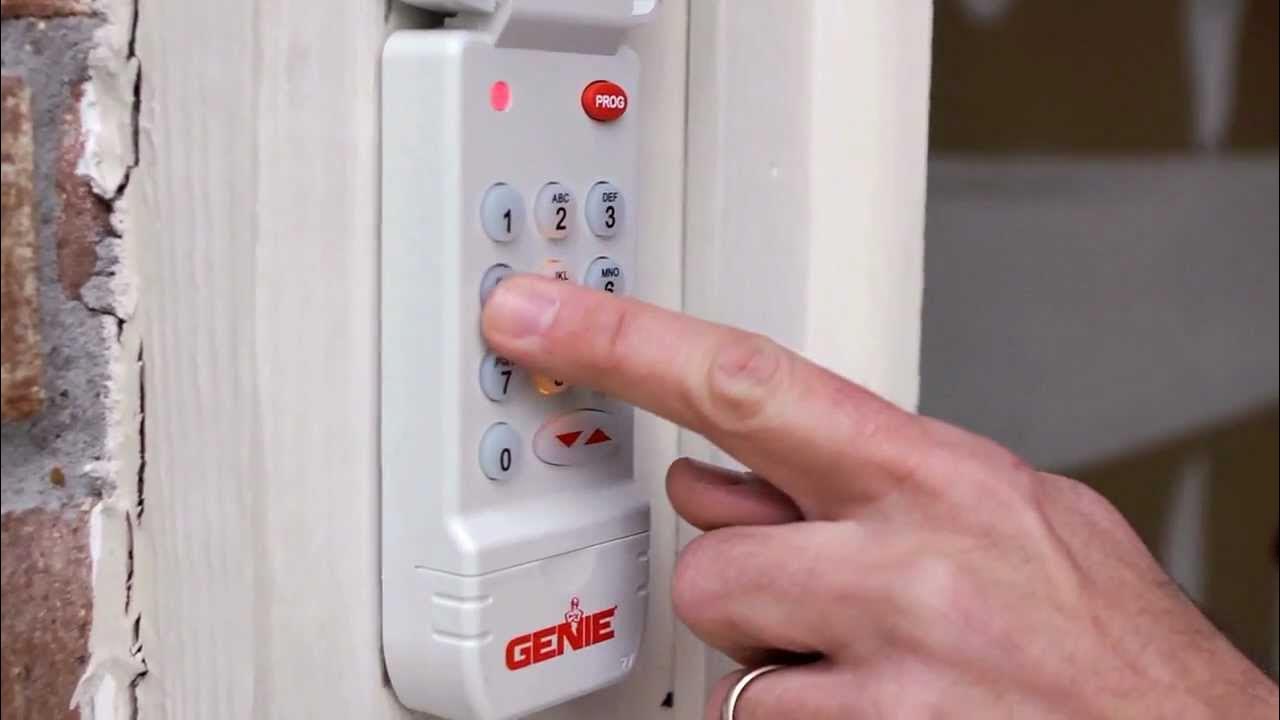
Go to your exterior wireless keypad. Enter your desired new 4-digit PIN. After entering the fourth digit, press and hold the “SEND” or “OPEN/CLOSE” button (depending on your keypad model). Hold this button until the motor head LED blinks or turns off, confirming the signal was received.
Step 4: Verify the New Code
Wait five seconds after the LED stops flashing. Enter your new 4-digit PIN and press SEND. The garage door should activate. Test it twice to ensure consistency. If the door does not respond, repeat Steps 2 and 3, ensuring you are within the 30-second window.
Step 5: Clear Old Codes (Optional but Recommended)
If you are changing the code due to a security breach or lost keypad, consider clearing all previously programmed devices. Press and hold the Learn Button on the motor head for 10–15 seconds until the LED turns off completely. This erases all remotes and keypads. You will then need to reprogram all devices, including your car visor remotes, using the same learn process.
Troubleshooting Common Programming Failures
Even professionals encounter hiccups. If you are struggling with how to change keypad code on Genie garage door opener, review these frequent issues before assuming hardware failure.
- LED Flashes But Door Doesn’t Move: This usually indicates successful programming but a mechanical issue. Check for locked disconnect switches or obstructed safety sensors.
- Keypad Lights Flash Rapidly: This often signals low battery voltage. Even if the lights turn on, the transmission power may be insufficient to reach the motor head. Replace batteries immediately.
- Code Works Once Then Fails: This suggests interference or a failing capacitor in the keypad. Try reprogramming from a different location on the wall to rule out RF interference from nearby transformers or LED bulbs.
- Motor Head LED Never Activates: The logic board may have lost power. Check the outlet and circuit breaker. If power is present but the learn button is unresponsive, the receiver module may require professional replacement.
FAQ: Frequently Asked Questions About Genie Keypad Codes
1. Can I change my Genie keypad code without accessing the motor unit?
Generally, no. For security reasons, Genie designs their systems so that new codes must be synchronized directly with the motor head’s receiver. Some newer Wi-Fi enabled models allow code management via the Aladdin Connect app, but traditional wireless keypads require physical interaction with the Learn Button on the ceiling unit. Always verify your specific model’s capabilities in the user manual.
2. How often should I change my garage door keypad code?
Security experts recommend changing your code every 6–12 months, or immediately after any of these events: moving into a new home, losing a keypad, ending a service relationship with a contractor, or suspecting unauthorized access. Regular rotation significantly reduces the risk of code compromise and keeps your home security posture strong.
3. Will changing the keypad code erase my existing remote controls?
Not unless you perform a full system reset. Simply adding or changing a keypad code using the standard Learn Button sequence preserves all previously programmed remotes. However, if you hold the Learn Button for 10+ seconds to clear memory, all devices will be erased. Only perform a full reset if you intentionally want to remove old users or troubleshoot persistent sync issues.
4. What do I do if my Genie keypad doesn’t have a SEND button?
Some compact Genie keypads use the number pad itself as the send mechanism. After entering your 4-digit PIN, press and hold the “0” key or the last digit entered until the motor responds. Consult your specific keypad’s label or manual, as button configurations vary significantly across generations. Never force programming sequences that don’t match your hardware.
5. Is there a master override code for Genie keypads?
No. Genie does not implement universal master codes for consumer security products. Each keypad must be individually programmed to each opener. If you’ve purchased a used home and cannot access the motor unit to reprogram, you may need to replace the keypad entirely or consult a certified Genie dealer for authorized assistance. Avoid websites claiming to provide “universal Genie codes,” as these are typically scams.
6. Can weather affect keypad programming success?
Yes. Extreme cold (below freezing) can reduce battery output and slow LCD response times, while extreme heat can cause thermal expansion in internal contacts. If programming fails during temperature extremes, try warming the keypad with your hands or waiting for milder conditions. Always use lithium batteries in climates with harsh winters, as they maintain voltage better than alkaline in cold weather.
Conclusion: Secure Your Home With Confidence
Learning how to change keypad code on Genie garage door opener systems is more than a maintenance task—it is an act of protecting your family and property. By following this guide, you have taken proactive control of your home’s first line of defense. Remember to test your new code thoroughly, keep spare batteries on hand, and schedule regular code rotations as part of your home security routine.
Your garage door opener is a sophisticated piece of safety equipment, and treating it with respect ensures reliable performance for years to come. If you found this tutorial helpful, please share it on social media to help fellow homeowners secure their garages safely and confidently. Tag a friend who just moved into a new house—they will thank you later! Stay safe, stay secure, and never hesitate to consult a certified Genie professional if you encounter issues beyond basic reprogramming. Your peace of mind is worth the extra care.
Leave a Reply