Introduction
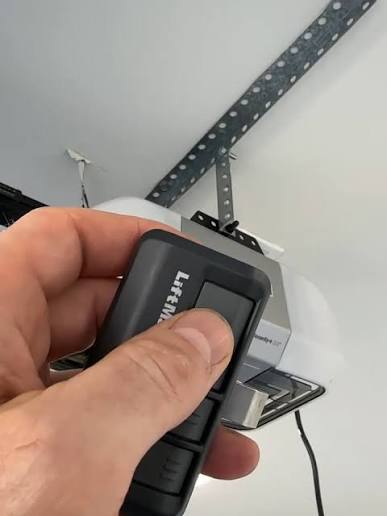
Is your garage door refusing to open when you press the remote? Or perhaps the keypad outside is unresponsive? It is a frustrating situation that often happens at the worst possible time, usually when you are rushing out the door. The good news is that the solution is often simple and inexpensive. Knowing how to change battery in garage door opener Liftmaster systems can save you from calling a technician and get your home security back on track in minutes.
In this guide, we will walk you through the exact steps to replace batteries in both your handheld remotes and the main unit’s backup battery. We will cover common models, safety tips, and troubleshooting advice to ensure your LiftMaster system runs smoothly for years to come.
Identifying Your LiftMaster Model and Battery Type
Before you grab a screwdriver, it is crucial to identify which part of your system needs a new battery. LiftMaster systems typically have two distinct battery components: the handheld remote control and the backup battery for the main motor unit (common in newer Wi-Fi enabled models).
Handheld Remote Controls
Most LiftMaster remotes use standard coin-cell or alkaline batteries. The most common types are:
- CR2032: A 3-volt lithium coin cell. This is the industry standard for most modern key fobs.
- 9-Volt Alkaline: Used in older, larger “brick-style” remotes.
- AA or AAA: Occasionally used in newer, slim-profile remotes.
Main Unit Backup Battery
If you have a newer LiftMaster model with Wi-Fi capability (such as the 8500W or 87504-267), it likely includes a backup battery pack. This ensures your garage door operates during power outages. These units typically use a sealed lead-acid battery or a proprietary lithium pack, depending on the manufacturing year.
Pro Tip: Check the back of your remote or the side of your motor unit for a model number. You can cross-reference this on the LiftMaster official support page to confirm the exact battery specification. For general technical standards on battery safety and types, you can also refer to Wikipedia’s entry on electric batteries to understand voltage requirements better.
Step-by-Step: Changing the Remote Control Battery
Replacing the battery in your handheld remote is the most common maintenance task. Follow these precise steps to avoid damaging the plastic casing or the internal circuit board.
Step 1: Open the Remote Casing
Locate the seam on the side of your remote. Most LiftMaster remotes do not have screws; they snap together.
- Find the small notch or groove on the bottom or side of the remote.
- Insert a flat-head screwdriver or a coin into the notch.
- Gently twist to pry the two halves apart. Do not force it. If it resists, check for hidden screws under the battery cover or label.
Step 2: Remove the Old Battery
Once the case is open, locate the battery.
- For Coin Cells (CR2032): Note the orientation. The positive side (+) usually faces up. Use a non-conductive tool (like a plastic spudger) to pop the battery out.
- For 9-Volt Batteries: Simply disconnect the snap connector.
Step 3: Insert the New Battery
Insert the new battery, ensuring the polarity matches the old one.
- Critical Detail: For CR2032 batteries, ensure the positive (+) side is facing up. Incorrect installation will prevent the remote from working and could damage the contacts.
- Press down firmly until you hear a slight click, indicating the battery is seated correctly.
Step 4: Reassemble and Test
Snap the two halves of the remote back together. Ensure there are no gaps. Stand within 10 feet of your garage door and press the button. The LED light on the remote should flash, and the door should activate.
| Battery Type | Common Models | Average Lifespan | Estimated Cost |
|---|---|---|---|
| CR2032 | Security+ 2.0 Remotes | 2–3 Years | $2–$5 |
| 9-Volt | Older Brick Remotes | 1–2 Years | $3–$6 |
| AA/AAA | Slim Line Remotes | 1 Year | $1–$3 |
How To Change Battery In Garage Door Opener Liftmaster Main Unit
If your remote works but the wall console or Wi-Fi features fail during a power outage, you may need to replace the backup battery in the main motor unit. This process is slightly more involved.
Safety First
Warning: Always unplug the garage door opener from the power outlet before working on the main unit. Although the voltage is low, accidental shorts can damage the logic board.
Step 1: Locate the Battery Compartment
On most newer LiftMaster models, the battery compartment is located on the back or side of the motor housing. It is often covered by a plastic panel secured by two or four Phillips-head screws.
Step 2: Disconnect the Old Battery
- Remove the screws and take off the cover.
- You will see a battery pack connected by a red (positive) and black (negative) wire harness.
- Gently pull the connector straight out. Do not pull on the wires themselves, as this can break the solder joints.
Step 3: Install the New Battery
- Purchase the exact replacement battery specified in your owner’s manual. Using a generic battery with different voltage or amperage can void your warranty or cause fire hazards.
- Connect the new battery harness to the port on the logic board. Ensure it clicks into place.
- Tuck the wires neatly into the compartment to avoid interference with moving parts.
Step 4: Secure and Power Up
Replace the cover and tighten the screws. Plug the unit back into the power outlet. The opener may take up to 5 minutes to fully charge the new battery and recalibrate its sensors. During this time, the status lights may flash amber. Wait for a solid green light before testing.
Troubleshooting Common Issues
Even after replacing the battery, you might encounter issues. Here is how to address them based on expert insights and user data.
Remote Still Not Working?
- Reprogram the Remote: Sometimes, the connection is lost. Hold the “Learn” button on the motor unit until the light blinks, then press the remote button.
- Check Battery Contacts: Corrosion can block the current. Clean the metal contacts with a cotton swab dipped in rubbing alcohol.
- Interference: LED light bulbs in the garage can emit frequencies that interfere with remote signals. Try turning off the garage lights and testing the remote.
Backup Battery Drains Quickly?
- Age of Unit: If your opener is over 10 years old, the logic board may be drawing excessive power.
- Temperature Extremes: Batteries degrade faster in extreme heat or cold. If your garage is uninsulated, consider an insulated battery box.
- Frequent Outages: If you live in an area with frequent power fluctuations, the battery cycles more often, reducing its lifespan.
Why Regular Maintenance Matters
According to industry statistics, nearly 30% of garage door service calls are related to simple electrical issues, including dead batteries and loose wiring. By proactively changing your batteries every 2–3 years, you can avoid being locked out of your garage.
Furthermore, a well-maintained opener lasts longer. The average lifespan of a LiftMaster opener is 10–15 years. Neglecting basic maintenance like battery replacement can strain the motor and reduce this lifespan significantly.
FAQ Section
Q1: How often should I change the battery in my LiftMaster remote?
A: You should replace the battery in your handheld remote every 2 to 3 years. However, if you notice the range decreasing or the LED light dimming, replace it immediately. Proactive replacement prevents unexpected failures.
Q2: Can I use a rechargeable battery in my LiftMaster remote?
A: It is generally not recommended. Rechargeable batteries often have a lower voltage (1.2V vs 1.5V for alkaline) and may not provide enough power for the remote to send a strong signal to the motor unit. Stick to high-quality lithium or alkaline batteries for best performance.
Q3: What does it mean if my LiftMaster backup battery light is flashing red?
A: A flashing red light usually indicates that the backup battery is disconnected, faulty, or needs charging. If you recently replaced it, ensure the connector is fully seated. If the light persists after 24 hours of charging, the battery may be defective.
Q4: Is it safe to leave the garage door opener unplugged while changing the main battery?
A: Yes, it is not only safe but required. Unplugging the unit protects you from electrical shock and prevents potential short circuits on the logic board while you are handling the battery connectors.
Q5: Where can I buy the correct replacement battery for my LiftMaster?
A: You can purchase genuine LiftMaster batteries from authorized dealers, hardware stores like Home Depot or Lowe’s, or online retailers like Amazon. Ensure you match the model number exactly. For coin cells, any reputable brand (Duracell, Energizer) will work.
Conclusion
Learning how to change battery in garage door opener Liftmaster systems is a valuable skill for any homeowner. Whether it is a simple coin cell in your remote or a backup pack in the main unit, regular maintenance ensures reliability and security. By following the steps outlined above, you can save money on service calls and keep your garage operating smoothly.
Don’t wait until you are stuck outside in the rain! Check your remotes today. If you found this guide helpful, please share it with your neighbors or on social media to help others troubleshoot their garage door issues. Stay secure and stay connected!
Leave a Reply