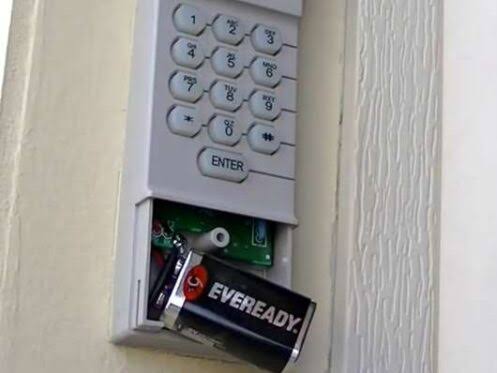
Is your Craftsman garage door keypad beeping or completely unresponsive? You’re not alone—thousands of homeowners face this frustrating issue every month. Learning how to change battery in Craftsman garage door opener keypad is simpler than you think, and we’ll walk you through every step to get your system working perfectly again.
A dead keypad battery can leave you stranded outside your garage, especially during bad weather or late at night. The good news? This quick fix takes less than five minutes and requires no special tools. Whether you have a newer model with wireless technology or an older wired version, this comprehensive guide covers everything you need to know about replacing your Craftsman keypad battery safely and effectively.
What Type of Battery Does My Craftsman Keypad Use?
Before diving into the replacement process, it’s crucial to identify the correct battery type for your specific Craftsman keypad model. Using the wrong battery can damage your device or simply won’t work.
Most Craftsman garage door opener keypads use one of these common battery types:
| Keypad Model | Battery Type | Voltage | Expected Lifespan |
|---|---|---|---|
| Craftsman 315 MHz Wireless | 9V Alkaline | 9 Volts | 12-18 months |
| Craftsman 390 MHz Digital | 9V Alkaline | 9 Volts | 12-24 months |
| Craftsman Security+ 2.0 | CR2032 Lithium | 3 Volts | 2-3 years |
| Older Wired Models | 9V Alkaline | 9 Volts | 6-12 months |
Pro tip: Always check your owner’s manual or look inside the battery compartment for specific requirements. If you’ve lost the manual, most Craftsman keypads have the model number printed on the back or inside the battery cover.
According to Wikipedia’s article on garage door openers, modern wireless keypads have become increasingly popular due to their convenience and ease of installation, but they do require regular battery maintenance to function properly.
How to Identify Your Exact Model
- Look for the model number on the back of your keypad or inside the battery compartment
- Check the frequency (usually 315 MHz or 390 MHz) printed on the device
- Note the year your garage door opener was installed
- Take a photo of your current setup before removing anything
Step-by-Step Guide: How to Change Battery in Craftsman Garage Door Opener Keypad
Now let’s get to the main event. Follow these detailed steps to replace your Craftsman keypad battery safely and efficiently.
Step 1: Gather Your Supplies
Before starting, make sure you have:
- New battery (correct type as identified above)
- Small Phillips screwdriver (if your model has screws)
- Clean, dry cloth for wiping the compartment
- Flashlight (for better visibility)
Step 2: Locate and Open the Battery Compartment
The battery compartment location varies by model:
For most wireless Craftsman keypads:
- Look for a small sliding panel on the back or bottom of the keypad
- Some models have a snap-off cover that pops open with gentle pressure
- Others may have one or two small screws securing the cover
For older wired models:
- The battery compartment is typically located inside the main housing
- You may need to remove the entire keypad from the wall first
- Look for screws around the perimeter of the unit
Step 3: Remove the Old Battery Carefully
- Note the battery orientation before removing it (take a photo if needed)
- Gently lift or slide out the old battery
- Check for any corrosion or leakage around the contacts
- If you see corrosion, clean it with a cotton swab dipped in white vinegar
Warning: Never force the battery out. If it’s stuck, gently wiggle it side to side while pulling upward.
Step 4: Prepare the New Battery
- Remove any protective film from the new battery
- Wipe the battery terminals with a clean, dry cloth
- Ensure the battery is fresh (check the expiration date)
- Have the correct polarity ready (+ and – symbols)
Step 5: Install the New Battery
- Insert the battery following the same orientation as the old one
- Press firmly until it clicks into place (for snap-in models)
- Double-check that the positive and negative terminals match the markings
- Ensure the battery sits flush in the compartment
Step 6: Test Your Keypad
- Close the battery compartment securely
- Wait 30 seconds for the keypad to initialize
- Enter your PIN code to test functionality
- Try opening and closing your garage door
If the keypad doesn’t respond immediately, don’t panic. Some models require a brief reset period after battery replacement.
Troubleshooting Common Issues After Battery Replacement
Even after following the steps correctly, you might encounter some issues. Here’s how to address them:
Keypad Still Not Working?
- Check battery orientation – Even experienced DIYers sometimes install batteries backward
- Test with a multimeter – Ensure the new battery actually has power
- Try a different brand – Some keypads are sensitive to certain battery brands
- Reset the keypad – Consult your manual for the reset procedure
Weak Signal or Intermittent Response?
- Move closer to the garage door opener during testing
- Check for interference from other electronic devices
- Ensure the antenna on your garage door opener isn’t damaged
- Replace with a high-quality alkaline battery instead of generic brands
Battery Drains Quickly?
- Check for moisture in the battery compartment
- Ensure the cover seals properly to prevent humidity damage
- Use lithium batteries for longer lifespan in extreme temperatures
- Verify there’s no short circuit in the wiring (for wired models)
Tips to Extend Your Craftsman Keypad Battery Life
Prevention is always better than cure. Follow these expert tips to maximize your battery lifespan:
Environmental Protection
- Keep the keypad covered from direct rain and snow
- Avoid extreme temperatures when possible
- Install a weatherproof cover if your keypad is exposed
- Clean regularly to prevent dirt buildup
Smart Usage Habits
- Don’t hold buttons down unnecessarily
- Use the keypad only when needed
- Consider a backup entry method to reduce keypad dependency
- Monitor battery performance monthly
Quality Matters
- Invest in premium batteries from reputable brands like Duracell or Energizer
- Avoid mixing old and new batteries
- Store spare batteries in a cool, dry place
- Buy batteries with recent manufacturing dates
When to Call a Professional
While most battery replacements are straightforward DIY tasks, certain situations warrant professional help:
- Persistent electrical issues after multiple battery changes
- Visible damage to the keypad housing or wiring
- Garage door opener malfunctioning beyond just the keypad
- Complex smart home integration problems
- Safety concerns with the garage door mechanism itself
According to industry experts, approximately 15% of garage door issues stem from simple battery problems, while the remaining 85% may require professional diagnosis and repair.
FAQ: Common Questions About Craftsman Keypad Battery Replacement
Q: How often should I change my Craftsman keypad battery?
A: Most Craftsman keypad batteries last between 12-24 months with normal use. However, factors like temperature extremes, frequency of use, and battery quality can affect lifespan. We recommend checking your battery every 6 months and replacing it annually as preventive maintenance.
Q: Can I use rechargeable batteries in my Craftsman keypad?
A: While technically possible, we don’t recommend rechargeable batteries for garage door keypads. They typically have lower voltage output and may not provide consistent power. Standard alkaline batteries offer more reliable performance and longer shelf life for this application.
Q: What should I do if my keypad gets wet during battery replacement?
A: If your keypad gets wet, immediately remove the battery and dry all components thoroughly with a clean cloth. Let it air dry for at least 24 hours before reinstalling the battery. If you suspect water damage to internal components, consider replacing the entire keypad for safety.
Q: Why does my new battery drain so quickly?
A: Rapid battery drain usually indicates one of several issues: moisture in the compartment causing corrosion, a faulty keypad drawing excess power, extreme temperatures affecting battery performance, or using low-quality batteries. Check for visible damage and ensure proper sealing of the battery compartment.
Q: Can I program a new keypad without the original remote?
A: Yes, most Craftsman garage door openers can be programmed with a new keypad using the learn button on the motor unit. However, having at least one working remote makes the process easier. Consult your owner’s manual for specific programming instructions for your model.
Q: Is it safe to leave the battery compartment open while troubleshooting?
A: No, never leave the battery compartment open for extended periods. Exposure to moisture, dust, and debris can damage internal components and create safety hazards. Complete your troubleshooting quickly and always secure the compartment properly afterward.
Conclusion
Learning how to change battery in Craftsman garage door opener keypad is an essential skill for every homeowner. With this comprehensive guide, you now have the knowledge to handle this common maintenance task confidently and efficiently. Remember, regular battery checks and using quality batteries can prevent unexpected failures and keep your garage accessible when you need it most.
Don’t let a dead battery strand you outside your garage again. Share this helpful guide with friends and family who might benefit from these tips, and bookmark it for future reference. Your future self will thank you when you’re not fumbling with a non-responsive keypad in the rain!
Have you successfully replaced your Craftsman keypad battery using this guide? Share your experience in the comments below or on social media to help other homeowners!
Leave a Reply