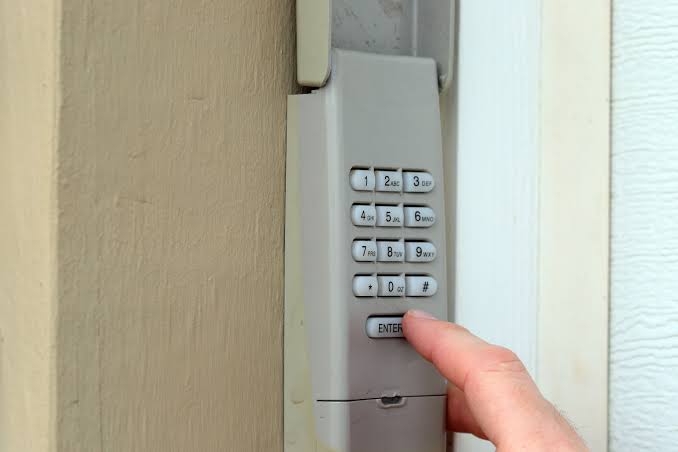
Have you ever worried that someone might know your garage door code? Whether you’ve moved into a new home, shared your code with a neighbor who no longer needs access, or simply want to boost your home’s security, knowing how to change a keypad code on a garage door is an essential skill for every homeowner. The good news? It’s easier than you think, and this guide will walk you through the process step by step.
Why Should You Change Your Garage Door Keypad Code?
Before diving into the “how,” let’s address the “why.” Many homeowners underestimate the importance of updating their garage door codes regularly. According to a study by the National Crime Prevention Council, garages are among the most common entry points for burglars because they often lack robust security measures.
Changing your keypad code periodically ensures that only authorized individuals can access your garage. This is especially important if:
- You’ve recently moved into a new house.
- You’ve lent your code to service providers, friends, or family members who no longer need access.
- You suspect unauthorized use of your garage.
By taking control of your garage door security, you’re not just protecting your vehicle—you’re safeguarding your entire home.
Step-by-Step Guide: How to Change a Keypad Code on a Garage Door
While the exact steps may vary depending on your garage door opener brand, the general process is similar across most models. Below, we’ll cover universal steps and provide specific instructions for popular brands like LiftMaster, Chamberlain, and Genie.
Step 1: Locate the “Learn” or “Program” Button
The first thing you’ll need to do is find the “Learn” or “Program” button on your garage door opener motor unit. This button is usually located on the back or side of the motor housing and is often colored (e.g., yellow, red, or purple).
If you’re unsure where to find it, consult your owner’s manual. For additional help, you can refer to Wikipedia’s page on garage door openers for technical details about different models.
Step 2: Clear Existing Codes
To ensure old codes don’t interfere with the new one, you’ll need to clear the memory of your garage door opener. Here’s how:
- Press and hold the “Learn” button for 6–10 seconds until the indicator light turns off.
- Release the button. All previously programmed remotes and keypads will now be erased.
Note: After clearing the memory, you’ll need to reprogram any other remotes or devices connected to your garage door opener.
Step 3: Enter Programming Mode
Next, press the “Learn” button briefly. The indicator light should blink or turn solid, signaling that the opener is ready to accept a new code.
Step 4: Input Your New Code on the Keypad
Now it’s time to set your new keypad code:
- Walk over to your wireless keypad outside the garage.
- Enter your desired 4-digit PIN. Choose something memorable but hard to guess (avoid birthdays or sequential numbers like 1234).
- Press the “Enter” or “Send” button on the keypad.
The garage door opener should respond with a click or flash its lights, confirming that the new code has been accepted.
Step 5: Test the New Code
Finally, test your new code to ensure it works properly:
- Close your garage door completely.
- Enter the new code on the keypad and press “Enter.”
- Verify that the door opens smoothly.
If the door doesn’t respond, double-check each step and repeat the process if necessary.
Brand-Specific Instructions
Different manufacturers may have slight variations in their programming procedures. Here’s a quick breakdown for some of the most popular brands:
| Brand | Key Steps |
|---|---|
| LiftMaster | Hold the “Learn” button for 6 seconds to clear codes; press again to enter programming mode. |
| Chamberlain | Similar to LiftMaster; look for a yellow “Learn” button near the antenna wire. |
| Genie | Use the “Set” button instead of “Learn”; follow prompts on LED display if applicable. |
For detailed instructions tailored to your model, always refer to the manufacturer’s website or user manual.
Common Mistakes to Avoid
When learning how to change a keypad code on a garage door, even small errors can cause frustration. Here are some pitfalls to watch out for:
- Not clearing old codes: Failing to reset the system can lead to conflicts between old and new codes.
- Choosing weak passwords: Avoid obvious combinations like 1111 or 0000.
- Skipping testing: Always verify that your new code works before assuming the job is done.
FAQ Section
Q1: Can I change my garage door keypad code without resetting the entire system?
Yes, many modern garage door openers allow you to update individual keypad codes without erasing all stored devices. Check your owner’s manual for specifics.
Q2: What should I do if my keypad stops working after changing the code?
First, ensure batteries in the keypad are fresh. If the issue persists, try reprogramming the keypad following the steps above.
Q3: Is it safe to share my garage door code with others?
It’s best to avoid sharing your code whenever possible. Instead, consider using temporary access features offered by smart garage door systems.
Q4: How often should I change my garage door code?
Experts recommend updating your code at least once a year or whenever someone with access moves away.
Q5: Will changing the code affect my remote controls?
If you clear the memory during the process, yes, you’ll need to reprogram all remotes. However, some models allow selective updates.
Q6: What happens if I forget my new code?
Most garage door openers include a reset option. Refer to your manual for instructions on retrieving or resetting your code.
Conclusion
Knowing how to change a keypad code on a garage door empowers you to take charge of your home’s security. With just a few simple steps, you can protect your property from potential intruders while ensuring convenience for yourself and trusted visitors.
Don’t wait until something goes wrong—take action today! Share this guide with friends and family so they too can secure their homes effectively. Together, let’s make our neighborhoods safer, one garage door at a time.
Leave a Reply