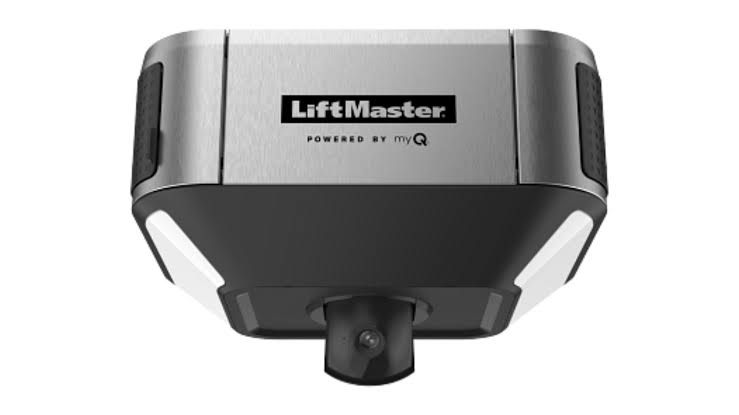
Have you ever stood in your driveway, pressing the garage door remote repeatedly, only to be met with silence? It is a frustrating experience that disrupts your daily routine and leaves you wondering if your expensive opener has suddenly failed. Before you call a costly technician or buy a new unit, you should know that how to change a battery in Liftmaster garage door opener is often the simplest solution to this common problem.
Most of the time, the issue is not with the motor or the sensors, but simply a depleted power source in your handheld remote or wall console. In this comprehensive guide, we will walk you through the exact steps to identify the right battery, replace it safely, and ensure your garage door responds instantly again. Whether you are a seasoned DIY enthusiast or a complete beginner, this process is straightforward, cost-effective, and can be completed in under ten minutes.
Identifying the Right Battery Type for Your Liftmaster Remote
Before you rush to the store, it is crucial to identify exactly which battery your specific Liftmaster model requires. Using the wrong battery type can lead to poor performance or even damage the internal contacts of your remote. Liftmaster produces various models, ranging from the classic Security+ series to the modern MyQ-enabled smart remotes.
Common Battery Types
Most Liftmaster remotes use one of the following standard batteries:
- CR2032: A 3-volt lithium coin cell. This is the most common battery for newer, slim-profile remotes and keychain models.
- 3V12 (or A23): A small cylindrical 12-volt alkaline battery. These are frequently found in older, bulkier “brick-style” remotes.
- 9-Volt Alkaline: Typically used for the backup battery system inside the main motor unit itself, rather than the handheld remote.
To confirm your specific requirement, check the back of your remote. Many models have the battery type printed directly on the casing or inside the battery compartment. If the label is worn off, consult your user manual. According to Wikipedia’s entry on garage door openers, standardized battery types have helped streamline maintenance across major brands, making replacements widely available at grocery stores and hardware shops.
| Remote Model Style | Typical Battery Type | Estimated Lifespan |
|---|---|---|
| Slim Keychain Remote | CR2032 (3V) | 1–2 Years |
| Standard Visor Clip | 3V12 / A23 (12V) | 1–2 Years |
| Wall-Mounted Console | 9V or AA (varies) | 6–12 Months |
| Main Motor Unit Backup | 12V Sealed Lead Acid | 3–5 Years |
Step-by-Step Guide: How to Replace the Battery
Now that you have the correct battery, let’s dive into the actual replacement process. Follow these steps carefully to avoid damaging the plastic clips or misaligning the internal components.
Step 1: Open the Remote Casing
Locate the seam on the side or back of your remote. For most Liftmaster remotes, you do not need screws. Instead, look for a small slot or indentation. Insert a flathead screwdriver or a coin into the slot and gently twist to pry the two halves of the casing apart.
- Tip: Apply gentle pressure. If it feels stuck, check for hidden screws under rubber feet or labels. Forcing it can break the plastic tabs.
Step 2: Remove the Old Battery
Once the case is open, locate the battery. Note the orientation of the positive (+) and negative (-) terminals before removing it.
- For coin cells (CR2032): Use a non-conductive tool like a plastic spudger or your fingernail to pop it out. Avoid using metal tools that could short-circuit the board.
- For cylindrical batteries (A23/3V12): Simply pull it straight out of the holder.
Step 3: Clean the Contacts
Over time, battery corrosion or dust can accumulate on the metal contacts, leading to poor connectivity. Take a dry cotton swab or a soft cloth to gently wipe the metal springs and plates. If you see white crusty residue (corrosion), dip the swab in a tiny amount of isopropyl alcohol and clean it thoroughly. Let it dry completely before proceeding.
Step 4: Insert the New Battery
Place the new battery into the compartment. Ensure the polarity matches the markings in the remote.
- CR2032: The positive side (usually with the text/logo) should face up.
- A23/3V12: Align the positive tip with the spring contact as indicated by the diagram inside the case.
Step 5: Reassemble and Test
Snap the two halves of the remote back together. You should hear a satisfying click indicating the tabs are locked in place. Stand within range of your garage door and press the button. The LED light on the remote should flash, and the door should activate. If the door does not move, try reprogramming the remote (see below).
Troubleshooting: What If the Remote Still Doesn’t Work?
If you have successfully learned how to change a battery in Liftmaster garage door opener but the device still fails to operate, do not panic. There are several other factors at play.
Check the Main Unit’s Power Source
Sometimes the issue is not the remote, but the opener itself. Check if the main motor unit is plugged in and if the circuit breaker has tripped. Additionally, if your model has a backup battery system for power outages, that battery may need replacement. These are typically 12V sealed lead-acid batteries located inside the motor housing.
Reprogramming the Remote
Changing the battery usually retains the memory code. However, in rare cases, the remote may lose its synchronization with the opener. To reprogram:
- Locate the “Learn” button on the back or side of the motor unit. It is usually yellow, purple, or orange.
- Press and release the Learn button. The indicator light will turn on.
- Within 30 seconds, press and hold the button on your remote.
- Release the button when the motor unit’s lights blink or you hear a click.
Interference Issues
LED light bulbs in your garage can sometimes emit frequency interference that blocks remote signals. If your remote works outside the garage but not inside, try turning off the garage lights and testing again. If this resolves the issue, consider switching to shielded LED bulbs designed for garage door openers.
Maintaining Your Garage Door System for Longevity
Replacing the battery is just one aspect of maintaining a reliable garage door system. Regular maintenance can prevent unexpected failures and extend the life of your Liftmaster opener.
- Test Safety Sensors Monthly: Ensure the photo-eye sensors near the floor are aligned and clean. Place an object in the door’s path while closing; it should reverse immediately.
- Lubricate Moving Parts: Use a silicone-based lubricant on the rollers, hinges, and springs every six months. Avoid WD-40 as it attracts dust and gumms up the mechanism.
- Inspect Cables and Springs: Look for fraying cables or rusted springs. These are high-tension components and should only be serviced by professionals.
By combining regular battery checks with broader system maintenance, you ensure that your garage door remains safe, quiet, and responsive for years to come.
FAQ Section
Q1: How often should I change the battery in my Liftmaster remote?
A: On average, you should replace the battery every 1 to 2 years. However, this depends on usage frequency. If you notice the LED light dimming or the range decreasing, it is time for a change regardless of the timeline.
Q2: Can I use a rechargeable battery in my Liftmaster remote?
A: It is generally not recommended. Rechargeable batteries often have a lower voltage (1.2V per cell vs 1.5V for alkaline) which may not provide enough power for the remote to transmit a strong signal. Stick to high-quality alkaline or lithium batteries for consistent performance.
Q3: Why does my remote work closer to the door than before?
A: This is a classic sign of a weak battery. As the voltage drops, the transmission power decreases, reducing the effective range. Replacing the battery should restore the original range. If it doesn’t, check for interference from LED bulbs or nearby radio towers.
Q4: Is it dangerous to change the battery myself?
A: No, changing the battery in the handheld remote is completely safe. However, if you are replacing the backup battery inside the main motor unit, ensure the unit is unplugged from the wall outlet to avoid electrical shock.
Q5: What do I do with the old battery?
A: Do not throw batteries in the regular trash. Lithium and alkaline batteries contain chemicals that can harm the environment. Take them to a local recycling center or a hardware store that offers battery disposal services.
Conclusion
Learning how to change a battery in Liftmaster garage door opener is a small task with a big impact on your daily convenience. By identifying the correct battery type, following the simple replacement steps, and performing basic troubleshooting, you can save money and avoid unnecessary service calls. Remember, a well-maintained garage door is a safe garage door.
If you found this guide helpful, please share it with your friends and family on social media. You never know who else might be standing in their driveway, frustrated with a silent remote! Stay proactive, keep your batteries fresh, and enjoy the smooth operation of your Liftmaster system.
Leave a Reply