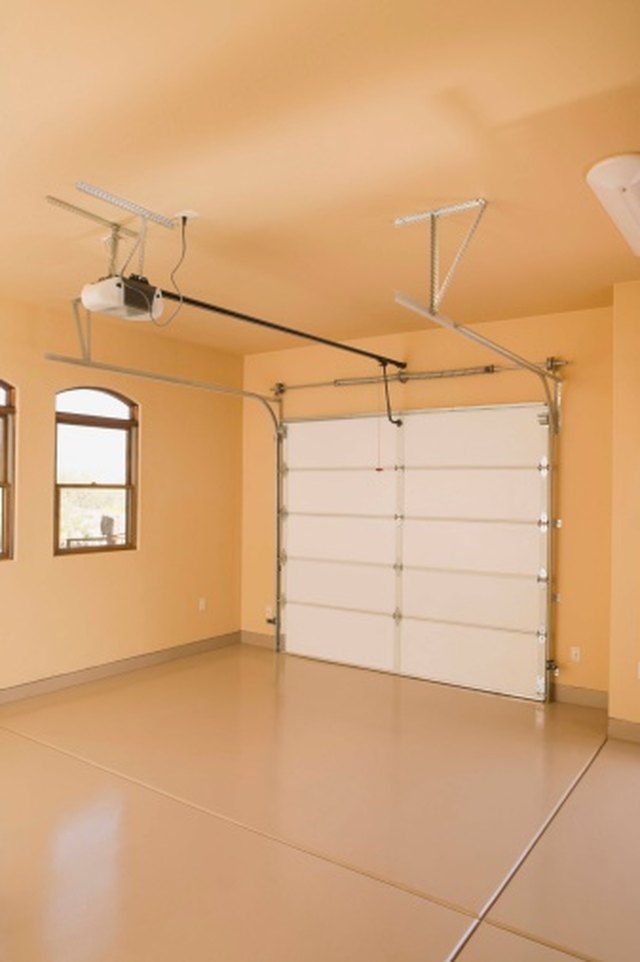
Have you ever looked at your unused garage and imagined the potential it holds? Whether you need extra living space, a home office, or a dedicated workshop, closing off that massive garage door opening is often the first critical step. Learning how to build a wall in a garage door opening can seem daunting, but with the right planning and tools, it is a manageable DIY project that adds significant value to your home.
This guide will walk you through the entire process, from obtaining permits to installing the final drywall. We will focus on safety, structural integrity, and code compliance to ensure your new wall stands the test of time.
Why Convert Your Garage Door Opening?
Before we dive into the nuts and bolts, let’s address why this project is worth the effort. Converting a garage door opening into a standard wall unlocks square footage that is often underutilized. According to recent real estate trends, functional living space increases home appraisal values more effectively than storage space.
However, this isn’t just about aesthetics. A properly built wall improves energy efficiency by eliminating the drafts common around older garage doors. It also enhances security and noise reduction, making your home quieter and safer.
Step 1: Check Local Building Codes and Permits
One of the most overlooked steps in DIY construction is regulatory compliance. You cannot simply frame a wall without checking local zoning laws. Most municipalities require a building permit for structural changes, especially those involving load-bearing elements.
Why Permits Matter
- Safety Assurance: Inspections ensure your work meets safety standards.
- Resale Value: Unpermitted work can cause issues during home sales.
- Insurance Coverage: Some policies may not cover damages from unpermitted structural changes.
Visit your local city or county building department website. Look for requirements regarding “structural alterations” or “garage conversions.” If you are unsure, consult with a local structural engineer. For general definitions of building codes and their importance, you can refer to Wikipedia’s page on Building Codes.
Step 2: Remove the Existing Garage Door System
You cannot build a wall where a door exists. This phase involves dismantling the mechanical and structural components of the garage door.
Safety First
Garage doors are heavy and under high tension. The springs, in particular, can cause severe injury if they snap. If you are uncomfortable handling torsion springs, hire a professional for this specific step.
Removal Process
- Disconnect the Opener: Unplug the garage door opener and disconnect it from the door.
- Release Tension: Carefully release the tension from the springs using winding bars. Note: This is the most dangerous step.
- Remove Panels: Unscrew the hinges and remove the door panels one by one. Have a helper support each panel as you remove it.
- Take Out Tracks: Unscrew the vertical and horizontal tracks from the wall and ceiling.
- Clear the Header Area: Remove any trim or weatherstripping around the opening.
Step 3: Assess Structural Requirements
Not all garage door openings are created equal. Some are load-bearing, meaning they support the weight of the roof or upper floors. Others are non-load-bearing partitions.
Load-Bearing vs. Non-Load-Bearing
- Load-Bearing: Requires a substantial header beam to transfer weight to the sides. You must install a double or triple 2×10 or 2×12 lumber header, depending on the span.
- Non-Load-Bearing: Can use a simpler header, such as a double 2×4, primarily for supporting drywall and minor loads.
If you are unsure, look at the blueprints of your home or consult a structural engineer. Misjudging this can lead to sagging roofs or structural failure.
Step 4: Frame the New Wall
Framing is the skeleton of your new wall. Precision here ensures that drywall installation is smooth and the wall is plumb.
Materials Needed
- 2×4 or 2×6 lumber (pressure-treated for bottom plates if on concrete)
- 16d nails or 3-inch structural screws
- Level and tape measure
- Circular saw
Framing Steps
- Install the Bottom Plate: Cut a 2×4 to fit the width of the opening. Anchor it to the concrete floor using concrete anchors or wedge bolts. Ensure it is level.
- Install King Studs: Place two vertical studs on each side of the opening, running from the bottom plate to the top plate. These are called “king studs.”
- Install the Header: Lift your pre-assembled header beam into place above the opening. It should rest on the king studs. Secure it with nails or screws.
- Add Jack Studs: Cut shorter studs (“jack studs”) to fit under the header and nail them to the king studs. These support the header’s weight.
- Install Top Plate: Add a horizontal top plate connecting the king studs at the top.
- Add Cripple Studs: Fill in the space above the header with short vertical studs (“cripple studs”) spaced 16 inches on center. This provides backing for drywall.
Pro Tip: Spacing Matters
Standard framing uses 16-inch on-center spacing. This aligns with standard drywall and insulation widths, minimizing waste and ensuring structural consistency.
Step 5: Install Insulation and Vapor Barrier
Garages are often poorly insulated. When converting the opening to a wall, take this opportunity to upgrade your home’s thermal envelope.
Choosing Insulation
- Fiberglass Batts: Cost-effective and easy to install. Ideal for standard stud cavities.
- Spray Foam: Provides superior air sealing and higher R-value per inch. More expensive but highly effective.
- Rockwool: Excellent for soundproofing and fire resistance.
Installation Process
- Measure the cavity depth (usually 3.5 inches for 2x4s).
- Cut insulation to fit snugly between studs. Do not compress it, as this reduces its R-value.
- If using fiberglass, wear protective gear (gloves, mask, goggles).
- Install a vapor barrier (plastic sheeting) on the warm-in-winter side of the wall (usually the interior side) to prevent moisture buildup.
Step 6: Hang and Finish Drywall
With the frame and insulation in place, it’s time to close up the wall.
Hanging Drywall
- Measure and cut drywall sheets to fit the opening.
- Lift sheets into place and secure them to the studs using drywall screws every 12–16 inches.
- Ensure seams are staggered to avoid weak points.
Finishing Touches
- Tape and Mud: Apply joint tape over seams and cover with joint compound (“mud”).
- Sand: Once dry, sand the compound smooth. Repeat for 2–3 coats.
- Prime and Paint: Prime the drywall to seal it, then paint to match your existing interior walls.
Common Mistakes to Avoid
| Mistake | Consequence | Solution |
|---|---|---|
| Skipping Permits | Fines and resale issues | Always check local codes first |
| Ignoring Load-Bearing Status | Structural damage | Consult an engineer if unsure |
| Poor Anchoring to Concrete | Wall shifting or collapsing | Use proper concrete anchors |
| Compressing Insulation | Reduced energy efficiency | Cut insulation to fit snugly, not tightly |
FAQ Section
Q1: Can I build a wall in a garage door opening myself?
Yes, if you have basic carpentry skills and follow safety guidelines. However, if the wall is load-bearing or involves complex electrical/plumbing rerouting, hiring a professional is recommended.
Q2: How much does it cost to build a wall in a garage door opening?
Costs vary based on size and materials. On average, expect to spend between $500 and $1,500 for materials (lumber, drywall, insulation). Labor costs can double this if hired out.
Q3: Do I need a header for a non-load-bearing wall?
Yes, even non-load-bearing walls need a header to support the drywall and provide a finished look. A simple double 2×4 header is usually sufficient.
Q4: How long does it take to complete this project?
For a DIYer, the project typically takes 2–4 days. Day 1: Removal and framing. Day 2: Insulation and drywall hanging. Day 3–4: Mudding, sanding, and painting.
Q5: What type of lumber should I use for the bottom plate?
Use pressure-treated lumber for the bottom plate if it sits directly on concrete. This prevents rot from moisture wicking up from the slab.
Q6: Can I add windows or a door in the new wall?
Absolutely. You can frame rough openings for windows or a standard entry door within the new wall structure. Just ensure you adjust the framing to accommodate these features.
Conclusion
Learning how to build a wall in a garage door opening is a rewarding project that transforms unused space into functional living area. By following these steps—checking permits, removing the door safely, framing correctly, and finishing with care—you can achieve professional-looking results.
Remember, patience and precision are key. Take your time with measurements and ensure every stud is plumb. Once completed, enjoy your new space, whether it becomes a cozy family room, a productive office, or a quiet reading nook.
Did you find this guide helpful? Share it with friends who are considering similar home improvements! Let’s inspire others to unlock their home’s potential.
Leave a Reply