Dealing with a heavy, unbalanced garage door can be incredibly frustrating and even dangerous if ignored. If you are asking yourself, “How Do You Wind The Spring On A Garage Door,” you are in the right place to safely restore smooth operation. Let’s walk through this DIY fix together so you can get your door working perfectly again without the guesswork.
How Do You Wind The Spring On A Garage Door Safely?
Before we grab any tools, we need to talk about safety first. Garage door springs are under extreme tension—enough to lift hundreds of pounds of steel. If handled incorrectly, they can cause severe injury.
According to the Door and Access Systems Manufacturers Association (DASMA), improper spring adjustment is the leading cause of DIY garage door injuries. Therefore, you must never use screwdrivers or makeshift tools. Always use properly sized, solid steel winding bars. Think of me as your knowledgeable neighbor who just wants you to get the job done safely. If you ever feel unsure, calling a professional is always the smartest backup plan.
Torsion vs. Extension Springs: Which One Do You Have?
To understand how to adjust your system, we first need to identify the type of spring you have. The mechanics differ significantly between the two.
| Feature | Torsion Springs | Extension Springs |
|---|---|---|
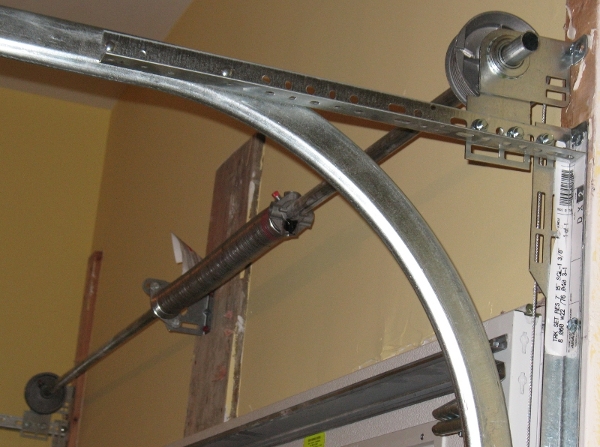
| Location | Mounted horizontally above the closed door. | Mounted parallel to the horizontal tracks on both sides. |
| Mechanism | Twists (torques) to store energy. | Stretches and contracts to store energy. |
| Winding Process | Requires steel winding bars to turn the cone. | Adjusted by moving a pulley clip or hook along a track. |
| Safety Level | High tension; requires strict safety protocols. | Lower tension, but still requires safety cables. |
Note: This guide focuses primarily on torsion springs, as they are the most common in modern US homes and require actual “winding.”
What Tools Do You Need to Wind a Garage Door Spring?
Gathering the right equipment before you start prevents dangerous mid-job scrambles. Here is your essential toolkit:
- Two solid steel winding bars (usually 3/8-inch or 1/2-inch diameter, 18 inches long).
- A adjustable wrench or socket set (typically 7/16-inch or 9/16-inch for the set screws).
- A sturdy stepladder tall enough to comfortably reach the spring assembly.
- Safety glasses and heavy-duty work gloves.
- A pair of locking pliers (Vise-Grips) to clamp the torsion tube to the bracket (optional but highly recommended for safety).
Step-by-Step Guide: How to Wind a Torsion Spring
Ready to learn exactly how to execute the adjustment? Follow these concrete steps carefully.
Step 1: Secure the Garage Door
Close the garage door completely. Disconnect the garage door opener by pulling the red emergency release cord. To prevent the door from suddenly shooting up while you work, clamp a pair of locking pliers onto the track just below the bottom roller on both sides.
Step 2: Identify the Winding Direction
Look at the cones at the ends of the springs. The standard rule of thumb is to wind the spring toward the center bracket.
- The left spring (when facing the door from the outside) is typically wound clockwise.
- The right spring is wound counter-clockwise.
Step 3: Loosen the Set Screws
Using your socket wrench, loosen the set screws on the winding cone just enough so the spring can turn, but do not remove them completely. Pro tip: Keep your face turned away from the cone while doing this.
Step 4: Insert the First Winding Bar
Insert your first steel winding bar into the bottom hole of the winding cone (imagine the cone is a clock face; insert it at the 9 o’clock position for the left spring). Push down firmly to remove any slack. This bar acts as your safety brake.
Step 5: Loosen and Swap
With the first bar holding the tension, loosen the set screws completely. The spring will want to unwind, but your bar is holding it. Now, insert your second winding bar into the next available hole (the 6 o’clock position).
Step 6: Wind the Spring
Carefully remove the first bar and move it to the next empty hole (the 3 o’clock position). Pull up on the top bar, which forces the bottom bar down. Once the bottom bar is free, move it to the next empty hole (the 12 o’clock position).
Repeat this “leapfrog” process. For a standard 7-foot tall door, you typically need to wind the spring exactly 30 quarter-turns (which equals 7.5 full revolutions). Always check the manufacturer’s sticker on the spring for the exact number of turns required for your specific door height.
Step 7: Tighten and Test
Once you reach the required number of turns, ensure your winding bar is firmly in the bottom hole. Tighten the set screws aggressively against the shaft. Remove the winding bars, unclamp the tracks, and manually lift the door to test the balance. The door should lift smoothly with just one hand and stay open about 3 to 4 feet off the ground.
How Many Turns Should a Garage Door Spring Have?
A common question is, “How tight is too tight?” The number of turns depends entirely on the height and weight of your door.
As certified garage door technician Mark Johnson notes, “Over 80% of garage door service calls are related to spring tension issues. Proper winding is the difference between a smoothly operating door and a dangerous projectile.”
Here is a quick reference guide for standard residential doors:
- 7-foot door: 30 to 32 quarter-turns.
- 8-foot door: 34 to 36 quarter-turns.
- 10-foot door: 40 to 42 quarter-turns.
According to the general mechanics of a garage door, the counterbalance system relies heavily on precise spring tension to offset the door’s exact weight. If your door is too heavy to lift, add a quarter-turn. If it slams shut too fast, remove a quarter-turn.
DIY vs. Professional Spring Winding
Is it worth doing this yourself? Let’s look at the pros and cons.
| Approach | Pros | Cons |
|---|---|---|
| DIY Winding | Saves $150–$250 in labor costs; empowering to learn a new skill; immediate fix. | High risk of injury if tools slip; requires buying specialized winding bars; voids some warranties. |
| Professional Service | Guaranteed safety; includes lubrication and full system inspection; usually comes with a 1-year warranty. | Higher upfront cost; requires scheduling and waiting for a technician to arrive. |
Frequently Asked Questions
How many times do you wind a garage door spring?
For a standard 7-foot residential garage door, you typically wind the torsion spring 30 to 32 quarter-turns. However, you must always check the manufacturer’s label on the spring, as the exact number depends on the door’s weight and height.
Can I wind my garage door spring myself?
Yes, you can wind a garage door spring yourself if you have the correct steel winding bars and follow strict safety protocols. However, if you are uncomfortable working with high-tension systems, hiring a licensed professional is highly recommended.
What happens if I overwind my garage door spring?
If you overwind the spring, the garage door will be too light. It may shoot up too quickly, slam violently against the header bracket when opening, or refuse to stay closed and pop back open. If this happens, you need to release a quarter-turn of tension.
How do I know if my garage door spring is broken?
A broken spring is usually obvious. You will hear a loud bang similar to a gunshot when it snaps. Additionally, the garage door will feel incredibly heavy to lift manually, and you will visibly see a 2-inch gap in the metal coil of the spring above the door.
How often should I lubricate my garage door springs?
To extend the lifespan of your springs and ensure smooth operation, you should lubricate them every 6 months. Use a high-quality silicone spray or a dedicated garage door lithium grease, and apply a light coat evenly across the coils. Avoid using standard WD-40, as it attracts dust and can dry out the metal.
Leave a Reply