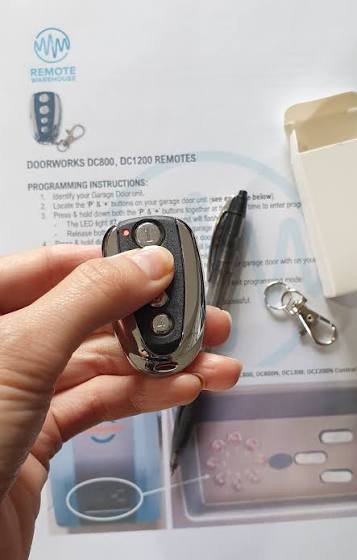
Introduction
There are few things more frustrating than sitting in your driveway, pressing a button repeatedly, and watching your garage door refuse to budge. Whether you have lost an old clicker, bought a replacement, or simply moved into a new home, understanding how do you program a remote to a garage door is an essential homeowner skill that saves both time and service fees. In this comprehensive guide, we will walk you through the exact steps to get your opener synced safely and correctly, ensuring you never get locked out again.
Understanding Your Garage Door Opener System
Before grabbing a ladder, it is vital to understand that not all openers speak the same language. Modern garage door systems utilize rolling code technology for security, while older models may use fixed DIP switches. According to industry standards documented on Wikipedia, most residential openers manufactured after 1996 use rolling codes to prevent signal theft, meaning the synchronization process involves a digital handshake rather than matching physical switches.
Identifying your system type is the first step in answering how do you program a remote to a garage door. Check the motor unit hanging from your ceiling. The color of the “Learn” button is often the universal indicator for the frequency and protocol your specific model requires.
| Learn Button Color | Typical Brand/Era | Signal Type |
|---|---|---|
| Yellow | LiftMaster/Chamberlain (2011+) | Security+ 2.0 |
| Purple | LiftMaster/Chamberlain (2005-2014) | Security+ |
| Red/Orange | Genie / Older LiftMaster | Intellicode / Fixed |
| Green | Older Craftsman | Fixed Code / DIP |
Note: Always verify your specific model number against the manufacturer’s manual, as variations exist.
Safety First: Pre-Programming Checklist
Safety must be your priority when working with overhead machinery. Before attempting any programming, ensure the garage door area is clear of people, pets, and objects. The door should be fully closed during the syncing process to prevent accidental activation while you are near the motor.
Additionally, check the following:
- Fresh Batteries: Weak batteries are the #1 cause of programming failure. Install brand-new alkaline batteries before starting.
- Clear Line of Sight: Ensure nothing obstructs the safety sensors at the bottom of the door tracks.
- Power Source: Verify the opener is plugged in and the circuit breaker has not tripped.
- Antenna Position: Make sure the hanging wire antenna on the motor unit is fully extended and not tucked inside the housing.
Step-by-Step: How Do You Program A Remote To A Garage Door
This universal method works for approximately 90% of modern rolling-code openers (LiftMaster, Chamberlain, Genie, Craftsman). Follow these precise instructions to ensure a successful sync.
Step 1: Locate the Learn Button
Find the “Learn” or “Smart” button on the back or side of the motor unit. It is typically located near the antenna wire or under the light lens cover. You may need a stepladder to reach it safely. Do not stand directly under the door while on the ladder.
Step 2: Clear Old Codes (Optional but Recommended)
If you are reprogramming due to a lost remote or security concern, press and hold the Learn button for 6–10 seconds until the LED light turns off. This erases all previously paired remotes and keypads. Release the button and wait for the light to blink, indicating the system is ready for new devices.
Step 3: Initiate Programming Mode
Press and release the Learn button once. The indicator LED will illuminate steadily or begin blinking, signaling that the opener is in pairing mode. You typically have 30 seconds to complete the next step before the system times out.
Step 4: Sync the Remote
Within the 30-second window, press and hold the button on your new remote that you wish to program. Hold it for 1–2 seconds, then release. Watch the motor unit’s LED; it should flash or turn off, and you may hear two distinct clicks. This confirms the code has been accepted.
Step 5: Test the Connection
Press the programmed remote button once. The door should activate immediately. If it does not, repeat Steps 3 and 4, ensuring you are within 3 feet of the motor during programming. Test the safety reversal system afterward by placing a 2×4 board on the floor in the door’s path; the door must reverse upon contact.
Troubleshooting: When Programming Fails
Even when you know how do you program a remote to a garage door, technical hiccups happen. Here are data-backed solutions for common failures:
- LED Flashes but Door Doesn’t Move: The remote is paired, but the travel limits may need resetting. Consult your manual for “limit adjustment” procedures.
- No Response at All: Replace the remote battery again. Even new batteries can be defective. Also, verify the remote frequency matches your opener (e.g., 315 MHz vs. 390 MHz).
- Works Only When Close: Your antenna may be damaged or the remote battery is weak. Try extending the antenna wire vertically. Interference from nearby LED bulbs can also reduce range; switch to garage-door-rated LED bulbs if suspected.
- Remote Works Intermittently: This often indicates radio frequency interference. Identify new electronics added recently (Wi-Fi routers, baby monitors) and relocate them away from the opener.
Expert Tips for Long-Term Reliability
Professional technicians recommend reprogramming your remotes annually as part of home maintenance. This ensures the rolling code algorithm stays synchronized and identifies failing batteries before they leave you stranded. Additionally, consider upgrading to a smart garage controller if your opener is over 15 years old. Smart controllers add Wi-Fi connectivity, allowing phone-based control and real-time status alerts, which significantly enhances both convenience and security.
Always keep a spare programmed remote in a secure location inside your home, and never leave a remote visible in your vehicle to prevent break-ins.
Frequently Asked Questions (FAQ)
Can I program multiple remotes to the same garage door opener?
Yes, most modern openers support between 8 and 30 remotes simultaneously. Each remote must be programmed individually using the Learn button method described above. There is no need to erase existing remotes unless you want to remove access for a specific device.
Why did my garage door remote stop working suddenly?
Sudden failure is usually caused by dead batteries, signal interference, or a tripped GFCI outlet powering the opener. In rare cases, the opener’s logic board may have failed due to a power surge. Start with fresh batteries and check the outlet before assuming hardware failure.
Do I need to reprogram my remote after changing the battery?
Generally, no. Rolling-code remotes retain their programming in non-volatile memory. However, if the battery was completely depleted for an extended period, some older models may require re-syncing. Always test the remote immediately after a battery change.
Is it safe to program a garage door remote myself?
Absolutely, provided you follow safety precautions. Never bypass safety sensors, always keep hands clear of moving parts, and use a stable ladder. If you are uncomfortable working at height or dealing with electrical components, hiring a certified technician is a wise investment that typically costs between $75 and $150.
What if my opener doesn’t have a Learn button?
Openers without a Learn button likely use DIP switches. Match the switch positions inside the remote to those on the motor unit exactly. These older systems are less secure, and upgrading to a modern rolling-code opener is strongly recommended for safety and insurance compliance.
Can weather affect remote programming success?
Extreme cold can reduce battery output and slow electronic response times. If programming fails in winter, warm the remote and batteries to room temperature (68–72°F) before attempting again. Humidity rarely affects programming but can corrode contacts over time; inspect battery terminals for white corrosion and clean with vinegar if present.
Conclusion
Mastering how do you program a remote to a garage door empowers you to maintain one of your home’s most-used entry points confidently and safely. By identifying your opener type, following the precise Learn-button sequence, and troubleshooting methodically, you can resolve most issues without professional help. Remember to prioritize safety, use fresh batteries, and test your system regularly to ensure reliable operation year-round.
Found this guide helpful? Share it on Facebook, X (Twitter), or Pinterest to help fellow homeowners avoid being locked out! Have a unique opener model or additional tips? Drop a comment below—we’d love to hear from you. 🔧🏠
Leave a Reply