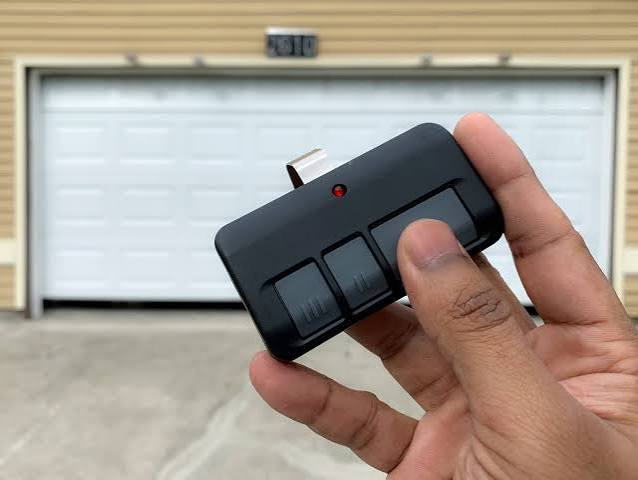
Have you ever stood in your driveway, pressing the garage door remote button repeatedly, only to watch it sit there stubbornly closed? It is a frustrating experience that disrupts your daily routine and leaves you feeling helpless. If you are wondering how do you program a Liftmaster garage door opener remote, you are not alone. This guide will walk you through the process simply and safely, getting your garage back in working order without the need for an expensive service call.
Understanding Your Liftmaster Model
Before diving into the buttons and codes, it is crucial to identify which specific Liftmaster model you own. Liftmaster has produced various openers over the years, and while the core technology remains similar, the physical interface can differ slightly. Most modern units use a “Learn” button located on the motor unit, which hangs from your garage ceiling.
The color of this Learn button is the key indicator for programming compatibility:
- Yellow/Purple/Orange: These usually indicate Security+ 2.0 or newer systems. They require you to press the learn button once, then press the remote button within 30 seconds.
- Red: Older models may use a red learn button, which often requires a different sequence, such as holding the learn button until the light blinks.
Identifying your model ensures you do not waste time trying incompatible methods. If you cannot find the manual, look for the model number printed on the back or side of the motor unit. You can also refer to Liftmaster’s official support page for specific diagrams, but for most users, the general steps below will apply.
Step-by-Step Guide: Programming a New Remote
Programming a remote is generally a straightforward process if you follow the sequence exactly. Here is the universal method that works for the majority of Liftmaster openers manufactured after 1993.
Step 1: Locate the Learn Button
Climb up to your garage door opener motor unit. You will need a sturdy ladder for this. Look for a small button labeled “Learn,” “Smart,” or “Program.” It is typically located near the antenna wire hanging down from the unit. The LED light next to this button will be your visual cue during the process.
Step 2: Clear Old Codes (Optional but Recommended)
If you are replacing a lost remote or suspect interference from old devices, it is wise to clear the memory first. Press and hold the Learn button for about 6–10 seconds until the indicator light turns off. Release the button. Note that this will erase all previously programmed remotes and keypads, so you will need to reprogram them all.
Step 3: Initiate Programming Mode
Press and release the Learn button quickly. Do not hold it down. The indicator light should turn on or start blinking, signaling that the opener is now in “learning mode.” You typically have 30 seconds to complete the next step before the mode times out.
Step 4: Sync the Remote
Within those 30 seconds, take your new remote and press and hold the button you wish to program. Keep holding it until you see the lights on the motor unit flash or hear two clicks. This confirms that the code has been successfully transmitted and accepted.
Step 5: Test the Connection
Step down from the ladder and test the remote from inside your car or the driveway. The door should respond immediately. If it does not, repeat the process, ensuring you are within range and that the remote has fresh batteries.
Troubleshooting Common Programming Issues
Even with careful following of instructions, things can go wrong. Here are the most common hurdles and how to overcome them.
| Issue | Possible Cause | Solution |
|---|---|---|
| Remote not responding | Dead batteries | Replace with fresh alkaline batteries. |
| Light blinks but no sync | Interference | Unplug nearby LED bulbs or Wi-Fi routers temporarily. |
| Learn button not lighting up | Power issue | Check if the opener is plugged in and the circuit breaker is on. |
| Door moves but reverses | Sensor misalignment | Check the safety eyes at the bottom of the door tracks. |
The Battery Factor
It sounds simple, but weak batteries are the number one cause of programming failures. A remote might have enough power to send a weak signal but not enough to complete the handshake protocol with the opener. Always use high-quality batteries and ensure they are inserted with the correct polarity.
Interference from LED Bulbs
A lesser-known issue involves LED light bulbs installed in the garage opener unit. Some cheap LEDs emit electromagnetic interference that blocks the radio frequency signal from your remote. If you recently changed bulbs and suddenly lost connectivity, try switching back to incandescent bulbs or buying RF-rated LEDs.
Advanced Tips for Multi-Button Remotes
If you have a multi-button remote (e.g., 3 or 4 buttons), you can program each button to control a different door or device. The process is identical for each button:
- Press the Learn button on the motor unit.
- Press and hold the specific button on the remote you want to assign.
- Wait for the confirmation flash.
- Repeat for the next button.
This feature is particularly useful for households with multiple garage doors or for controlling gate openers integrated into the same system.
Security Considerations
Modern Liftmaster openers use rolling code technology, which changes the access code every time you use the remote. This prevents thieves from “code grabbing” your signal. However, if you lose a remote, it is critical to clear the memory as described in Step 2. This ensures that the lost remote can no longer open your garage, maintaining the security of your home.
For added peace of mind, consider integrating your opener with a smart home system. Many newer Liftmaster models are compatible with MyQ technology, allowing you to monitor and control your garage door via smartphone. This adds a layer of convenience and security, letting you verify if the door is closed even when you are miles away.
Frequently Asked Questions
How long does it take to program a Liftmaster remote?
The actual programming process takes less than a minute. However, locating the ladder, identifying the learn button, and testing may take 5–10 minutes total.
Can I program a universal remote to my Liftmaster opener?
Yes, most universal remotes are compatible with Liftmaster. You will need to set the dip switches or use the auto-search function on the universal remote to match the frequency of your opener. Refer to the universal remote’s manual for specific codes.
What if I don’t have a ladder to reach the motor unit?
If you cannot reach the learn button, you may need to borrow a ladder or ask a neighbor for assistance. There is no safe way to program a new remote without accessing the motor unit’s learn button, unless you are using a keypad with a known PIN.
Why does my remote work close up but not from the car?
This is likely a battery issue or interference. Try replacing the batteries first. If that fails, check for large metal objects or electronic devices between your car and the garage that might block the signal.
Is it possible to program a remote without the learn button?
No, the learn button is essential for syncing new devices. If your learn button is broken, you will need to contact Liftmaster support or replace the logic board of the opener.
Conclusion
Learning how do you program a Liftmaster garage door opener remote is a valuable skill that saves time and money. By following the simple steps of locating the learn button, clearing old codes if necessary, and syncing your remote within the 30-second window, you can restore functionality to your garage door quickly. Remember to check your batteries and be aware of potential interference from LED bulbs.
Now that your garage door is working perfectly, why not share this guide with a friend or neighbor who might be struggling with their own remote? A quick share on social media could save someone from a frustrating morning. Stay secure, stay connected, and enjoy the convenience of a smoothly operating garage door.
Leave a Reply