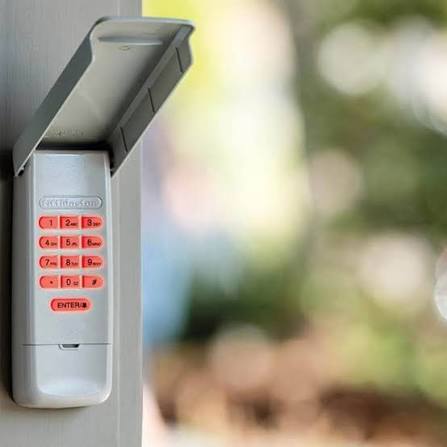
Are you standing in your driveway, frustrated by a blinking light on your wireless entry pad? We completely understand the hassle of being locked out, which is why we created this guide to help. If you are wondering how do you program a Liftmaster garage door opener keypad, follow our simple steps to regain secure, keyless access today.
How Do You Program A Liftmaster Garage Door Opener Keypad: Step-by-Step Guide
Setting up your exterior entry device does not require advanced technical skills. In fact, most homeowners complete this LiftMaster keypad setup in under five minutes.
Before you begin, ensure your garage door is fully closed. This prevents any accidental movements while you are working near the motor unit.
Step 1: Locate the Learn Button
Every LiftMaster motor unit features a “Learn” button. It is typically located on the back or side panel of the ceiling-mounted motor. Depending on your specific model, this button will be yellow, red/orange, purple, or green.
You might need a sturdy stepladder and a flashlight to see it clearly. If a plastic light lens covers the area, gently pry it off to expose the internal circuit board.
Step 2: Press the Learn Button
Press and release the Learn button quickly. Do not hold it down! Holding the button for more than 10 seconds will erase all previously programmed remotes and keypads from the system.
Once pressed, an LED light next to the button will illuminate or begin to blink. You now have exactly 30 seconds to complete the next crucial step.
Step 3: Enter Your New PIN
Walk over to your wireless entry pad outside the garage. Type in a unique 4-digit PIN of your choice (for example, 8-4-2-1). Avoid using obvious numbers like your street address or birth year to maintain optimal smart garage security.
Step 4: Press and Hold the ENTER Button
After entering your PIN, press and hold the ENTER button. Keep holding it firmly until the garage door opener lights flash or you hear two distinct clicks from the motor unit.
This confirmation usually takes about 5 to 10 seconds. The flashing light confirms that the radio frequency has successfully paired with your exterior device.
Step 5: Test Your Keypad
Wait for the motor lights to turn off completely. Then, enter your new 4-digit PIN and press ENTER. The door should smoothly activate. If it does not, simply repeat the process, ensuring you work quickly within the 30-second window.
What Are the Different Types of LiftMaster Keypads?
Understanding your hardware helps troubleshoot future issues. LiftMaster generally categorizes its devices by the manufacturing era of the motor unit.
- Security+ 2.0 Models (Yellow Learn Button): Manufactured after 2011, these use advanced rolling code technology. The 877MAX is the most popular wireless entry pad for these systems.
- Security+ 1.0 Models (Red, Orange, Purple, or Green Learn Button): Produced between 1997 and 2011. The 977LM is the standard keypad for these older, yet highly reliable, units.
- DIP Switch Models (No Learn Button): Pre-1993 units require you to manually match tiny physical switches inside the keypad to the motor unit.
When dealing with the mechanics of these devices, it helps to understand how a standard garage door opener utilizes specific radio frequencies to communicate securely with exterior keypads without interference.
Why Is My LiftMaster Keypad Blinking and Not Working?
A blinking keypad is your system’s way of communicating an error. Here is how to decode those flashes and solve the problem.
1. The Battery is Dying If the LED blinks slowly when you press a button, your 9-volt battery is running low. Simply unscrew the battery compartment at the bottom of the unit and swap in a fresh alkaline 9V battery. Avoid heavy-duty carbon-zinc batteries, as they drain much faster in outdoor temperatures.
2. Radio Frequency Interference Did you recently install new LED bulbs in your garage ceiling fixture? Some cheap LED bulbs emit electromagnetic noise that blocks the keypad’s signal. Try unscrewing the garage light bulbs to see if the keypad instantly starts working again.
3. Safety Sensor Misalignment Look at the small “eyes” near the floor tracks. If they are misaligned or covered in cobwebs, the door will refuse to close, and the keypad might flash in protest. Wipe the lenses with a soft microfiber cloth and ensure they point directly at each other.
Pros and Cons of Using a Wireless Garage Door Keypad
Is a keyless entry pad right for your home? Here is an objective breakdown to help you decide.
| Feature | Pros | Cons |
|---|---|---|
| Convenience | No need to carry physical keys or worry about losing remotes. | Requires memorizing a 4-digit PIN for every family member. |
| Security | Instantly change the PIN anytime for superior smart garage security. | Vulnerable to “shoulder surfing” if strangers watch you type. |
| Installation | 100% wireless; mounts easily to exterior wood or brick with basic screws. | Batteries need replacement every 1 to 2 years depending on usage. |
| Guest Access | Grant temporary access to dog walkers, guests, or contractors. | Must remember to change the PIN immediately after guests leave. |
How Do I Reset My LiftMaster Garage Door Keypad?
If you are moving into a new house, a factory reset is absolutely essential. You never know who might have kept a copy of the old PIN!
- Walk to the motor unit and locate the colored Learn button.
- Press and hold the Learn button for exactly 6 to 10 seconds until the LED light turns off completely.
- Release the button. All remote controls and garage door remote programming codes are now entirely wiped from the system’s memory.
- You will need to reprogram all your vehicle clickers and the exterior keypad from scratch using the step-by-step guide above.
Tips for Choosing a Highly Secure PIN
Your PIN is the digital key to your home. Treat it with the same level of secrecy as your front door key.
Never use sequential numbers like 1-2-3-4 or 0-0-0-0. Hackers and opportunistic thieves always try these combinations first. Instead, choose a random sequence that holds personal meaning to you but appears completely random to an outsider. This simple habit drastically reduces the risk of unauthorized entry.
FAQ Section
How do I change the PIN on my LiftMaster keypad?
To change your PIN, enter your current 4-digit code and press the ENTER button. Before the light stops blinking, immediately type in your brand new 4-digit PIN and press ENTER again. The lights will flash to confirm the update.
Can I program multiple LiftMaster keypads to one opener?
Yes, you absolutely can! You can program up to five different wireless keypads and multiple vehicle remotes to a single motor unit. Just repeat the Learn button sequence for each individual device you wish to add to the network.
What do I do if the Learn button is missing or unreachable?
If your unit is mounted exceptionally high, use a telescoping pole or a sturdy ladder. If the button is genuinely missing, your unit might be an older, pre-1993 model. In this case, you must use a small screwdriver to match the physical DIP switch positions on the keypad to the motor unit.
Why does my keypad work for a few days and then stop?
This intermittent issue is almost always caused by extreme temperature fluctuations draining the battery life, or corroded battery terminals. Open the battery compartment, check the metal springs for white crust, and wipe them clean with a dry cloth.
Are LiftMaster keypads weatherproof?
Yes, genuine LiftMaster wireless entry pads are designed with UV-resistant plastic and weather-sealed buttons. They are built to withstand heavy rain, snow, and extreme summer heat. However, keeping the protective slide cover closed when not in use will significantly prolong the device’s lifespan.
Conclusion
Learning how do you program a Liftmaster garage door opener keypad is one of the most rewarding DIY home improvement tasks you can tackle. Not only does it eliminate the frustration of lost keys, but it also provides a massive boost to your daily convenience and overall home security. By following these clear, concrete steps, you ensure your family enjoys safe, reliable access for years to come.
Did you find this guide helpful? Share this article on your favorite social media platforms like Facebook, Pinterest, or Twitter to help your friends and neighbors secure their homes too! Let us know in the comments which PIN strategy you prefer!
Leave a Reply