Have you ever stood in your driveway, pressing the remote button repeatedly, only to watch your garage door remain stubbornly closed? It is a frustrating experience that disrupts your daily routine and leaves you feeling helpless. If you are wondering how do you program a Craftsman garage door opener, you are not alone; this is one of the most common maintenance questions for homeowners across the United States.
The good news is that programming your opener is rarely a complex technical challenge. With the right instructions and a few minutes of patience, you can regain control of your garage access. This guide will walk you through the process for various models, ensuring you get back on track safely and efficiently.
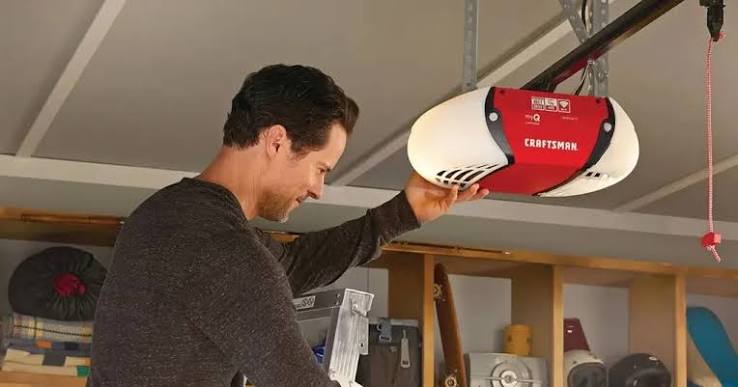
Identifying Your Craftsman Model Type
Before diving into the programming steps, it is crucial to identify which type of Craftsman opener you own. Craftsman has produced several generations of openers, and the programming method varies significantly between them. Generally, they fall into three main categories based on the technology used:
- Older Models (Pre-2011): These often use DIP switches or simple “Learn” buttons without rolling code technology.
- Standard Security+ Models: These feature a square or rectangular “Learn” button, usually colored yellow, orange, purple, or red.
- MyQ Smart Openers: These are newer models equipped with Wi-Fi capabilities and often use a yellow learn button but require specific app integration for full functionality.
Locating the motor unit is your first step. Look for the “Learn” button on the back or side of the motor housing. The color of this button is the key determinant for the programming procedure. If you cannot find the manual, identifying this button color will guide you to the correct method below.
Step-by-Step: Programming a Remote Control
Programming a handheld remote is the most common task. Whether you have lost your original remote or bought a universal replacement, the process is straightforward if you follow these steps.
For Models with a Colored “Learn” Button (Most Common)
This method applies to the vast majority of Craftsman openers manufactured after 1997.
- Clear the Memory (Optional but Recommended): If you are having issues, start by clearing old codes. Press and hold the “Learn” button on the motor unit for about 6–10 seconds until the indicator light turns off. Note: This erases all previously programmed remotes and keypads.
- Press the Learn Button: Briefly press and release the “Learn” button. The indicator light will turn on or begin to blink, signaling that the opener is in programming mode. You typically have 30 seconds to complete the next step.
- Activate the Remote: Within those 30 seconds, press and hold the button on your remote control that you wish to use. Keep holding it until the opener’s lights flash or you hear two clicks.
- Test the Connection: Press the remote button again to ensure the door operates. If it does not, repeat the process, ensuring you are standing within 10 feet of the motor unit.
For Older Models with DIP Switches
If your remote and motor unit have a row of tiny switches (DIP switches), you must match them manually.
- Open the battery compartment of your remote.
- Locate the row of small switches inside.
- Match the switch positions on the remote to the exact same pattern found on the motor unit’s receiver.
- Close the remote and test it. No electronic syncing is required for these legacy systems.
How to Program a Wireless Keypad
Adding a keypad outside your garage provides convenient access without carrying a remote. The process is similar to programming a remote but requires an extra step for security.
- Enter Programming Mode: Press the “Learn” button on the motor unit. The light will activate.
- Input Your PIN: Within 30 seconds, go to your wireless keypad. Enter your desired 4-digit PIN.
- Confirm the Code: Immediately after entering the PIN, press and hold the “Enter” or “Send” button on the keypad.
- Wait for Confirmation: Hold the button until the motor unit’s light blinks or you hear a click. This confirms the code has been accepted.
- Test the Keypad: Enter your PIN again and press “Enter.” The door should activate.
Pro Tip: Choose a PIN that is easy for you to remember but difficult for others to guess. Avoid using sequential numbers like 1234 or birth years.
Troubleshooting Common Programming Issues
Even with clear instructions, things can go wrong. Here are the most frequent hurdles and how to overcome them.
| Issue | Possible Cause | Solution |
|---|---|---|
| Remote Not Responding | Dead batteries | Replace batteries with fresh alkaline ones. |
| Light Blinks But No Action | Interference | Unplug nearby LED bulbs or chargers that may cause signal noise. |
| Keypad Fails to Sync | Timing Error | Ensure you press the keypad button within the 30-second window. |
| Door Reverses Immediately | Sensor Misalignment | Check that safety eyes are aligned and free of dirt. |
If your remote still fails after replacing batteries and reprogramming, consider the frequency compatibility. Universal remotes must match the frequency of your opener (usually 315 MHz or 390 MHz for Craftsman). You can verify this by checking the label on the back of your old remote or the motor unit.
Understanding Security+ and Rolling Codes
Modern Craftsman openers use Security+ technology, which employs rolling codes. This means the code changes every time you use the remote, preventing hackers from capturing and replaying the signal to open your garage.
According to industry standards, rolling code technology significantly enhances home security. When you program a new remote, the opener and the remote synchronize their internal code sequences. If you press the remote button while out of range of the opener multiple times, the codes may become unsynchronized. To fix this, simply stand near the opener and press the remote button twice to resync the sequence.
For more detailed technical specifications on garage door safety standards, you can refer to Wikipedia’s entry on Garage Door Openers, which provides a comprehensive overview of the evolution of these security features.
Frequently Asked Questions (FAQ)
1. How do I reset my Craftsman garage door opener completely?
To perform a hard reset, locate the “Learn” button on the motor unit. Press and hold it for approximately 10 seconds until the indicator light turns off. This clears all paired remotes, keypads, and wireless devices. You will need to reprogram all devices afterward.
2. Can I program a universal remote to my Craftsman opener?
Yes, most universal remotes are compatible with Craftsman openers. Ensure the universal remote supports the frequency of your opener (check the manual). Follow the specific instructions provided with the universal remote, which usually involve setting DIP switches or using an auto-search function.
3. Why is my garage door opener blinking but not working?
A blinking light often indicates a locked status or a sensor issue. Check if the lock button on your wall console is activated. If not, inspect the safety sensors near the floor; if the LED on one sensor is blinking or off, realign them so they face each other directly.
4. Do I need a ladder to program the opener?
In most cases, yes. The “Learn” button is located on the motor unit, which is mounted on the ceiling. Ensure your ladder is stable and have someone assist you if possible for safety. Alternatively, some newer MyQ models allow partial setup via the smartphone app, but initial pairing usually requires physical access to the unit.
5. What should I do if the remote works intermittently?
Intermittent issues are often caused by weak batteries or radio frequency interference. Replace the batteries first. If the problem persists, check for new electronic devices installed near the opener, such as LED light bulbs or Wi-Fi routers, which can interfere with the signal.
Conclusion
Learning how do you program a Craftsman garage door opener is a valuable skill that saves you time and money on service calls. By identifying your model type, following the specific steps for your “Learn” button color, and troubleshooting common issues, you can ensure reliable access to your home.
Remember, safety is paramount. Always keep your hands clear of moving parts and ensure your safety sensors are functioning correctly. If you found this guide helpful, please share it with friends or family who might be struggling with their garage door setup. A well-programmed garage opener is the first step toward a smoother, more secure home experience
Leave a Reply