Introduction
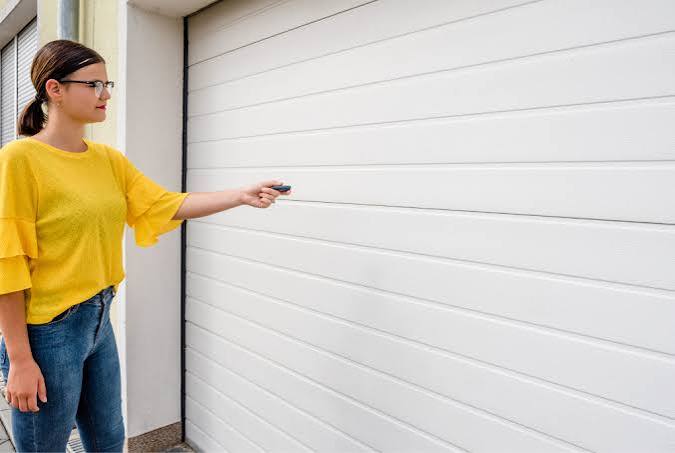
There are few things more frustrating than pressing your garage door remote only to watch the door stop, hesitate, and immediately retreat back up. This common malfunction not only disrupts your daily routine but also raises significant safety concerns for homeowners across the United States. If you are wondering how do you fix a garage door that keeps reversing, you have come to the right place for actionable, safe, and effective solutions. In this comprehensive guide, we will walk you through diagnosing the root cause and applying precise fixes so you can restore your garage door’s reliability without unnecessary service calls.
Why Does My Garage Door Keep Reversing? Understanding the Safety Mechanisms
Before grabbing your tools, it is vital to understand why this happens. Modern garage door openers manufactured after 1993 are federally mandated to include photoelectric safety sensors and auto-reverse mechanisms. According to the U.S. Consumer Product Safety Commission (CPSC), these features prevent thousands of entrapment injuries annually. When your door reverses unexpectedly, it is usually because the system detects an obstruction, misalignment, or incorrect force setting.
The reversal mechanism acts as a fail-safe. However, environmental factors like dirt, sunlight interference, or worn mechanical components can trigger false positives. Understanding the distinction between a safety sensor issue and a mechanical force issue is the first step in effective troubleshooting. For a deeper historical context on how these safety standards evolved, you can refer to the Garage Door Opener entry on Wikipedia, which details the regulatory timeline that makes these safety features mandatory in American homes.
How Do I Check and Align the Safety Sensors?
The most frequent culprit behind a reversing garage door is misaligned or dirty photoelectric eyes. These sensors sit about 6 inches above the floor on either side of the door track. Here is a precise, step-by-step method to address this:
Step-by-Step Sensor Troubleshooting
- Inspect for Obstructions: Clear any spiderwebs, leaves, or debris from the sensor lenses. Use a soft microfiber cloth and a mild glass cleaner to wipe each lens gently.
- Check Indicator Lights: Most sensors feature LED indicators. Typically, the sending unit has a steady amber light, while the receiving unit shows a steady green light. If the receiving light is blinking or off, alignment is the issue.
- Measure Alignment Height: Use a tape measure to ensure both sensors are exactly the same distance from the floor. Even a 0.25-inch discrepancy can break the infrared beam.
- Adjust the Bracket: Loosen the wing nut on the misaligned sensor bracket. Gently pivot the sensor until the LED turns solid green. Tighten the nut carefully without shifting the position.
- Test the Beam: Wave a cardboard box under the sensors while attempting to close the door. The door should reverse instantly upon breaking the beam. If it does not, the sensors may need replacement.
Expert Tip: Direct sunlight hitting the receiving sensor can overwhelm the infrared signal. If your door only reverses during specific times of day, install small sun shields or swap the sender/receiver positions to mitigate glare.
How Do I Adjust the Travel Limits and Force Settings?
If your sensors are perfectly aligned and clean, the problem likely lies in the opener’s travel limits or force sensitivity. Over time, springs lose tension and tracks shift, causing the opener to “think” it has hit an obstacle when it actually hasn’t.
Adjusting Down-Force Sensitivity
Modern openers use electronic force settings rather than physical screws. Locate the control panel on your motor unit:
- Press and hold the “Down” or “Close” adjustment button.
- Increase the down-force incrementally. Test the door after each single press.
- Safety Warning: Never exceed the minimum force required to close the door. Excessive force defeats the safety reverse mechanism and creates a crushing hazard.
- Perform the 2×4 Test: Place a 2-inch by 4-inch piece of lumber flat on the ground under the center of the door. Close the door. Upon contact, the door must automatically reverse within 2 seconds. If it doesn’t, reduce the force immediately.
Correcting Travel Limit Errors
If the door reverses before touching the floor, the “down limit” is set too high.
| Symptom | Likely Cause | Adjustment Needed |
|---|---|---|
| Reverses 6+ inches above floor | Down limit too short | Increase down travel limit |
| Hits floor then reverses | Up limit too low OR excessive force | Decrease down force / Adjust up limit |
| Reverses mid-cycle randomly | Sensor interference or binding | Clean sensors / Lubricate rollers |
| Struggles to open fully | Spring tension loss | Professional spring service needed |
Note: Always consult your specific opener’s manual for button sequences, as brands like LiftMaster, Genie, and Chamberlain vary significantly.
Could Worn Rollers or Track Issues Be Causing the Reversal?
Absolutely. Mechanical resistance mimics an obstruction. If your door binds, sticks, or grinds, the opener interprets this friction as an object in the path.
Inspecting Hardware for Binding
- Disconnect the Opener: Pull the emergency release cord to operate the door manually.
- Lift Manually: The door should move smoothly with minimal effort. If it feels heavy or catches at certain points, you have a mechanical problem.
- Examine Rollers: Look for chipped nylon, rusted steel, or wobbly bearings. Replace damaged rollers in sets to maintain balance.
- Check Track Alignment: Use a level to verify vertical tracks are plumb and horizontal tracks have proper pitch toward the back of the garage. Gaps wider than 0.125 inches between roller and track indicate misalignment.
- Lubricate Properly: Apply lithium-based grease or silicone spray to rollers, hinges, and springs. Avoid WD-40, which attracts dust and worsens friction over time.
Addressing mechanical drag often resolves reversal issues that no amount of sensor adjustment can fix.
When Should I Call a Professional Instead of DIY?
While many reversal fixes are homeowner-friendly, certain scenarios demand certified expertise. Attempting these yourself risks severe injury or property damage:
- Torsion Spring Replacement: Springs store lethal kinetic energy. Only trained technicians should handle spring work.
- Cable Repair or Replacement: Frayed cables indicate imminent failure and require specialized tools.
- Persistent Electrical Issues: If new sensors and adjusted settings fail, the logic board or capacitor may be faulty.
- Door Imbalance: If the door doesn’t stay put when stopped halfway manually, your springs are dangerously out of calibration.
According to industry data, approximately 15% of garage door injuries occur during DIY repairs involving springs and cables. Knowing your limits is part of being a responsible homeowner.
Frequently Asked Questions About Garage Door Reversal
Q1: Can cold weather cause my garage door to reverse?
Yes. Extreme cold thickens lubricants and contracts metal components, increasing friction. Metal tracks may also contract slightly, altering alignment. Switching to synthetic lubricant rated for -40°F and checking sensor alignment seasonally prevents winter-related reversals.
Q2: How often should I test my garage door’s auto-reverse feature?
The CPSC recommends testing monthly. Simply place a 2×4 board on the floor under the door and activate closure. Immediate reversal confirms proper function. Regular testing ensures compliance with safety standards and protects your family.
Q3: Why does my garage door reverse only when closing but opens fine?
This typically indicates a down-force setting that is too low or a downward-specific mechanical bind. Opening requires less force due to spring assistance, while closing fights gravity and friction. Focus adjustments on down-force and inspect bottom seals for ground obstructions.
Q4: Will replacing the remote fix a reversing door?
Rarely. Remotes transmit signals; they don’t control force or sensor logic. However, weak batteries can cause intermittent signals that confuse older units. Replace batteries first as a low-cost diagnostic step before pursuing complex repairs.
Q5: Is it safe to bypass the safety sensors temporarily?
Never bypass safety sensors. Doing so violates federal regulations and eliminates critical protection against entrapment. If sensors malfunction, repair or replace them properly. Temporary bypasses create unacceptable liability and danger.
Q6: How long do garage door safety sensors last?
Quality sensors typically last 10–15 years. Exposure to moisture, UV radiation, and voltage surges accelerates degradation. If your opener is over a decade old and reversal issues persist despite cleaning and alignment, sensor replacement is likely necessary.
Conclusion: Restoring Peace of Mind One Fix at a Time
Learning how do you fix a garage door that keeps reversing empowers you to maintain one of your home’s most-used entry points safely and efficiently. By systematically checking sensors, adjusting force settings, and addressing mechanical wear, most homeowners resolve this issue without professional intervention. Remember: safety always trumps convenience. When in doubt, call a certified technician.
A properly functioning garage door isn’t just about convenience—it’s about protecting what matters most. Take ten minutes today to perform the 2×4 test and inspect your sensors. Your future self (and your car) will thank you.
Found this guide helpful? Share it on Facebook, X (Twitter), or Pinterest to help fellow homeowners tackle this frustrating problem. Tag us with your success stories or remaining questions—we’re here to support your DIY journey safely! 💪🏡
Leave a Reply