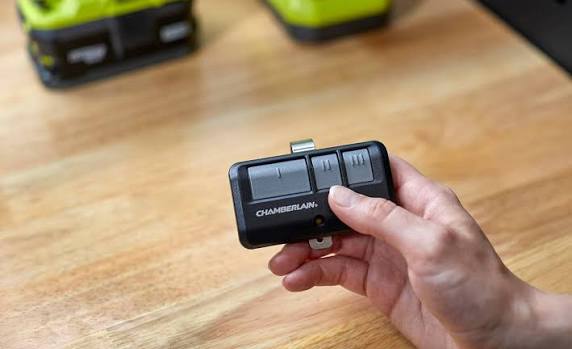
Have you ever locked yourself out because your only garage door remote died or got lost? It is a frustrating situation that many homeowners face. If you are wondering how do I program a second garage door opener remote, you are not alone. Adding a backup remote is a simple process that enhances convenience and ensures you always have access to your home.
Why You Need a Second Garage Door Remote
Before diving into the technical steps, it is important to understand why having a secondary remote is crucial for modern home management. According to recent home safety surveys, nearly 30% of homeowners experience at least one instance of remote failure per year due to battery issues or accidental damage.
A second remote serves as an essential backup. It prevents the stress of being stranded outside your garage, especially during bad weather or late at night. Furthermore, if you share your home with family members, having individual remotes allows for better tracking and security management.
Identifying Your Garage Door Opener Model
The first step in programming a new remote is identifying the make and model of your garage door opener. The programming process varies significantly between brands such as LiftMaster, Chamberlain, Genie, and Craftsman.
Locate the Model Number
Look for a label on the motor unit hanging from your garage ceiling. This label typically contains:
- The manufacturer’s name.
- The model number.
- The frequency (e.g., 315 MHz or 390 MHz).
If you cannot find the label, check the original manual or the back of your existing remote. Knowing your specific model is critical because older openers use different security protocols than newer ones.
Understanding Security Codes
Modern garage door openers use rolling code technology to prevent theft. This means the code changes every time you use the remote. For more detailed information on how rolling codes enhance security, you can refer to this Wikipedia article on garage door openers.
General Steps to Program a Second Remote
While specific steps vary by brand, most garage door openers follow a similar general procedure. Below is a universal guide that works for many standard models.
Step 1: Prepare the New Remote
Ensure the new remote has fresh batteries installed. Weak batteries can cause programming failures. Remove the battery cover and insert the batteries according to the polarity markings.
Step 2: Locate the “Learn” Button
On your garage door motor unit, find the “Learn” or “Smart” button. It is usually located near the antenna wire and is often colored yellow, purple, orange, or red.
Step 3: Clear Old Codes (If Necessary)
If you are replacing a lost remote, it is wise to clear all previously programmed remotes to ensure security. Press and hold the “Learn” button for about 10 seconds until the indicator light blinks or turns off. Note: This will erase all existing remotes, so you will need to reprogram them all.
Step 4: Initiate Programming Mode
Press and release the “Learn” button. The indicator light will turn on or start blinking, signaling that the opener is ready to receive a new code. You typically have 30 seconds to complete the next step.
Step 5: Sync the Remote
Within 30 seconds, press and hold the button on your new remote that you wish to use. Hold it until the garage door opener’s lights flash or you hear two clicks. This confirms that the code has been accepted.
Step 6: Test the Remote
Stand clear of the garage door and press the programmed button. The door should open or close. If it does not respond, repeat the process, ensuring you are within range and the batteries are functional.
Brand-Specific Programming Instructions
Different manufacturers have unique nuances in their programming processes. Here are specific guidelines for the most common brands.
LiftMaster and Chamberlain
These brands often share similar technology.
- Press the “Learn” button on the motor unit.
- Within 30 seconds, press and hold the remote button.
- Release when the light blinks.
- For MyQ-enabled models, you may also need to sync via the app if you want smart features.
Genie Openers
Genie uses a slightly different method for some models.
- Press the “Learn” button twice quickly.
- The LED will blink twice.
- Press and hold the remote button until the door moves.
- Some older Genie models require dip switches to match the remote and motor settings.
Craftsman
Craftsman openers, often manufactured by LiftMaster, follow the standard Learn button protocol.
- Press the “Learn” button.
- Press the remote button within 30 seconds.
- Verify operation.
| Brand | Learn Button Color | Common Frequency | Special Note |
|---|---|---|---|
| LiftMaster | Yellow/Purple | 315/390 MHz | Supports MyQ App |
| Chamberlain | Yellow/Purple | 315/390 MHz | Similar to LiftMaster |
| Genie | Red/Blue | 390 MHz | May require double-press |
| Craftsman | Purple/Orange | 315/390 MHz | Check manual for dip switches |
Troubleshooting Common Issues
Even with careful following of instructions, issues can arise. Here are solutions to common problems.
Remote Not Responding
- Check Batteries: Replace them with new ones, even if they seem fine.
- Range Issues: Ensure you are within 15–20 feet of the motor unit during programming.
- Interference: LED light bulbs in the garage can sometimes interfere with signals. Try turning them off during programming.
Light Blinks but Door Does Not Move
This often indicates a security lock feature is active. Check your wall console for a “Lock” button and disable it. Alternatively, the remote may not be compatible with your opener’s frequency.
Compatibility Issues
Not all remotes work with all openers. Ensure your universal remote is listed as compatible with your specific model. Using a remote from the same manufacturer is always the safest bet.
Frequently Asked Questions (FAQ)
1. Can I program a used remote from another garage?
Yes, but you must first clear the memory of the used remote if it was previously programmed to another system. Most universal remotes can be reset by holding down specific buttons while removing the batteries. Always verify compatibility with your opener’s frequency.
2. How many remotes can I program to one garage door opener?
Most modern garage door openers allow you to program between 8 to 15 remotes. However, check your specific model’s manual for exact limits. Keep in mind that each remote takes up a slot in the opener’s memory.
3. What if I lost all my remotes and don’t know the code?
If you have no working remotes, you can still program new ones using the “Learn” button on the motor unit. You do not need the old code. Simply press the Learn button and follow the syncing steps with your new remote. If the Learn button is missing or broken, you may need to replace the logic board.
4. Is it safe to buy a used garage door remote online?
Buying used remotes can be risky due to potential security vulnerabilities. If the previous owner did not clear the memory properly, there could be residual codes. It is generally safer to buy new remotes or certified refurbished units from reputable sellers. Always clear the opener’s memory after installing a used remote.
5. Why does my new remote work intermittently?
Intermittent issues are often caused by weak batteries, signal interference from other electronic devices, or misaligned antennas. Try replacing the batteries and ensuring the antenna on the motor unit is hanging vertically. If the problem persists, check for nearby LED bulbs that may be causing frequency interference.
6. Do I need a professional to program a second remote?
No, programming a second remote is a simple DIY task that takes less than 10 minutes. Most manufacturers design the process to be user-friendly. However, if you encounter persistent issues or have an older model with complex dip switches, consulting a professional technician may save time.
Conclusion
Learning how do I program a second garage door opener remote is a valuable skill that enhances your home’s accessibility and security. By following the steps outlined above, you can easily sync a new remote with your existing system. Remember to identify your model, use fresh batteries, and follow the specific instructions for your brand.
Don’t wait until you’re locked out to take action. Grab a spare remote today and program it as a backup. If you found this guide helpful, please share it with your friends and family on social media to help them avoid garage door headaches too!
Leave a Reply