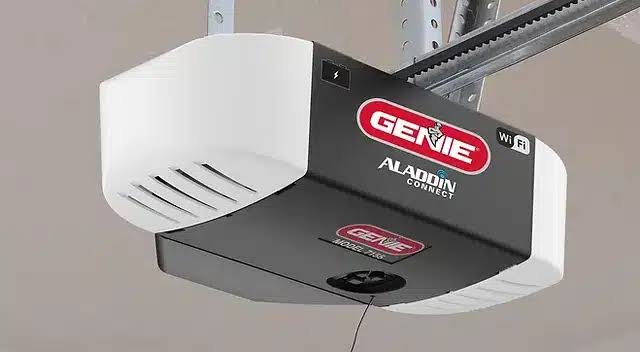
Is there anything more frustrating than hitting the remote button, hearing your garage door start to rise, and then watching it stop abruptly just a few feet from the top? You are left with a partially open door, a confused vehicle, and a growing sense of annoyance. If you are dealing with a situation where your Genie garage door opener will not open all the way, you are not alone. This is a common issue that often stems from simple mechanical adjustments rather than a broken motor.
In this guide, we will walk you through the exact steps to diagnose and fix this problem. Whether you have a newer smart model or an older chain-drive unit, these solutions are designed to get your door moving smoothly again without calling a professional.
Why Does My Genie Garage Door Stop Before Reaching the Top?
Before we dive into the tools and tweaks, it is essential to understand why this happens. Modern garage door openers, including those made by Genie, are equipped with safety sensors and limit switches. These components tell the motor when to stop. If these settings drift out of alignment, or if physical obstacles interfere with the door’s path, the opener will halt prematurely to prevent damage.
According to industry standards, a properly balanced garage door should require minimal force to lift manually. If your door is heavy or sticky, the opener’s safety mechanism may interpret this resistance as an obstruction, triggering a stop. Understanding this balance between mechanical force and electronic sensing is key to solving the issue.
Check and Adjust the Up-Limit Switch
The most common culprit behind a Genie garage door opener that will not open all the way is the up-limit switch. This switch tells the motor exactly how far to travel upward before stopping. Over time, vibrations from daily use can cause this setting to shift slightly.
How to Adjust the Limit Settings
Most Genie models feature a set of dials or screws on the back or side of the motor unit, often labeled “Up” and “Down” or marked with arrows. Here is how to adjust them safely:
- Locate the Limit Screws: Look for two small plastic screws on the motor housing. One controls the up travel, and the other controls the down travel. They are usually white or black and may be labeled.
- Mark the Original Position: Before turning anything, use a marker to note the current position of the screw. This ensures you can return to the original setting if needed.
- Adjust in Small Increments: Turn the “Up” limit screw in the direction indicated by the arrow (usually clockwise) to increase the travel distance. Turn it only one or two full rotations at a time.
- Test the Door: Press the wall button to operate the door. Observe if it opens further. If it still stops short, repeat the adjustment.
- Avoid Over-Adjustment: Be careful not to set the limit too high. If the door tries to push past its physical track limits, it can damage the rollers, tracks, or the opener itself.
Pro Tip: If your Genie opener has digital buttons instead of screws, refer to your specific model’s manual. The process usually involves holding a specific button until an LED blinks, then using arrow keys to adjust the travel distance.
Inspect the Safety Sensors and Tracks
If adjusting the limit switch does not resolve the issue, the problem might lie with the safety eyes or the physical track. Genie openers are designed to stop and reverse if they detect any inconsistency in the door’s movement.
Clean and Align the Safety Eyes
Located near the floor on both sides of the garage door opening, these small sensors emit an invisible beam. If the beam is blocked or misaligned, the door will not close fully, and in some cases, may hesitate during opening.
- Check the Lights: Each sensor has an LED light. One should be solid green (power), and the other should be solid amber or red (beam received). If either is blinking or off, they are misaligned.
- Clean the Lenses: Wipe the lenses with a soft, dry cloth. Dust, spiderwebs, or dirt can interrupt the signal.
- Realign the Brackets: Loosen the wing nuts on the sensor brackets and gently adjust them until both lights are solid. Tighten the nuts securely.
Examine the Tracks and Rollers
Physical obstructions are a frequent cause of incomplete opening. Inspect the metal tracks on both sides of the door.
- Look for Debris: Remove any leaves, tools, or rocks that may have fallen into the track.
- Check for Dents: A bent track can cause the rollers to jam. If you see a dent, you may need a professional to straighten it.
- Lubricate Moving Parts: Use a silicone-based lubricant or lithium grease on the rollers, hinges, and tracks. Avoid using WD-40 as it attracts dust and can gum up the mechanism over time. Proper lubrication reduces friction, allowing the opener to work less hard.
For more detailed information on garage door safety standards and mechanisms, you can refer to the general overview on Wikipedia.
Test the Door Balance and Spring Tension
A garage door is heavy, often weighing between 100 and 400 pounds. The springs are designed to counterbalance this weight, making it easy for the opener to lift. If the springs are worn out or broken, the opener must bear the full weight, which can trigger its thermal overload protection or force limits.
How to Perform a Balance Test
- Disconnect the Opener: Pull the red emergency release cord to disengage the door from the opener carriage.
- Lift Manually: Lift the door halfway up and let go.
- Observe the Movement:
- If the door stays in place, it is well-balanced.
- If it slides down, the springs are too loose or worn.
- If it shoots up, the springs are too tight.
Warning: Garage door springs are under extreme tension. Do not attempt to adjust or replace springs yourself. This is a dangerous task that requires specialized tools and training. If your door fails the balance test, contact a certified technician immediately.
Resetting Your Genie Garage Door Opener
Sometimes, the electronic brain of the opener gets confused due to power surges or glitches. A simple reset can clear temporary errors and restore default settings.
Steps to Perform a Hard Reset
- Unplug the Unit: Locate the power cord of the Genie opener and unplug it from the outlet. If it is hardwired, turn off the circuit breaker.
- Wait: Leave it disconnected for at least 60 seconds. This allows the capacitors to discharge and the memory to clear.
- Reconnect Power: Plug the unit back in or turn the breaker on.
- Reprogram Remotes: You may need to re-sync your remote controls and keypad. Refer to your manual for the specific “Learn” button procedure for your model.
- Retest Limits: After a reset, the limit settings may revert to factory defaults. You may need to readjust the up-limit switch as described earlier.
When to Call a Professional
While many issues with a Genie garage door opener will not open all the way can be fixed with DIY methods, some situations require expert intervention. Consider calling a professional if:
- The door makes loud grinding or scraping noises.
- The springs are broken or visibly damaged.
- The motor runs but the door does not move (indicating a stripped gear).
- You have adjusted the limits and lubricated the tracks, but the problem persists.
- The opener is more than 10–15 years old and frequently malfunctions.
Investing in professional maintenance can extend the life of your opener and ensure the safety of your family and property.
FAQ Section
Q: Why does my Genie garage door open halfway and then stop?
A: This is typically caused by an incorrect up-limit setting. The opener thinks it has reached the top position when it hasn’t. Adjusting the up-limit screw or button usually resolves this. It can also be due to binding in the tracks or lack of lubrication.
Q: Can a weak battery in my remote cause the door to not open fully?
A: No, a weak remote battery will prevent the signal from reaching the opener entirely, meaning the door won’t start at all. If the door starts but doesn’t finish opening, the issue is with the opener, sensors, or door mechanics, not the remote.
Q: How often should I lubricate my Genie garage door opener?
A: It is recommended to lubricate the moving parts (rollers, hinges, and tracks) every six months. Use a silicone-based spray or lithium grease. Avoid oil-based products as they attract dirt.
Q: What does it mean if the LED light on my Genie opener is flashing?
A: A flashing LED usually indicates an error code. For example, rapid flashes might mean the safety sensors are misaligned or blocked. Consult your user manual for the specific flash pattern associated with your model to diagnose the exact issue.
Q: Is it safe to bypass the safety sensors to make the door open?
A: Absolutely not. Bypassing safety sensors removes critical protection against entrapment and injury. It is illegal in many jurisdictions and poses a severe risk to children and pets. Always fix the sensors properly instead of bypassing them.
Conclusion
Dealing with a Genie garage door opener will not open all the way is a manageable problem for most homeowners. By systematically checking the limit switches, cleaning the safety sensors, lubricating the tracks, and testing the door balance, you can often restore full functionality without expensive repairs. Remember, regular maintenance is the key to preventing future issues.
If you found this guide helpful, please share it with friends or neighbors who might be struggling with their garage doors. A smooth-operating garage door is not just a convenience—it’s a safety essential. Stay safe, and keep your garage moving!
Leave a Reply