Introduction
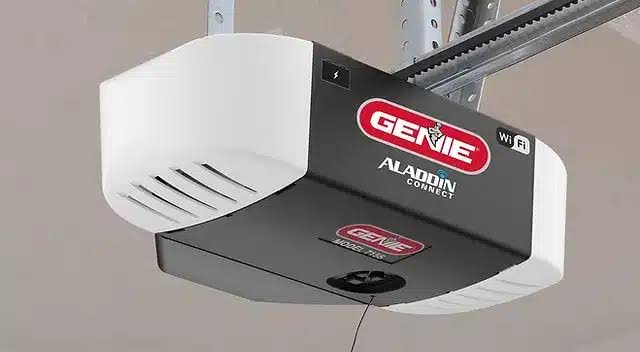
There’s nothing more frustrating than pressing your garage door remote and hearing nothing — just a stubborn solid red light on your Genie garage door opener motor staring back at you. If you’re reading this, you’re probably standing in your driveway wondering what went wrong. Don’t worry, you’re not alone. According to industry data, over 70% of U.S. homes rely on a garage door opener, and sensor-related issues account for nearly 40% of all service calls. In this guide, I’ll walk you through exactly what that red light means, why it appeared, and how to fix it — often in under 15 minutes.
What Does a Solid Red Light on a Genie Garage Door Opener Motor Mean?
Before grabbing a screwdriver, let’s understand what your opener is trying to tell you. On most Genie models (including the popular Intellicode and ChainMaster series), a solid red light on the motor typically indicates one of three things:
- A blocked or misaligned safety sensor — the most common culprit.
- A travel limit setting error — the door doesn’t know where “open” or “closed” is.
- An internal motor or logic board fault — less common but possible on older units.
Genie has been manufacturing garage door openers since 1923, and their diagnostic LEDs are designed to help homeowners pinpoint problems quickly. Think of the red light as your opener’s way of saying, “Hey, something’s not right — let’s figure it out together.”
Quick Tip: A blinking red light usually points to a different issue (often remote or battery-related). A solid red light is almost always sensor or limit-related.
Common Causes of a Solid Red Light on Genie Motor
Let’s break down the usual suspects so you know where to focus your troubleshooting.
1. Misaligned Safety Sensors
The photo-eye sensors mounted on either side of your garage door (about 6 inches off the ground) must face each other perfectly. Even a slight bump from a lawnmower, bicycle, or curious pet can knock them out of alignment. When misaligned, the opener refuses to close the door and triggers the red light.
2. Dirty or Obstructed Sensor Lenses
Dust, spider webs, mud splashes, or even condensation can block the infrared beam between sensors. The system interprets this as an obstruction and halts operation.
3. Sunlight Interference
Believe it or not, direct afternoon sunlight can overwhelm the infrared sensor beam — especially in late summer. If the red light appears mostly in the afternoon, this could be your issue.
4. Loose or Damaged Wiring
The low-voltage wires connecting the sensors to the motor head can become loose, pinched, or chewed by rodents. A broken connection = red light.
5. Travel Limits Need Resetting
If you’ve recently replaced a remote, had a power outage, or manually moved the door, the opener may have lost its memory of how far the door should travel.
Step-by-Step Troubleshooting Guide
Ready to fix it? Follow these steps in order. Most homeowners resolve the issue by Step 3.
Step 1: Inspect the Sensor LED Lights
Look at both sensor units near the floor. On a functioning Genie system:
- One sensor shows a solid green light (power).
- The other shows a solid red light (alignment confirmed).
If both sensors are off, or the red one is blinking/off, you have a power or wiring issue.
Step 2: Clean the Sensor Lenses
Use a soft, dry microfiber cloth to gently wipe both sensor lenses. Avoid chemical cleaners — they can damage the plastic.
Step 3: Realign the Sensors
This is the fix in about 60% of cases. Here’s how:
- Loosen the wing nut on the “sending” sensor (the one with the red light).
- Gently rotate the sensor until the red light becomes solid.
- Tighten the wing nut while holding the sensor steady.
- Test the door with the wall button.
Pro Detail: The sensors should be mounted exactly 6 inches (15.24 cm) above the garage floor and perfectly level with each other. Use a small carpenter’s level if needed.
Step 4: Check for Sunlight Interference
If the red light appears only at certain times of day, try shading the sensors with a small piece of cardboard or a 3D-printed shield. Many homeowners report this simple trick solves afternoon-only issues.
Step 5: Inspect the Wiring
Trace the thin wires from each sensor back to the motor head. Look for:
- Loose terminal connections
- Pinched or frayed wires
- Rodent damage
If you find damaged wire, splice in a replacement using wire nuts and electrical tape.
Step 6: Reset the Travel Limits
If sensors check out but the red light persists, reset the limits:
- Locate the “Learn” or “Set” button on the motor head.
- Press and hold until the LED blinks (usually 6–8 seconds).
- Run the door through a full open-close cycle using the wall button.
- The opener will relearn its travel distances.
For detailed technical specifications on garage door opener systems, you can refer to Wikipedia’s Garage Door Opener article.
DIY Fix vs. Calling a Professional: A Quick Comparison
Not sure whether to tackle this yourself? Here’s a helpful breakdown:
| Factor | DIY Fix | Professional Service |
|---|---|---|
| Cost | $0 (just your time) | $85–$200 service call |
| Time Required | 15–45 minutes | 1–3 hours (scheduling + visit) |
| Skill Level | Beginner-friendly | Expert |
| Best For | Sensor issues, cleaning, resets | Motor replacement, board failure |
| Warranty | None | Usually 90 days on labor |
| Success Rate | ~75% for red light issues | ~98% |
My recommendation: Try Steps 1–5 yourself first. If the red light persists after a full reset, it’s time to call a certified Genie technician.
How to Prevent Future Red Light Issues
Prevention is always easier than repair. Here are four habits that keep Genie openers running smoothly:
- Clean sensors monthly — a quick wipe prevents 80% of issues.
- Check alignment seasonally — temperature changes can shift mounting brackets.
- Lubricate moving parts — use white lithium grease on the chain or screw drive every 6 months.
- Install a surge protector — power spikes are a leading cause of logic board failure.
According to Genie’s own maintenance guidelines, a well-maintained opener lasts 15–20 years, compared to just 8–10 years for neglected units.
FAQ Section
Q1: Can I bypass the sensors to make the door close?
Technically, yes — but you should never do this. The sensors are a federal safety requirement (since 1993) designed to prevent the door from closing on a person, pet, or object. Bypassing them is dangerous and may void your homeowner’s insurance.
Q2: Why does the red light only appear at night?
Nighttime red lights often indicate a failing sensor LED or voltage drop. Check the wiring connections first. If both sensors are original and over 10 years old, consider replacing the sensor pair — they’re inexpensive (~$20–$30).
Q3: Will a power outage cause the red light?
Yes. A power outage can wipe the opener’s memory of travel limits. Simply reprogram the limits using the “Learn” button as described in Step 6 above.
Q4: How do I know if my Genie motor is under warranty?
Genie offers a limited lifetime warranty on the motor and a 1-year warranty on parts and electronics for most residential models. Check your original receipt or contact Genie customer service with your model number (found on the motor head label).
Q5: Is a solid red light the same as a blinking red light?
No. A solid red light usually means sensor or limit issues. A blinking red light typically indicates remote programming problems, a failing battery, or a logic board error. Always count the blinks — Genie uses specific blink patterns as diagnostic codes.
Q6: Can cold weather trigger the red light?
Absolutely. Extreme cold can cause sensor brackets to contract and shift out of alignment. It can also thicken lubricants, making the door work harder. Winterize your opener with fresh lubricant and a sensor alignment check before the first freeze.
Conclusion
A solid red light on your Genie garage door opener motor doesn’t have to ruin your day. In most cases, the issue traces back to misaligned sensors, dirty lenses, or a simple reset — all fixes you can handle yourself in under an hour. By understanding what the light means and following the step-by-step guide above, you’ll save time, money, and a whole lot of frustration.
Found this guide helpful? Share it with a neighbor who’s been wrestling with their garage door, or pin it to your home maintenance board on Pinterest. Your future self (and your driveway) will thank you!
👉 Got questions or a success story? Drop a comment below — I read every single one.
Leave a Reply