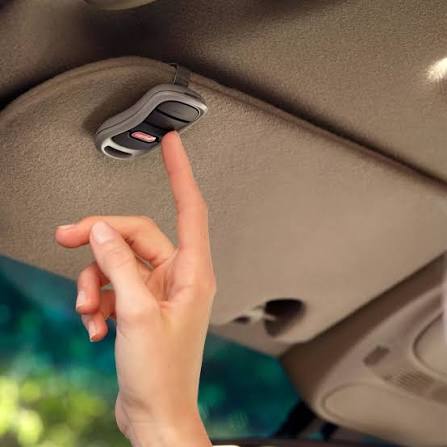
Losing access to your garage can be incredibly frustrating, especially when you are rushing out the door in the morning. That is why finding a reliable, easy-to-use solution like the Genie 3 Button Keychain And Visor Garage Door Opener Remote is a game-changer for your daily routine. This comprehensive guide will walk you through everything you need to know to get it working perfectly.
What Is the Genie 3 Button Keychain And Visor Garage Door Opener Remote?
The Genie 3 Button Keychain And Visor Garage Door Opener Remote (often identified by model numbers G3T-R or 37330R) is a compact, highly versatile transmitter designed for seamless garage access. Fundamentally, a garage door opener is a motorized device that opens and closes a garage door, often featuring handheld radio transmitters for ultimate convenience
en.wikipedia.org.
This specific Genie model stands out because of its dual-purpose design. It features a detachable visor clip for easy storage in your vehicle, yet it is small enough to attach directly to your keychain. It utilizes Genie’s proprietary Intellicode® rolling code technology, which changes the access code with every use to prevent unauthorized entry. Additionally, it boasts Auto-Seek Dual Frequency technology, automatically selecting either 315 MHz or 390 MHz to minimize radio interference in densely populated neighborhoods.
Is the Genie 3 Button Remote Compatible With My Opener?
Before attempting to program your new remote, verifying compatibility is crucial to avoid frustration. The good news is that this remote boasts broad compatibility.
- Genie Openers (1997–Present): Fully compatible with almost all Genie garage door openers manufactured from 1997 to the present day.
- Older Genie Openers (1995–1997): Compatible, but you must use the two upper buttons on the remote for programming.
- External Add-On Receivers: Works seamlessly with Genie external receivers manufactured between 1995 and 2011.
Note: This remote is designed specifically for Genie systems. It is not compatible with other major brands like LiftMaster, Chamberlain, or Craftsman, even if they use similar frequencies.
How to Program the Genie 3 Button Keychain Remote (Step-by-Step)
Programming your remote is straightforward if you follow the exact sequence. Think of it like pairing a new Bluetooth device; timing and distance matter. Follow these concrete steps for a successful setup.
Step 1: Prepare the Remote
Pull the protective plastic battery tab from the remote to activate the CR2032 coin cell battery. Ensure the battery is seated correctly, matching the polarity symbols inside the housing.
Step 2: Activate the Opener’s Programming Mode
- For Newer Genie Openers: Press and hold the round program button on the motor head until the LED turns solid blue, then release it. The small round LED will go out, and the long LED will begin flashing purple.
- For Older Genie Openers (1995–2011): Locate the “Learn Code” button on the motor head. Press and release it once. The red LED will begin to flash.
Step 3: Program the Remote
Warning: You only have approximately 30 seconds to complete this step once the opener is in programming mode.
- Stand at least 5 feet away from the garage door opener. This distance ensures proper signal communication and prevents signal overload.
- Slowly press and release your chosen button on the remote two times.
- Observe the opener: the LEDs will flash and then turn off, indicating successful programming.
Step 4: Test the Connection
Press and release the exact same button a third time. Your garage door should now activate (open or close). If the LEDs on the motor head do not turn off, you may be pressing the button too quickly. Press it several more times with a deliberate, steady pace to achieve confirmation.
Genie 3 Button Remote: Pros and Cons
To help you make an informed decision, here is a quick comparison of what to expect from this device.
| Feature | Pros | Cons |
|---|---|---|
| Design | Compact; includes a detachable visor clip for car storage. | Small size means it can be easily misplaced if not clipped securely. |
| Compatibility | Works with Genie openers from 1997 to the present. | Not compatible with non-Genie brands (e.g., Craftsman, LiftMaster). |
| Battery | Uses a widely available, inexpensive CR2032 coin cell battery. | Opening the case to replace the battery requires a flat coin or washer. |
| Security | Intellicode rolling technology actively prevents code hacking. | Openers from 1995–1997 require using specific upper buttons only. |
Troubleshooting: What to Do If Your Genie Remote Is Not Working
Even the best technology occasionally hiccups. If your remote fails to operate the door, do not panic. Most issues are easily resolved with these troubleshooting steps.
- Check the Battery: The most common culprit is a depleted battery. Open the remote casing using a coin and replace the old battery with a fresh CR2032 battery. Ensure the positive (+) side is facing up.
- Reprogram the Remote: Sometimes, the memory link between the remote and the opener gets corrupted. Clear the remote from the system and repeat the 4-step programming guide above.
- Check for Interference: LED light bulbs in your garage can emit radio frequencies that interfere with garage door signals. If the remote works only when you are very close to the door, try turning off the garage LED lights temporarily to test for interference.
- Reset the Opener’s Memory: If a remote is lost or stolen, you must erase all programmed devices for security. For newer models, press and hold the program button until the LED turns blue, then press the Up (+) and Down (-) buttons simultaneously until both LEDs turn solid blue. Note: This erases all remotes and keypads, requiring you to reprogram them.
Frequently Asked Questions (FAQ)
1. How many garage doors can the Genie 3-button remote control?
You can program this remote to operate up to three different Genie garage door openers or gate operators. Simply repeat the programming steps for each button, assigning one button to each door.
2. What type of battery does the Genie 3-button keychain remote use?
It uses a standard CR2032 3V lithium coin cell battery. This battery is widely available at most grocery stores, pharmacies, and hardware stores, making replacements quick and inexpensive.
3. Why is my Genie visor remote not working after I just programmed it?
If you followed the steps but it fails, you may have pressed the remote button too quickly during Step 3. Stand at least 5 feet away and press the button slowly and deliberately. Also, verify that you pulled the plastic battery activation tab out before starting.
4. Is this remote compatible with Craftsman or LiftMaster openers?
No. The Genie 3 Button Keychain And Visor Garage Door Opener Remote is engineered exclusively for Genie Intellicode systems. It will not communicate with Craftsman, LiftMaster, or Chamberlain openers, even if the dip switches appear similar.
5. How do I know if my Genie opener uses Intellicode technology?
Look at the motor head of your garage door opener. If it has a “Learn Code” button (usually square or round, often located near the antenna wire) and was manufactured after 1995, it uses Intellicode rolling code technology and is compatible with this remote.
Conclusion
Upgrading or replacing your garage access with the Genie 3 Button Keychain And Visor Garage Door Opener Remote is a smart, secure, and highly convenient choice for any homeowner. With its dual-frequency reliability, robust Intellicode security, and user-friendly programming, it solves the daily hassle of fumbling for keys or dealing with bulky transmitters.
By following the step-by-step instructions in this guide, you can have your remote up and running in under two minutes.
Found this guide helpful? Share it with your friends and family on Facebook, Twitter, or Pinterest to help them master their smart home devices too!
Leave a Reply