Is your garage door opener goes up a little then stops, leaving you stranded and frustrated? You’re not alone—this is one of the most common garage door issues homeowners face. The good news? Most causes are simple to diagnose and fix yourself with the right guidance.
When your garage door refuses to complete its upward journey, it’s more than just an inconvenience—it’s a security concern and a daily hassle. Whether you’re rushing to work or returning home late at night, a malfunctioning garage door can disrupt your entire routine. Let’s dive into why this happens and how you can get your door moving smoothly again.
Why Does My Garage Door Only Go Up Partially?
Understanding why your garage door opener goes up a little then stops is the first step toward fixing it. Several mechanical and electronic factors can cause this frustrating behavior:
Safety Sensor Misalignment
Modern garage doors come equipped with photo-eye sensors near the floor on both sides of the door. These sensors create an invisible beam that detects obstacles. If they’re misaligned—even by a fraction—the system interprets this as an obstruction and reverses direction immediately after starting.
Quick Check: Look for blinking LED lights on your sensors. A steady light means proper alignment; blinking indicates a problem.
Limit Switch Settings Are Off
Your garage door opener has built-in limit switches that tell the motor when to stop going up or down. If these settings drift over time due to regular use, temperature changes, or power surges, the door may stop prematurely.
According to the International Door Association, approximately 30% of garage door service calls involve limit switch adjustments—a surprisingly common yet easily fixable issue.
Worn or Broken Springs
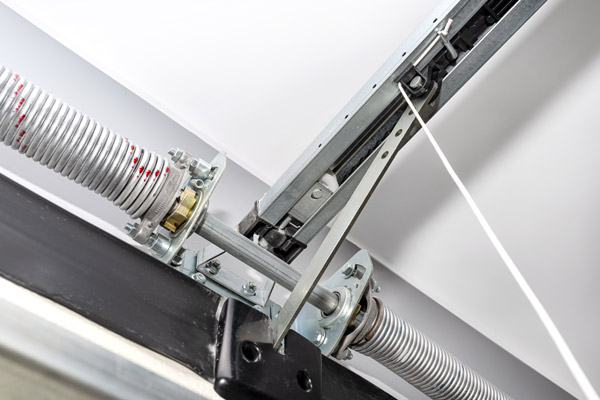
Garage door springs counterbalance the door’s weight, making it easy for the opener to lift. When springs wear out or break, the opener struggles against the full weight of the door, causing it to stall partway up.
Warning: Spring replacement is dangerous and should always be handled by professionals. Torsion springs store enormous energy and can cause serious injury if mishandled.
Obstructed Track or Rollers
Debris, dirt buildup, or damaged rollers in the track can physically prevent the door from completing its upward motion. Even small obstructions like leaves, pebbles, or hardened grease can trigger the safety reversal mechanism.
How to Diagnose the Problem Step-by-Step
Before calling a technician, try these diagnostic steps to identify what’s causing your garage door opener to go up a little then stops:
Step 1: Visual Inspection
Start with a thorough visual check:
- Examine both sides of the door track for debris or damage
- Check sensor alignment (they should face each other directly)
- Look for visible spring damage or gaps
- Inspect rollers for wear or cracks
Step 2: Test the Manual Release
Pull the emergency release cord (usually red) and try lifting the door manually:
- If it lifts easily: The problem is likely with the opener unit itself
- If it’s heavy or stuck: The issue is mechanical (springs, tracks, or rollers)
Step 3: Check the Remote and Wall Button
Test both your remote control and wall-mounted button:
- If neither works properly, the issue may be with the opener’s motor or circuit board
- If only the remote fails, replace the batteries first
Step 4: Listen for Unusual Sounds
Pay attention to noises during operation:
- Grinding: Indicates worn gears or lack of lubrication
- Clicking: May signal electrical issues or relay problems
- Straining motor: Suggests the opener is working too hard due to imbalance
7 Proven Fixes for a Garage Door That Won’t Complete Its Cycle
Once you’ve identified the likely culprit, here are actionable solutions ranked from easiest to most complex:
Fix #1: Realign the Safety Sensors
This solves the problem in roughly 40% of cases:
- Locate the sensors on both sides of the door (6 inches above the floor)
- Clean the lens with a soft cloth
- Loosen the mounting bracket slightly
- Adjust until both indicator lights show steady (not blinking)
- Tighten the brackets securely
- Test the door
Fix #2: Adjust the Travel Limits
Most openers have two adjustment screws labeled “Up” and “Down”:
- Find the limit adjustment screws on the motor unit
- Use a screwdriver to turn the “Up” limit screw clockwise (increases travel) or counterclockwise (decreases travel)
- Make small adjustments (quarter-turn increments)
- Test after each adjustment
- Continue until the door closes completely and opens fully
Pro Tip: Mark the original screw position with a marker before adjusting, so you can return to it if needed.
Fix #3: Lubricate Moving Parts
Proper lubrication reduces friction and strain on the opener:
| Component | Recommended Lubricant | Frequency |
|---|---|---|
| Rollers | Silicone-based spray | Every 6 months |
| Hinges | White lithium grease | Every 6 months |
| Tracks | Dry PTFE lubricant | Every 12 months |
| Springs | Never lubricate torsion springs | N/A |
Avoid using WD-40 as a long-term lubricant—it attracts dust and wears off quickly.
Fix #4: Clear the Tracks
Remove any obstructions systematically:
- Disconnect the opener using the emergency release
- Vacuum debris from the tracks
- Wipe tracks clean with a damp cloth
- Check for dents or bends (straighten minor bends with a rubber mallet)
- Ensure track brackets are tight and secure
Fix #5: Replace Worn Rollers
If rollers are cracked, chipped, or excessively worn:
- Purchase matching replacement rollers (nylon or steel)
- Support the door with C-clamps on the track below the roller
- Remove the old roller by unscrewing the bracket
- Install the new roller and tighten securely
- Remove clamps and test
Fix #6: Check the Drive Mechanism
For chain-drive and belt-drive openers:
- Chain drive: Check tension (should have about 1/4 inch of slack). Tighten if necessary using the adjustment bolt.
- Belt drive: Inspect for cracks, fraying, or stretching. Replace if damaged.
- Screw drive: Lubricate the screw with appropriate garage door lubricant.
Fix #7: Reset the Opener
Sometimes a simple reset resolves electronic glitches:
- Unplug the opener from power
- Wait 30 seconds
- Plug it back in
- Reprogram remotes if necessary
- Test operation
For detailed technical specifications about garage door opener mechanisms, you can reference Wikipedia’s article on garage door openers.
When to Call a Professional
While many issues are DIY-friendly, certain situations require expert assistance:
Call a professional immediately if:
- Springs are broken or visibly damaged
- The door falls rapidly when manually released
- You hear loud snapping sounds
- The opener motor smokes or smells burnt
- Electrical wiring appears damaged
Consider professional service if:
- DIY fixes don’t resolve the issue after 2-3 attempts
- The door is more than 15 years old (may need replacement)
- You’re uncomfortable working with mechanical components
Professional garage door technicians typically charge $75-$150 for service calls, with repairs ranging from $100-$400 depending on complexity. While this may seem expensive, it’s far cheaper than replacing an entire door system ($800-$2,500) due to improper DIY repairs.
Preventive Maintenance Tips
Prevention is always better than cure. Follow these maintenance practices to avoid future problems:
- Monthly: Test safety sensors and auto-reverse feature
- Quarterly: Lubricate moving parts and inspect hardware
- Annually: Have a professional inspection and tune-up
- Seasonally: Check weather stripping and balance
A well-maintained garage door opener lasts 10-15 years, while neglected systems may fail within 5-7 years.
FAQ Section
Q: Can I adjust the force settings on my garage door opener?
A: Yes, most modern openers have force adjustment controls. However, be cautious—setting the force too high can defeat the safety features and create hazards. Always test the auto-reverse function after adjustments by placing a 2×4 piece of wood on the ground where the door closes. The door should reverse upon contact.
Q: Why does my garage door work fine in warm weather but stops in cold temperatures?
A: Cold weather causes metal components to contract and lubricants to thicken, increasing resistance. The opener may interpret this increased resistance as an obstruction. Solution: Use cold-weather lubricants, ensure proper insulation in your garage, and consider adjusting the force settings slightly higher during winter months (then readjust in spring).
Q: How do I know if my garage door springs need replacement?
A: Signs include: visible gaps in torsion springs, the door feels unusually heavy when lifted manually, loud banging noises during operation, or the door doesn’t stay open when released halfway. Extension springs may show stretching or wear marks. Since spring replacement is dangerous, always hire a licensed technician.
Q: Will resetting my garage door opener erase all my remote codes?
A: It depends on the model. Some openers retain programmed remotes after a power reset, while others require reprogramming. Consult your owner’s manual for specific instructions. Generally, you’ll need to press the “Learn” button on the motor unit and then press each remote button to reprogram them.
Q: Is it normal for my garage door to make noise when opening?
A: Some noise is normal, especially with chain-drive openers. However, excessive grinding, squeaking, or rattling indicates problems. Quiet operation suggests proper lubrication and alignment. If noise increases suddenly, investigate immediately—it could signal impending component failure.
Q: Can extreme weather affect my garage door opener’s performance?
A: Absolutely. Heat can cause metal expansion and electronic component stress, while cold thickens lubricants and contracts materials. Humidity can lead to corrosion and electrical issues. Install your opener in a climate-controlled area if possible, and perform seasonal maintenance adjustments.
Conclusion
Dealing with a garage door opener goes up a little then stops doesn’t have to be a nightmare. By understanding the common causes—sensor misalignment, limit switch issues, worn components, or obstructions—you can systematically diagnose and fix most problems yourself.
Remember: start with simple solutions like cleaning sensors and adjusting limits before moving to complex repairs. Regular maintenance prevents 80% of common garage door issues, saving you time, money, and frustration.
Did this guide help you fix your garage door? Share it with friends and neighbors who might be facing similar issues! Drop a comment below with your experience or questions—we love hearing success stories and helping fellow homeowners tackle their DIY projects.
Stay safe, stay informed, and keep that garage door rolling smoothly!
Leave a Reply