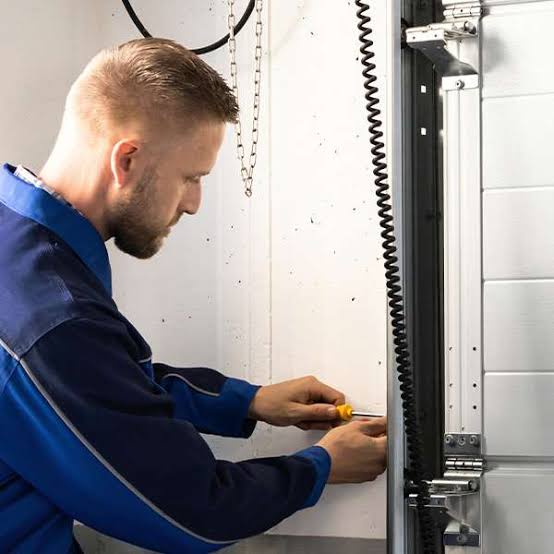
There is nothing more frustrating than rushing out the door in the morning, hitting the remote, and watching your garage door lift just a few inches before grinding to a halt. You are not alone; this is one of the most common household maintenance issues homeowners face. If your garage door only opens a little and then stops, it is usually a sign of a specific mechanical or electrical imbalance that can often be fixed without calling a technician immediately.
In this guide, we will walk you through the exact steps to diagnose and fix this problem safely. We will cover everything from simple sensor checks to tension adjustments, ensuring you understand why it is happening and how to stop it from recurring.
Why Does My Garage Door Stop After Opening Slightly?
Before grabbing your tools, it is crucial to understand the root cause. Modern garage doors are sophisticated machines with multiple safety features designed to prevent injury and property damage. When the system detects resistance, misalignment, or an error, it defaults to a “stop” or “reverse” mode.
According to industry data, nearly 60% of garage door service calls are related to sensor misalignment or track obstructions rather than broken springs. Understanding this helps you prioritize your troubleshooting steps. The door’s opener is essentially asking: “Is it safe to continue?” If the answer is no, it stops.
Common culprits include:
- Obstructed Safety Sensors: The invisible beam between the sensors is blocked.
- Track Misalignment: The rollers are hitting a bump or bend in the metal track.
- Limit Switch Errors: The opener “thinks” the door is already open.
- Broken Springs or Cables: The motor cannot handle the weight of the door.
Check and Clean the Safety Sensors First
The most frequent reason a garage door only opens a little and then stops is a issue with the photo-eye sensors. These are the small units located near the bottom of the door tracks on both sides. They emit an infrared beam; if this beam is interrupted, the door will stop or reverse to prevent crushing an object (or person).
Step-by-Step Sensor Check:
- Inspect the Lights: Look at the LED lights on each sensor. Typically, one should have a steady green light (power) and the other a steady amber or red light (beam alignment). If either is blinking or off, there is a problem.
- Clean the Lenses: Use a soft, dry microfiber cloth to wipe the lenses. Dust, spiderwebs, or dirt can block the signal.
- Check Alignment: Ensure both sensors are pointing directly at each other. Even a slight bump from a lawn mower or stored box can knock them out of line. Loosen the wing nut, adjust the bracket until the lights stabilize, and tighten it back.
- Remove Obstructions: Clear any boxes, bikes, or debris sitting between the sensors.
If the lights are steady but the door still stops, try disconnecting the sensors temporarily. If the door operates normally without them (note: this is for testing only, do not leave them disconnected), the issue is definitely with the sensor wiring or unit itself.
Inspect the Tracks and Rollers for Obstructions
If your sensors are clean and aligned, the next likely suspect is the physical path of the door. The garage door travels along metal tracks, and if these tracks are bent, dirty, or misaligned, the rollers will jam, causing the motor to stop to prevent burnout.
What to Look For:
- Debris in the Track: Leaves, twigs, or hardened grease can create a barrier. Use a stiff brush and a vacuum to clean the inside of the tracks thoroughly.
- Bent Tracks: Look closely at the metal rails. Even a small dent can derail a roller. If you see a bend, you may need a rubber mallet to gently tap it back into place. Caution: Do not hit the track too hard, as this can worsen the alignment.
- Loose Hardware: Check the bolts and brackets holding the tracks to the wall and ceiling. Vibration from daily use can loosen these over time. Tighten any loose screws with a socket wrench.
For a deeper understanding of how these mechanical systems interact, you can refer to the general principles of door mechanics which outlines the fundamental physics of hinged and sliding barriers.
Adjust the Travel Limit Settings
Modern garage door openers have “travel limit” settings that tell the motor how far to go up and down. If these settings are incorrect, the opener may think the door has reached its fully open position when it has only moved a few inches. This is common after power outages or if someone has manually adjusted the screws on the motor unit.
How to Reset Travel Limits:
- Locate the Adjustment Screels: On most opener units (like LiftMaster or Chamberlain), there are two screws or buttons labeled “Up” and “Down” or “Travel.”
- Identify the Direction: Determine which screw controls the upward travel.
- Make Small Adjustments: Turn the screw in small increments (usually clockwise to increase travel distance). Test the door after each quarter-turn.
- Test the Door: Run the door through a full cycle. It should open completely and close firmly against the ground without reversing.
Note: Consult your specific opener’s manual for exact instructions, as mechanisms vary by brand.
Evaluate the Spring Tension and Balance
This is the most critical and dangerous part of the diagnosis. Garage doors are heavy, and the springs do most of the lifting work. The motor’s job is primarily to guide the door. If the springs are broken or lost tension, the motor will struggle, overheat, and stop.
The Balance Test:
- Disconnect the Opener: Pull the red emergency release cord to disconnect the door from the motor.
- Lift Manually: Try to lift the door halfway up.
- Observe:
- Balanced: The door stays in place when you let go.
- Unbalanced: The door falls down or shoots up.
If the door is unbalanced, do not attempt to fix the springs yourself. Torsion springs are under extreme tension and can cause severe injury or death if handled incorrectly. This is a job for a certified professional. However, identifying this issue saves you time by preventing you from wasting hours troubleshooting the electronics when the problem is mechanical.
Lubricate Moving Parts for Smooth Operation
Friction is the enemy of your garage door. Over time, lubricant dries out, causing metal-on-metal contact. This increased resistance can trigger the opener’s safety force settings, causing it to stop prematurely.
Recommended Lubrication Routine:
- Frequency: Every 6 months.
- Products: Use a silicone-based spray or lithium grease. Avoid WD-40, as it is a degreaser and will attract more dust in the long run.
- Areas to Lubricate:
- Roller bearings (where the wheel meets the bracket).
- Hinges between door sections.
- Springs (lightly coat them).
- Lock bar (if present).
Apply a small amount to each point, then operate the door up and down twice to distribute the lubricant evenly. Wipe away any excess to prevent dripping.
When to Call a Professional Technician
While many issues causing your garage door only opens a little and then stops can be DIY-fixed, some situations require expert intervention. Knowing when to step back ensures your safety and protects your warranty.
| Issue | DIY Friendly? | Risk Level |
|---|---|---|
| Sensor Cleaning/Alignment | Yes | Low |
| Track Cleaning | Yes | Low |
| Lubrication | Yes | Low |
| Limit Switch Adjustment | Yes | Medium |
| Broken Springs/Cables | No | High |
| Motor Gear Failure | No | Medium |
| Electrical Wiring Issues | No | High |
If you hear loud banging noises, see snapped cables, or notice the door falling rapidly, stop using it immediately and call a licensed garage door repair service. Most professionals offer free diagnostics and can provide a quote before starting work.
FAQ: Common Questions About Garage Door Stopping
1. Why does my garage door stop and reverse immediately after touching the floor?
This is usually a force setting issue. The opener thinks it hit an obstacle because the down-force is set too high, or the safety sensors are misaligned. Check the sensors first, then adjust the “down force” screw on the motor unit slightly counter-clockwise.
2. Can a cold weather affect my garage door operation?
Yes. In freezing temperatures, metal tracks contract, and lubricants can thicken or freeze. This increases friction, causing the door to stop. Using a cold-weather silicone lubricant can help mitigate this issue.
3. My garage door opens a little and makes a humming noise. What does this mean?
A humming noise without movement often indicates a stripped gear in the motor unit or a seized bearing. The motor is running, but it isn’t transferring power to the chain or screw drive. This typically requires a motor repair or replacement.
4. How often should I maintain my garage door to prevent stopping issues?
Perform a visual inspection and lubrication every six months. Test the safety sensors monthly by placing an object in the beam’s path while closing the door; it should reverse immediately.
5. Is it safe to use my garage door if it only opens partially?
It is not recommended. A partially functioning door can be unstable and may fall unexpectedly. Additionally, it compromises your home’s security and insulation. Fix the issue or keep the door closed until repaired.
Conclusion
Dealing with a garage door only opens a little and then stops is stressful, but it is rarely a catastrophic failure. By systematically checking your safety sensors, cleaning your tracks, adjusting your limit switches, and lubricating moving parts, you can resolve the majority of these issues yourself. Remember, safety is paramount—never attempt to repair broken springs or high-tension cables on your own.
Regular maintenance is the key to longevity. A well-maintained garage door not only operates smoothly but also adds value and security to your home. If you found this guide helpful, please share it with your neighbors or on social media to help others troubleshoot their garage door woes. Stay safe, and keep your door moving!
Leave a Reply