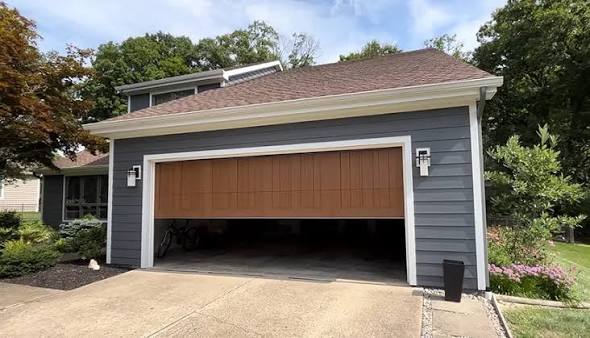
Dealing with a malfunctioning garage door is incredibly frustrating, especially when it refuses to stay closed to protect your home. If your garage door goes all the way down then back up, you are not alone, and the good news is that this common issue is usually a quick and easy fix.
Why Does the Garage Door Go All The Way Down Then Back Up?
Before we grab our tools, it is important to understand why this happens. Your garage door opener is designed with a built-in safety mechanism. If it detects even the slightest resistance or obstruction, it will automatically reverse to prevent damage or injury.
According to the Consumer Product Safety Commission (CPSC), these auto-reverse features prevent thousands of injuries annually. Modern automatic openers are required to have these reverse mechanisms, a safety standard that evolved significantly alongside the development of the modern garage door.
However, sometimes the door reverses even when there is no actual obstacle. This usually boils down to three main culprits:
- Misaligned or dirty photo-eye sensors.
- Incorrect travel limit settings.
- Excessive force settings or track friction.
As certified technicians often point out, “Ninety percent of reversing issues stem from dirty sensors or slightly misaligned limit switches rather than a broken motor.”
How to Troubleshoot and Fix the Reversing Garage Door
Let’s walk through the exact steps to get your door staying firmly on the ground. Please ensure the area is clear before starting.
Step 1: Check and Clean the Safety Sensors
The photo-eye sensors are located near the bottom of the door tracks. They shoot an invisible infrared beam across the door’s path. If this beam is broken, the door reverses.
- Check the height: Ensure both sensors are mounted exactly 6 inches above the floor.
- Inspect the LED lights: Look at the sensor lenses. One should have a steady green light (the sender), and the other should have a steady red or amber light (the receiver). If the receiver light is blinking, they are misaligned.
- Clean the lenses: Use a soft, lint-free microfiber cloth to gently wipe away dust, spider webs, or dirt.
- Realign the brackets: Loosen the wing nut slightly and adjust the sensor until the blinking light turns solid. Tighten the nut back up.
Step 2: Adjust the Travel Limit Switches
The travel limit switch tells the motor exactly how far to move the door down before it stops. If it is set too far, the door hits the floor, thinks it hit an obstacle, and bounces back up.
- Locate the limit dials: Find the adjustment screws on the back or side of your garage door motor head. They are usually labeled “Up,” “Down,” and “Force.”
- Adjust the “Down” limit: Using a flathead screwdriver, turn the “Down” limit screw.
- Use the 1/4 rule: Turn the screw exactly one-quarter (1/4) of a turn in the direction indicated to decrease the travel distance.
- Test the door: Press the wall button. If it still hits the ground and reverses, adjust it another 1/4 turn. Repeat until it stops perfectly flush with the floor.
Step 3: Inspect the Tracks and Rollers for Obstructions
If your tracks are dirty or bent, the door experiences physical resistance. The motor senses this friction and triggers the safety reverse.
- Clear the tracks: Wipe down the metal tracks with a damp cloth to remove hardened grease and debris.
- Check for dents: Look for any pinch points. If you find a small dent, you can sometimes gently tap it out with a rubber mallet.
- Lubricate properly: Spray a silicone-based lubricant on the rollers and hinges. Never use WD-40, as it attracts more dirt and dries out the moving parts.
Step 4: Test the Force Settings
If the limit switches are perfect but the door still reverses, the closing force might be set too low.
- Locate the force dial: Find the “Down Force” or “Close Force” adjustment screw on the motor unit.
- Make a small adjustment: Turn the screw slightly (about 1/8 of a turn) to increase the closing force.
- Perform the safety test: Place a 2×4 piece of wood flat on the ground under the center of the door. Close the door. It must immediately reverse when it touches the wood. If it doesn’t reverse, the force is too high, which is a severe safety hazard. Adjust it back down immediately.
DIY vs. Professional Garage Door Repair: Which Should You Choose?
While many reversing issues are easy DIY fixes, some problems require a professional. Here is a quick comparison to help you decide.
| Feature | DIY Troubleshooting | Hiring a Professional |
|---|---|---|
| Best For | Dirty sensors, limit adjustments, basic lubrication. | Broken springs, snapped cables, motor replacement. |
| Cost | Free to $15 (for cleaning supplies/lubricant). | $150 – $350 on average for service and parts. |
| Time Required | 15 to 30 minutes. | 1 to 2 hours (including scheduling). |
| Safety Risk | Very low (working with plastic sensors and screws). | High (torsion springs are under extreme tension). |
Pro Tip: If you hear a loud bang or notice a gap in the spring above the door, do not attempt a DIY fix. Torsion springs store massive amounts of kinetic energy and can cause severe injury if handled incorrectly. Call a pro immediately.
Frequently Asked Questions (FAQ)
1. Why does my garage door close halfway and then immediately open?
This usually indicates an issue with the travel limit switch or a physical obstruction in the tracks. The motor is programmed to stop at a certain point, but if the settings are off or the tracks are dirty, the door meets resistance and triggers the auto-reverse safety feature.
2. Can sunlight interfere with my garage door sensors?
Yes, absolutely! Direct, intense sunlight hitting the receiver sensor can blind it, mimicking a broken infrared beam. If this happens in the late afternoon, try swapping the sender and receiver sensors (put the green-light sensor on the side facing the sun) or build a small cardboard shield over the sensor.
3. How do I know if my garage door limit switch is broken?
If you adjust the limit switch dial multiple times and the door’s behavior does not change at all, the internal gear and sprocket assembly might be stripped. In this case, the limit switch mechanism itself is faulty, and you will likely need to replace the opener’s logic board or the entire motor unit.
4. How much does it cost to fix a garage door that won’t stay closed?
If the issue is simply misaligned sensors or limit switches, it will cost you nothing to fix it yourself. If you hire a professional to diagnose and adjust the limits or replace a faulty sensor pair, expect to pay a standard service fee ranging from $100 to $200.
Conclusion
When your garage door goes all the way down then back up, it is your home’s safety mechanism doing its job—perhaps a little too enthusiastically. By cleaning your photo-eye sensors, adjusting the travel limit switches in small increments, and keeping your tracks lubricated, you can solve this issue in under 30 minutes.
Regular maintenance not only keeps your door functioning smoothly but also ensures your family’s safety year-round.
Did this guide help you fix your garage door today? Please share this article on your social media or send it to a friend who might be struggling with a stubborn garage door!
Leave a Reply