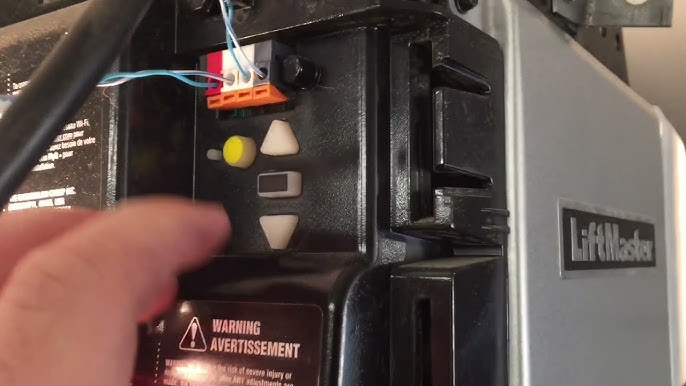
Have you ever stood in your driveway, remote in hand, watching your garage door refuse to budge? It is a frustrating scenario that many homeowners face, often leading to the immediate question: Does a Liftmaster garage door opener have a reset button? The short answer is nuanced—while most models do not have a single, labeled “Reset” button like a computer router, they do have specific procedures to clear memory and restore factory settings. Understanding this distinction is crucial for getting your system back online without calling a technician.
In this guide, we will demystify the resetting process for various Liftmaster models. We will walk you through the exact steps, explain why a reset might be necessary, and provide expert tips to ensure your garage door operates smoothly and securely.
Understanding the “Reset” Concept in Liftmaster Openers
Before diving into the buttons and levers, it is essential to understand what “resetting” actually means in the context of a garage door opener. Unlike a smartphone that can be wiped clean with a single command, a garage door opener’s memory is divided into two main categories: remote control codes and travel limits.
When users ask about a reset button, they are usually trying to achieve one of two goals:
- Clearing Old Remotes: Removing lost or stolen remotes from the system’s memory to enhance security.
- Recalibrating Travel Limits: Fixing issues where the door doesn’t open all the way or reverses before hitting the floor.
Liftmaster, a brand under Chamberlain Group, designs its openers with safety and security in mind. Therefore, the “reset” function is often integrated into the Learn Button or the limit adjustment screws, rather than a dedicated reset switch. This design prevents accidental resets that could leave your home vulnerable or your door misaligned.
Why You Might Need to Reset Your Opener
There are several common scenarios where performing a reset is the best course of action:
- Lost or Stolen Remotes: If you lose a remote, you should clear all codes to prevent unauthorized access.
- Interference Issues: New electronic devices in the neighborhood may cause signal interference, requiring a re-sync.
- Power Surges: After a significant power outage or surge, the opener’s logic board may need a refresh.
- Selling Your Home: For security reasons, always reset the opener before handing over the keys to new owners.
According to industry standards, maintaining the security of your garage door is as important as locking your front door. A properly reset opener ensures that only authorized users can access your property.
How to Reset Different Liftmaster Models
Since Liftmaster produces a wide range of models, the reset procedure varies slightly. Below, we break down the process based on the type of Learn Button your unit features.
Step-by-Step: Resetting via the Learn Button
The Learn Button is the heart of the resetting process. It is typically located on the back panel of the motor unit, near the antenna wire. The color of the button indicates the type of security code your opener uses.
| Learn Button Color | Security Type | Reset Procedure |
|---|---|---|
| Yellow | Security+ 1.0 | Press and hold the Learn button for 6–10 seconds until the indicator light turns off. |
| Purple | Security+ 2.0 | Press and hold the Learn button for 6–10 seconds until the indicator light turns off. |
| Red/Orange | Security+ | Press and hold the Learn button for 6–10 seconds until the indicator light turns off. |
| Green | Older Models | These models may not support a full memory wipe. Consult your specific manual. |
Detailed Steps:
- Locate the Motor Unit: Use a sturdy ladder to access the motor unit mounted on your garage ceiling.
- Identify the Learn Button: Look for a small button, often accompanied by an LED light. It may be labeled “Learn,” “Smart,” or simply have a colored icon.
- Press and Hold: Using a pen or a small tool, press and hold the Learn button.
- Wait for the Light to Extinguish: Keep holding the button for approximately 6 to 10 seconds. The LED indicator light will turn off. This signifies that all previously programmed remotes and keypads have been erased from the memory.
- Release the Button: Once the light is off, release the button. Your opener is now reset to its factory state regarding remote access.
Note: After this reset, you must reprogram all your remotes, wireless keypads, and vehicle HomeLink systems. They will no longer work until they are re-synced.
Resetting Travel Limits (If the Door Doesn’t Move Correctly)
If your issue is mechanical—such as the door stopping halfway or reversing prematurely—a memory reset won’t help. Instead, you need to adjust the travel limits.
- Find the Limit Screws: On the side of the motor unit, look for two small plastic screws. One is usually marked with an arrow pointing up (Open Limit) and the other down (Close Limit).
- Adjust the Up Limit: Turn the screw in small increments (quarter-turns) to increase or decrease how high the door opens.
- Adjust the Down Limit: Similarly, adjust the down limit screw to ensure the door closes fully and seals against the weather stripping.
- Test the Door: Use the wall control button to test the adjustments. Make small changes and test repeatedly to avoid damaging the door or the opener.
For more detailed technical specifications on garage door mechanisms, you can refer to general engineering principles outlined on Wikipedia.
Troubleshooting Common Post-Reset Issues
After performing a reset, you might encounter a few hiccups. Here is how to address them:
- Remote Not Working: Ensure you are standing within 10–15 feet of the motor unit when programming. Replace the battery in the remote if it is old.
- Keypad Unresponsive: After a full memory wipe, the keypad must be reprogrammed. Follow the instructions in your keypad’s manual, which usually involves entering a new PIN and pressing the Learn button.
- Door Reverses Immediately: Check the safety sensors. If the beams are misaligned or blocked by dirt, the door will reverse as a safety precaution. Clean the lenses and ensure they are facing each other directly.
Expert Tips for Maintaining Your Liftmaster Opener
To minimize the need for frequent resets, follow these maintenance best practices:
- Regular Lubrication: Apply a silicone-based lubricant to the rollers, hinges, and springs every six months. Avoid WD-40, as it can attract dust and gum up the works.
- Inspect the Springs: Torsion springs are under high tension. If you notice gaps or wear, call a professional. Do not attempt to repair them yourself.
- Check the Batteries: Replace remote batteries annually to ensure consistent signal strength. Weak batteries can cause intermittent connectivity issues that mimic a need for resetting.
- Keep the Area Clear: Ensure the path of the garage door is free of obstacles. Debris can trigger the safety reversal mechanism, causing confusion about whether the opener is malfunctioning.
FAQ Section
1. Does a Liftmaster garage door opener have a physical reset button?
Most Liftmaster openers do not have a dedicated button labeled “Reset.” Instead, the Learn Button serves this function. By holding the Learn button for 6–10 seconds, you erase all stored remote codes, effectively resetting the system’s access memory.
2. How do I know if my Liftmaster opener needs a reset?
You should consider resetting your opener if you have lost a remote, suspect unauthorized access, or are experiencing persistent signal interference that reprogramming individual remotes does not fix. Additionally, if the opener behaves erratically after a power surge, a reset may clear any temporary logic errors.
3. Will resetting my Liftmaster opener delete my Wi-Fi settings?
If you have a MyQ-enabled Liftmaster opener, a standard memory reset (holding the Learn button) typically does not delete your Wi-Fi credentials. However, it will remove all paired remotes and keypads. To reset Wi-Fi settings specifically, you usually need to use the MyQ app or perform a separate network reset procedure outlined in your specific model’s manual.
4. Can I reset just one remote without clearing all others?
No, the standard reset procedure clears all remotes and keypads from the memory. If you want to remove just one lost remote, you must reset the entire system and then reprogram all the remaining valid remotes. This is a security feature designed to ensure that no unauthorized devices remain paired.
5. What should I do if the Learn button light doesn’t turn off?
If the LED light stays on despite holding the button for 10 seconds, there may be an issue with the logic board or the button itself. Try unplugging the opener for 5 minutes to perform a hard power cycle. If the issue persists, consult a certified Liftmaster technician, as the internal component may need replacement.
Conclusion
So, does a Liftmaster garage door opener have a reset button? While it may not be labeled as such, the Learn Button acts as your gateway to resetting the system’s memory. By holding this button for 6–10 seconds, you can clear all paired devices and start fresh, ensuring your garage remains secure and functional.
Remember, resetting is a powerful tool for troubleshooting security concerns and interference issues. However, it requires you to reprogram all your access devices afterward. By following the steps outlined above and maintaining your system regularly, you can enjoy peace of mind and smooth operation for years to come.
If you found this guide helpful, please share it with your neighbors or on social media. Helping others understand their garage door systems can save them time, money, and unnecessary stress!
Leave a Reply