Introduction
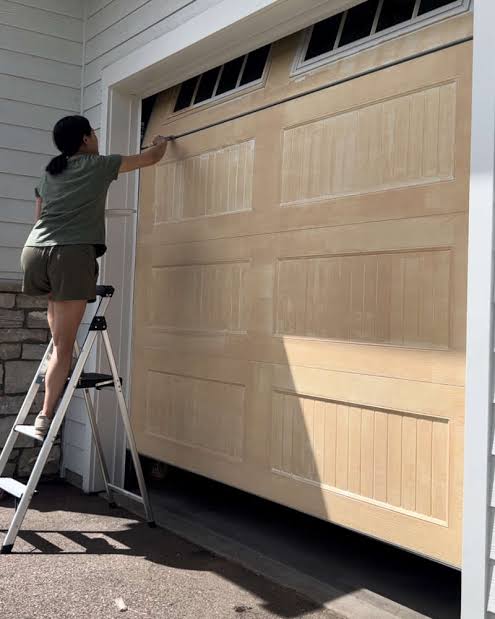
Standing in front of your faded, chipped, or rusted garage door can feel overwhelming. You want that fresh, curb-appeal boost, but you’re stuck wondering about the prep work. Specifically, do you need to prime a garage door before painting? The short answer is yes, in most cases, skipping this step is a recipe for peeling paint and wasted effort. In this guide, we will break down exactly when priming is non-negotiable, how to choose the right product, and the steps to ensure your paint job lasts for years.
Why Priming Is Not Just an Optional Step
Many homeowners view priming as an unnecessary extra step that adds time and cost to their weekend project. However, professional painters and coating experts agree that primer serves a critical function: it creates a bond between the surface and the topcoat.
Without primer, paint may not adhere properly to smooth metal or porous wood. This leads to premature failure, such as blistering, cracking, or flaking, often within the first year. According to industry standards, primer also seals the surface, preventing stains from bleeding through and providing a uniform base color that enhances the vibrancy of your final paint choice.
The Science Behind Adhesion
Paint needs a “tooth” or a slightly rough surface to grip onto. Bare metal is often too smooth, while old paint can be glossy and slick. Primer contains resins that penetrate these surfaces, creating a stable foundation. For metal doors, specialized primers also contain anti-corrosive agents that stop rust from spreading underneath the new paint layer.
When Is Priming Absolutely Necessary?
Not every garage door situation is identical. However, there are specific scenarios where priming is mandatory for a successful outcome.
1. Painting Over Bare Metal
If your garage door is made of steel or aluminum and has exposed bare metal due to scratches or sanding, you must use a primer. Bare metal oxidizes quickly when exposed to moisture and air. A high-quality metal primer acts as a barrier, preventing rust formation.
2. Covering Rust Spots
Even if you have scraped away visible rust, microscopic particles often remain. A rust-inhibitive primer neutralizes these particles and seals the area. Skipping this step will cause the rust to bubble up through your new paint job within months.
3. Switching Paint Types
If your existing door was painted with oil-based paint and you want to switch to latex (water-based) paint, primer is essential. Latex paint does not adhere well to oily surfaces. A bonding primer bridges the gap between the two different chemical compositions.
4. Painting Raw Wood
Wooden garage doors are highly porous. If left unprimed, they will absorb the paint unevenly, leading to a blotchy finish. Primer seals the wood grain, ensuring an even coat and reducing the amount of topcoat needed.
When Can You Skip the Primer?
There are rare instances where you might skip priming, but caution is advised.
- Previously Primed and Painted Surfaces: If your door was recently painted with a high-quality acrylic latex paint and is in good condition (no chipping or glossiness), you may be able to apply a new coat directly after cleaning and light sanding.
- Self-Priming Paints: Some premium exterior paints claim to be “self-priming.” While convenient, these are best suited for minor touch-ups or surfaces that are already in excellent condition. For a full restoration, a dedicated primer is still recommended for maximum durability.
How to Choose the Right Primer for Your Garage Door
Selecting the wrong primer can be just as detrimental as skipping it entirely. Here is a quick comparison to help you decide.
| Surface Type | Recommended Primer Type | Key Benefit |
|---|---|---|
| Steel/Metal | Oil-based or Acrylic Metal Primer | Rust inhibition and strong adhesion |
| Aluminum | Acrylic Latex Bonding Primer | Flexibility and corrosion resistance |
| Wood | Oil-based or Stain-Blocking Primer | Seals grain and prevents tannin bleed |
| Fiberglass | Acrylic Latex Primer | Lightweight and flexible bonding |
Pro Tip: Always check the manufacturer’s recommendations on your paint can. Many paint brands offer specific primers designed to work synergistically with their topcoats.
Step-by-Step Guide: How to Prime Your Garage Door Properly
Follow these detailed steps to ensure a professional-grade finish.
Step 1: Clean the Surface Thoroughly
Dirt, grease, and grime are the enemies of adhesion. Use a mixture of warm water and mild detergent. For greasy areas, a degreaser may be necessary. Rinse thoroughly and allow the door to dry completely. This process usually takes 2–4 hours depending on humidity and temperature.
Step 2: Repair and Sand
Inspect the door for dents, cracks, or rust. Use auto-body filler for dents and sandpaper (120–150 grit) to smooth out rough areas. For metal doors, sand any rust spots until you reach bare, shiny metal. Wipe away all dust with a tack cloth.
Step 3: Mask Off Areas
Use painter’s tape to protect windows, handles, and weather stripping. Lay down drop cloths to protect your driveway or sidewalk from drips.
Step 4: Apply the Primer
Stir the primer thoroughly. Using a high-quality synthetic brush or a foam roller, apply a thin, even coat. Start from the top and work your way down to catch any drips. Ensure you cover all edges and corners.
- Temperature Check: Apply primer when the temperature is between 50°F and 90°F (10°C–32°C). Avoid direct sunlight if possible, as it can cause the primer to dry too quickly and crack.
Step 5: Allow Proper Drying Time
Refer to the product label for drying times. Typically, oil-based primers require 24 hours to cure, while latex primers may be ready in 4–6 hours. Do not rush this step. Painting over wet or tacky primer will ruin the finish.
Step 6: Light Sanding (Optional but Recommended)
Once the primer is fully dry, lightly sand the surface with fine-grit sandpaper (220 grit). This removes any raised grain or imperfections and provides a smoother base for the topcoat. Wipe away dust again.
Common Mistakes to Avoid
Even with the best intentions, DIYers often make these errors:
- Ignoring Weather Conditions: Painting in high humidity or extreme heat affects drying and curing.
- Applying Too Thickly: Thick coats of primer take longer to dry and are prone to sagging. Two thin coats are better than one thick one.
- Skipping the Clean: No matter how good your primer is, it won’t stick to dirt.
- Using Interior Primer: Always use exterior-grade primer designed to withstand UV rays and temperature fluctuations.
For more detailed information on paint chemistry and surface preparation, you can refer to general guidelines on Wikipedia’s page on Paint.
FAQ Section
1. Can I use regular wall primer on my garage door?
No, regular interior wall primer is not designed for exterior conditions. It lacks the UV resistance and flexibility needed to handle temperature changes and weather exposure. Always use an exterior-grade primer.
2. How long should I wait to paint after priming?
This depends on the type of primer. Latex primers typically dry to the touch in 1 hour and can be recoated in 4–6 hours. Oil-based primers may need 24 hours. Always check the specific product instructions for “recoat time.”
3. Do I need to prime a fiberglass garage door?
Fiberglass is non-porous and smooth, making adhesion difficult. While some self-priming paints work, using a bonding primer specifically designed for slick surfaces ensures the paint will not peel or chip over time.
4. What happens if I don’t prime a rusty metal door?
If you paint over rust without priming, the rust will continue to spread underneath the paint. This causes bubbling and flaking, forcing you to redo the entire job much sooner than expected.
5. Can I tint my primer?
Yes, many stores can tint your primer to match your topcoat color. This is especially helpful when using dark or vibrant colors, as it reduces the number of topcoats needed for full coverage.
Conclusion
So, do you need to prime a garage door before painting? For the vast majority of projects, the answer is a resounding yes. Priming ensures adhesion, prevents rust, and extends the life of your paint job. While it adds a few hours to your project, it saves you from costly repairs and repainting in the near future.
By choosing the right primer, preparing the surface correctly, and allowing adequate drying time, you can achieve a showroom-quality finish that boosts your home’s curb appeal. Don’t cut corners—your garage door is the largest moving part of your home’s exterior, and it deserves the best protection.
If you found this guide helpful, please share it with your friends on social media who might be tackling their own DIY painting projects!
Leave a Reply