Introduction
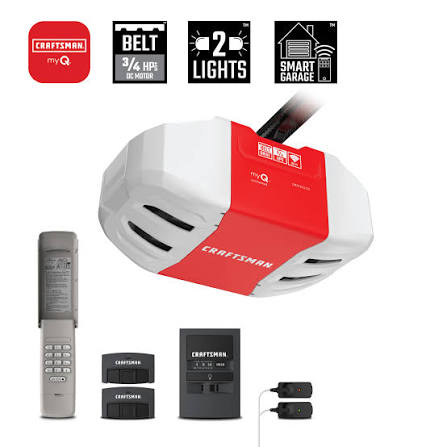
Is your current garage door motor struggling to lift your heavy, insulated double-door? Do you dread the loud grinding noises every time you come home late at night? You are not alone; many homeowners face these exact frustrations when their opener lacks the necessary torque. This is where the Craftsman Garage Door Opener 3/4 HP Chain Drive 53990 steps in as a robust, reliable solution designed specifically for heavier residential doors.
In this guide, we will break down everything you need to know about this specific model. From its raw power capabilities to step-by-step maintenance tips, we aim to help you decide if this workhorse is the right fit for your home. Let’s dive into the details that matter most to your safety and convenience.
Why Choose a 3/4 HP Chain Drive Model?
When selecting a garage door opener, horsepower (HP) is the primary indicator of lifting capacity. While 1/2 HP models are standard for single, lightweight doors, they often fall short with modern, insulated double-car doors.
The Craftsman 53990 utilizes a 3/4 HP motor, providing approximately 50% more lifting power than standard units. This extra torque ensures smooth operation even in extreme weather conditions where metal tracks may expand or contract.
Chain Drive vs. Belt Drive: What’s the Difference?
Many buyers hesitate between chain and belt drives. Here is a quick comparison to help you understand why the chain drive might be your best bet for durability:
| Feature | Chain Drive (Craftsman 53990) | Belt Drive |
|---|---|---|
| Durability | Extremely High | Moderate |
| Noise Level | Moderate (Louder) | Quiet |
| Maintenance | Low (Occasional Lubrication) | Low |
| Cost | Affordable | More Expensive |
| Best For | Heavy Doors, Detached Garages | Attached Garages, Light Doors |
If your garage is detached from your living space, the noise difference is negligible. However, the chain drive mechanism offers superior longevity and resistance to wear and tear, making it a favorite among contractors and DIY enthusiasts who prioritize long-term value over silence.
Key Features of the Craftsman 53990
Understanding the technical specifications helps you maximize the unit’s potential. The Model 53990 is not just a motor; it is a system engineered for safety and ease of use.
1. Heavy-Duty Steel Chain
The core of this unit is its industrial-grade steel chain. Unlike nylon belts that can stretch over time, the steel chain maintains tension, ensuring consistent performance for years. It is designed to handle doors weighing up to 500 lbs comfortably.
2. Integrated Safety Sensors
Safety is paramount. This model comes with photo-eye sensors that detect obstacles in the door’s path. If the beam is interrupted while the door is closing, the system automatically reverses direction. This feature is crucial for protecting children, pets, and vehicles.
3. Battery Backup Compatibility
While the standard 53990 model operates on AC power, many versions in this series are compatible with battery backup systems. This ensures you can still open your garage during a power outage, a critical feature for homes in areas prone to storms or grid instability.
4. Smart Home Integration
Modern iterations of the Craftsman lineup often support Wi-Fi connectivity. This allows you to control your garage door via smartphone apps, receive alerts if the door is left open, and integrate with voice assistants like Alexa or Google Assistant.
Step-by-Step Installation Guide
Installing a garage door opener can seem daunting, but with the right tools and preparation, it is a manageable weekend project. Always prioritize safety and consider hiring a professional if you are unsure about electrical wiring.
Tools Required:
- Power drill with bits
- Wrench set (adjustable and socket)
- Stepladder
- Level
- Pliers
- Helper (highly recommended)
Step 1: Assemble the Rail
Lay out the rail sections on the floor. Connect them using the provided bolts and nuts. Ensure the joints are tight but do not overtighten, as this can strip the threads. Attach the trolley and the chain according to the manual’s diagram.
Step 2: Install the Header Bracket
Locate the center of your garage door opening. Measure the height required for the header bracket (usually specified in the manual, often 2-4 inches above the door). Use a level to ensure it is perfectly horizontal before securing it with lag screws into the wall studs.
Step 3: Mount the Motor Unit
With the help of a partner, lift the motor unit and attach it to the ceiling joists using the mounting brackets. Crucial: Ensure the brackets are secured into solid wood joists, not just drywall or insulation. Use a level to check that the motor is aligned with the header bracket.
Step 4: Connect the Rail and Chain
Attach the front of the rail to the header bracket. Then, connect the rear of the rail to the motor unit. Thread the chain through the sprocket and attach it to the trolley. Adjust the tension so there is about 1/2 inch of slack in the middle of the chain.
Step 5: Wiring and Sensors
Connect the wall control panel and the safety sensors. Run the wires along the wall and secure them with clips. Ensure the sensors are aligned directly facing each other, no more than 6 inches above the floor. A solid LED light on both sensors indicates proper alignment.
Step 6: Programming and Testing
Plug in the unit. Program the remote controls and keypad following the instructions on the motor’s back panel. Test the door’s travel limits. Adjust the “Up” and “Down” limit screws until the door opens fully and closes snugly against the ground without excessive force.
Pro Tip: Always test the safety reversal system after installation. Place a 2×4 piece of wood on the floor under the door. When the door closes, it should immediately reverse upon touching the wood. If it does not, adjust the force settings immediately.
Maintenance Tips for Longevity
Even the most robust machines require care. Regular maintenance can extend the life of your Craftsman Garage Door Opener 3/4 HP Chain Drive 53990 by several years.
- Lubricate the Chain: Every six months, apply a high-quality garage door lubricant or white lithium grease to the chain. Avoid WD-40 as it attracts dust and dries out quickly.
- Inspect the Rollers: Check the rollers on the door itself. If they are cracked or chipped, replace them to reduce strain on the motor.
- Tighten Hardware: Vibration from the chain drive can loosen bolts over time. Once a year, go over all mounting brackets and rail connections with a wrench.
- Clean the Sensors: Wipe the lens of the safety sensors with a soft cloth to ensure they remain sensitive to obstructions.
For more detailed information on garage door mechanics and safety standards, you can refer to the general guidelines provided by Wikipedia’s entry on Garage Door Openers.
Troubleshooting Common Issues
Even with proper installation, issues can arise. Here are solutions to common problems:
Problem: The door opens but won’t close.
- Solution: Check the safety sensors. If the LED light is blinking or off, realign them. Ensure nothing is blocking the beam.
Problem: The motor runs, but the door doesn’t move.
- Solution: The chain may have slipped off the sprocket or broken. Inspect the chain tension and engagement. Also, check if the emergency release cord was accidentally pulled.
Problem: Excessive noise during operation.
- Solution: Lack of lubrication is the most common cause. Apply grease to the chain and hinges. If the noise persists, check for loose mounting brackets.
FAQ Section
Q1: Is the Craftsman 53990 suitable for a wooden garage door?
Yes, the 3/4 HP motor provides ample torque for heavy wooden doors. However, ensure the door is balanced correctly. An unbalanced door puts excessive strain on any opener, regardless of horsepower.
Q2: Can I install this myself, or do I need a professional?
While DIY installation is possible for those with mechanical aptitude, working with high-tension springs and electrical components carries risk. If you are uncomfortable with ladders or wiring, hiring a certified technician is recommended for safety.
Q3: How long does the chain last before needing replacement?
With regular lubrication, the steel chain on the Craftsman 53990 can last 10–15 years. It is one of the most durable components of the system. Replacement is only necessary if links become stretched or damaged.
Q4: Does this model work with existing remote controls?
It depends on the frequency and technology of your old remotes. The 53990 typically uses rolling code technology for security. Older fixed-code remotes may not be compatible. You will likely need to purchase new remotes compatible with the Craftsman Security+ system.
Q5: What is the warranty period for this model?
Craftsman typically offers a limited lifetime warranty on the motor and a 1-year warranty on parts. Always register your product online after purchase to activate the warranty and keep your receipt as proof of purchase.
Q6: Why is my garage door opener making a grinding noise?
A grinding noise usually indicates worn gears inside the motor head or a lack of lubrication on the chain. If the gears are plastic (common in some models), they may need replacement. If it’s the chain, simple lubrication often solves the issue.
Conclusion
The Craftsman Garage Door Opener 3/4 HP Chain Drive 53990 stands out as a powerful, durable, and cost-effective choice for homeowners with heavy or double-car garage doors. Its robust chain drive system ensures longevity, while the 3/4 HP motor provides the necessary lift for even the heaviest insulated doors.
By following the installation and maintenance tips outlined in this guide, you can ensure years of reliable service. Remember, a well-maintained garage door opener is not just a convenience; it is a critical component of your home’s security and accessibility.
If you found this guide helpful, please share it with friends or family who might be struggling with their own garage door issues. Your feedback helps us create more useful content for the community!
Leave a Reply