Introduction
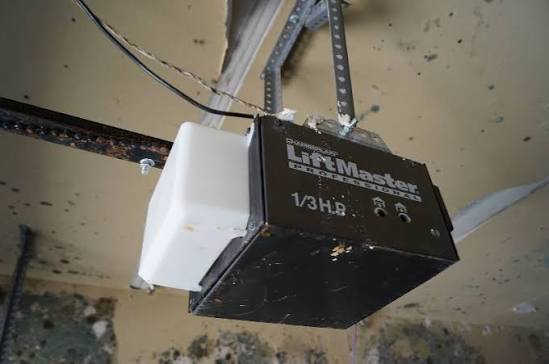
Is your current garage door opener struggling to lift your door smoothly, or perhaps making unsettling noises every time you come home? For many homeowners, finding a balance between affordability, reliability, and quiet operation is a challenge when upgrading their garage infrastructure. The Chamberlain Liftmaster Professional 1/3 Hp Garage Door Opener has emerged as a popular solution for those seeking a dependable entry-level motor that doesn’t compromise on essential safety features. In this guide, we will explore why this specific model remains a staple in the US market and how it can solve your daily garage access woes.
Why Choose a 1/3 HP Motor for Your Garage?
When shopping for a new opener, horsepower (HP) is often the first specification buyers notice. But what does 1/3 HP actually mean for your daily use?
A 1/3 HP motor is considered the standard entry-level power rating for residential garage doors. It is specifically designed for single-car garages or lightweight double-car doors made of aluminum or thin steel. If you have a standard-sized door without heavy insulation or solid wood construction, a 1/3 HP motor provides sufficient torque to lift and lower the door efficiently without straining the mechanism.
According to industry standards, most single-layer steel doors weigh between 100–150 pounds. A 1/3 HP motor can easily handle this weight range. However, if you have a heavily insulated door or a custom wooden door, you might need to consider a 1/2 HP or 3/4 HP model. For the average American homeowner with a standard setup, the Chamberlain Liftmaster Professional 1/3 Hp Garage Door Opener offers the perfect balance of power and energy efficiency.
Key Features of the Chamberlain Liftmaster Professional Series
Chamberlain and LiftMaster are often used interchangeably because they are part of the same corporate family. The “Professional” series typically denotes models built with durability and enhanced user experience in mind. Here are the standout features you can expect:
1. Quiet Operation Technology
One of the most common complaints about older openers is the noise. The Professional series often incorporates belt-drive or screw-drive mechanisms that significantly reduce vibration. While chain drives are durable, they are noisy. If your garage is attached to your home, a quieter motor ensures you don’t wake up the household when leaving early or arriving late.
2. Safety First: Security+ 2.0®
Safety is non-negotiable. This opener comes equipped with Security+ 2.0® technology, which uses rolling code encryption. This means that every time you press your remote, a new code is generated. This prevents hackers from intercepting your signal and opening your garage—a critical feature in today’s digital age.
3. Battery Backup Compatibility
Power outages don’t wait for convenient times. Many models in this series are compatible with battery backup units, ensuring you can still access your garage even when the grid goes down. This is particularly vital for homeowners in areas prone to storms or unstable power supplies.
4. Smart Home Integration
Modern convenience meets traditional reliability. The Chamberlain Liftmaster Professional 1/3 Hp Garage Door Opener is often compatible with the myQ® app. This allows you to control your garage door from anywhere using your smartphone. You can receive alerts when the door is left open, grant access to delivery drivers, or integrate with Amazon Key for in-garage deliveries.
Installation Guide: Step-by-Step
Installing a garage door opener can seem daunting, but with the right tools and preparation, it is a manageable DIY project. Always prioritize safety and consult the manual provided with your specific model.
Tools Needed:
- Stepladder
- Wrench set
- Screwdrivers (Phillips and Flathead)
- Drill with bits
- Level
- Assistant (highly recommended)
Step 1: Prepare the Area Clear the garage ceiling area where the motor will be mounted. Ensure there are no obstructions and that the electrical outlet is accessible. Disconnect any existing opener if you are replacing an old unit.
Step 2: Assemble the Rail Lay out the rail sections on the floor. Connect them according to the manual, ensuring all bolts are tightened securely. Attach the trolley and the spring tension assembly as directed.
Step 3: Mount the Header Bracket Locate the center point above your garage door. Install the header bracket firmly into the structural support above the door frame. Use a level to ensure it is perfectly horizontal. This bracket bears the weight of the door when it is open, so secure anchoring is crucial.
Step 4: Install the Motor Unit With the help of an assistant, lift the motor unit and attach it to the ceiling joists using the provided mounting brackets. Ensure the motor is centered relative to the door. Use lag screws to anchor into the wood joists for maximum stability.
Step 5: Connect the Rail to the Motor Attach the assembled rail to the motor unit. Then, connect the other end of the rail to the header bracket you installed earlier. Check the alignment using a level. The rail should be straight and parallel to the floor.
Step 6: Install the Door Bracket and Arm Attach the door bracket to the top section of your garage door. Connect the curved arm from the trolley to the door bracket. Ensure all pins and clips are secured.
Step 7: Electrical Connections and Sensors Plug in the motor unit. Install the safety reversal sensors on both sides of the garage door track, about 6 inches above the floor. These sensors must face each other directly; if the beam is interrupted, the door will not close. This is a mandatory safety feature required by law in the US.
Step 8: Programming and Testing Follow the manual to program your remotes and keypad. Test the door’s movement. Adjust the force and travel limits as needed. The door should reverse immediately if it encounters an obstacle during closing.
For more detailed technical specifications on garage door safety standards, you can refer to Wikipedia’s page on Garage Door Openers.
Pros and Cons: Is It Right for You?
To help you make an informed decision, here is a quick comparison of the advantages and limitations of this model.
| Feature | Pros | Cons |
|---|---|---|
| Power | Sufficient for standard single-car doors | May struggle with heavy, insulated double doors |
| Noise Level | Quieter than basic chain drives | Not as silent as premium belt-drive models |
| Price | Affordable entry-point for professional grade | Fewer smart features than high-end models |
| Durability | Built with high-quality materials | Requires regular maintenance for longevity |
| Smart Tech | Compatible with myQ® app | App features may require subscription for advanced use |
Frequently Asked Questions (FAQ)
1. Can I install the Chamberlain Liftmaster Professional 1/3 Hp Garage Door Opener myself?
Yes, many homeowners successfully install this unit themselves. However, it requires basic mechanical skills and an assistant for lifting. If you are uncomfortable working with electrical components or heavy machinery, hiring a professional installer is recommended to ensure warranty validity and safety.
2. How long does a 1/3 HP garage door opener last?
With proper maintenance, a quality opener like the Chamberlain Liftmaster Professional series can last between 10 to 15 years. Regular lubrication of moving parts and checking sensor alignment can extend its lifespan significantly.
3. Is this opener compatible with my existing remote controls?
Compatibility depends on the frequency and technology of your old remotes. Most newer Chamberlain/LiftMaster models use Security+ 2.0®, which is not backward compatible with very old remotes. You may need to purchase new remotes or a universal compatible kit.
4. What maintenance does this opener require?
Minimal maintenance is required. Every six months, inspect the hardware for loose bolts, lubricate the chain or screw drive with a suitable garage door lubricant (not WD-40), and test the safety reversal sensors. Keep the tracks clean and free of debris.
5. Does it come with a warranty?
Yes, Chamberlain/LiftMaster typically offers a limited warranty on their Professional series. This often includes a lifetime warranty on the motor and a shorter period (e.g., 1–5 years) on parts and accessories. Always register your product online to activate the warranty.
Conclusion
Upgrading your garage door infrastructure is an investment in both convenience and security. The Chamberlain Liftmaster Professional 1/3 Hp Garage Door Opener stands out as a reliable, efficient, and safe choice for homeowners with standard garage doors. Its blend of quiet operation, smart home compatibility, and robust safety features makes it a top contender in the mid-range market.
By understanding your door’s weight and your specific needs, you can determine if this 1/3 HP model is the perfect fit. Remember, a well-maintained opener not only lasts longer but also keeps your home secure.
If you found this guide helpful, please share it with friends or family who are considering a garage upgrade. Your next step could be a smoother, quieter, and smarter garage experience!
Leave a Reply