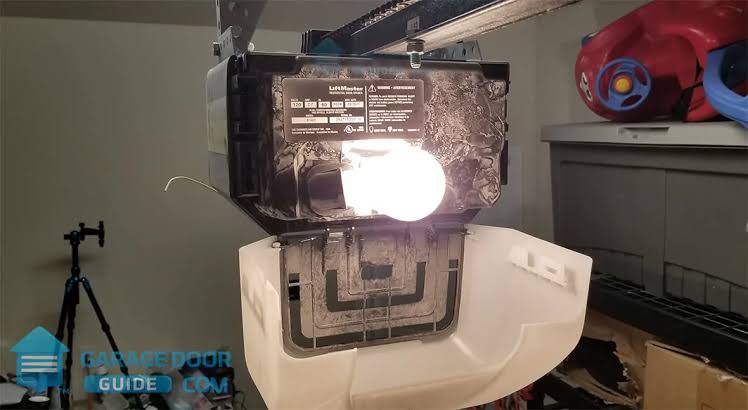
Introduction
If your garage door opener light recently burned out, you might be asking yourself: can you use LED bulbs in a garage door opener? It is a very common and practical question, especially since LED bulbs save energy and last significantly longer than traditional options. However, making the wrong choice can unexpectedly block your remote control from working, leaving you stranded in the dark. Let us explore exactly how to upgrade your lighting safely and effectively.
Can You Use LED Bulbs in a Garage Door Opener? The Short Answer
Yes, you can use LED bulbs in a garage door opener, but with one critical condition: the bulb must be specifically designed or certified to prevent radio frequency (RF) interference.
Standard, cheap LED bulbs often contain internal switching power supplies that emit electromagnetic noise. This noise can jam the 315 MHz or 390 MHz signals sent by your garage door remote. Therefore, while the physical installation is perfectly safe, the functional compatibility depends entirely on the bulb’s internal shielding.
Why Do Some LED Bulbs Fail in Garage Door Openers?
To understand the issue, we must look at how LED bulbs operate. Unlike incandescent bulbs, which produce light by heating a filament, LEDs use a small electronic driver to convert alternating current (AC) to direct current (DC).
In lower-quality LEDs, this driver lacks proper electromagnetic interference (EMI) shielding. As a result, it broadcasts broadband noise that overwhelms the sensitive receiver inside your garage door motor unit. According to guidelines from the Federal Communications Commission (FCC), unshielded electronic devices can cause significant radio-frequency interference, which disrupts wireless communications like your garage door remote or keypad.
Expert Insight:
“We see this issue weekly. Homeowners install a standard LED bulb, and suddenly their remote only works when they are standing directly underneath the opener. The moment they replace it with an RF-shielded LED or an incandescent bulb, the range returns to normal.”
— Mark R., Certified Garage Door Technician with 15 years of field experience.
LED vs. Incandescent: A Quick Comparison
Before making a purchase, it helps to see how the options stack up. Here is a clear breakdown of what you can expect:
| Feature | Standard Incandescent | Standard LED (Unshielded) | Garage-Rated LED (Shielded) |
|---|---|---|---|
| Remote Interference | None | High Risk | None |
| Lifespan | ~1,000 hours (1–2 years) | ~15,000 hours | ~25,000+ hours (10+ years) |
| Energy Consumption | 40W – 100W | 5W – 8W | 5W – 8W |
| Heat Output | High (can warp plastic lenses) | Low | Low |
| Upfront Cost | $1 – $2 | $3 – $5 | $8 – $15 |
Takeaway: While a garage-rated LED costs more upfront, it pays for itself within the first year through energy savings and eliminates the hassle of frequent replacements.
How to Choose the Best LED Bulb for Your Garage Door Opener
Not all “garage-ready” bulbs are created equal. When shopping, keep these three specific criteria in mind:
- Look for Explicit “Garage Door” Labeling: Brands like Chamberlain, LiftMaster, and Genie sell proprietary LED bulbs. Alternatively, look for third-party bulbs that explicitly state “RF Shielded” or “Garage Door Opener Compatible” on the packaging.
- Check the Wattage and Lumens: Most garage door openers have a maximum wattage limit (usually 100W for incandescent, or roughly 15W for LED). Ensure the LED bulb provides at least 400–800 lumens for adequate visibility without exceeding the unit’s electrical limits.
- Verify the Base Size: The most common base is the standard medium screw base (E26/A19). However, some older or compact models require a candelabra base (E12) or a wedge base (T10). Check your owner’s manual before buying.
Step-by-Step Guide: Safely Installing an LED Bulb
Upgrading your bulb is a simple task, but safety must come first. Follow these exact steps to ensure a smooth installation:
Step 1: Disconnect the Power
Unplug the garage door opener from the wall outlet, or turn off the dedicated circuit breaker. Never rely solely on the wall button to cut power, as it does not isolate the unit from mains electricity.
Step 2: Remove the Light Lens
Using a Phillips head screwdriver, remove the two screws holding the plastic light lens cover in place. Set the screws aside in a small bowl so they do not roll away.
Step 3: Remove the Old Bulb
If you are removing an incandescent bulb, wait at least 5 minutes for it to cool down to avoid burns. Gently unscrew it counterclockwise.
Step 4: Insert the New Shielded LED Bulb
Screw in your new RF-shielded LED bulb clockwise. Do not overtighten; stop once you feel firm resistance to avoid cracking the bulb’s base.
Step 5: Reassemble and Test
Replace the light lens and secure the screws. Restore power to the unit. Walk exactly 20 feet away from the garage door and press your remote button. If the door activates and the light turns on, your installation is a success.
Troubleshooting: What If My Remote Stops Working?
If you install an LED bulb and your remote suddenly loses range or fails entirely, do not panic. Follow this quick diagnostic process:
- The Control Test: Remove the new LED bulb and temporarily reinstall the old incandescent bulb. If the remote works perfectly again, the LED bulb is definitely the source of the interference.
- Check for Certification: Verify that the LED bulb you purchased has an FCC ID or explicit RF-shielding mentions. If it is a generic, unbranded bulb, it is likely the culprit.
- Reprogram the Remote: Occasionally, the installation process can trigger a minor glitch in the opener’s memory. Hold the “Learn” button on the back of the motor unit for 6 seconds until the indicator light turns off. This clears all remotes. Then, reprogram your remote by pressing the Learn button once and immediately pressing your remote button.
Frequently Asked Questions (FAQ)
Q1: Do all LED bulbs interfere with garage door openers?
No, not all LED bulbs cause interference. Only standard, unshielded LEDs with poor-quality internal drivers emit the electromagnetic noise that jams garage door signals. Bulbs specifically marketed as “garage door compatible” are built with shielding to prevent this.
Q2: What is the best LED bulb for a Chamberlain or LiftMaster garage door opener?
The safest choice is the official Chamberlain/LiftMaster LED Garage Door Opener Bulb. It is rigorously tested to ensure zero RF interference and is guaranteed to be compatible with their motor units.
Q3: Can using the wrong LED bulb damage my garage door opener?
No, an incompatible LED bulb will not physically damage the motor, circuit board, or gears of your garage door opener. The worst-case scenario is that the radio receiver will be jammed, preventing your remote from working until the bulb is replaced.
Q4: Why does my garage door light flicker when I use an LED bulb?
Flickering usually indicates one of two things: either the LED bulb is incompatible with the opener’s internal circuitry, or your garage door opener has a built-in dimmer feature that is not designed to work with non-dimmable LED bulbs. Switching to a garage-rated LED will typically resolve this.
Conclusion
Upgrading your garage lighting is a smart move for energy efficiency, safety, and long-term savings. So, can you use LED bulbs in a garage door opener? Absolutely—provided you choose an RF-shielded, garage-rated bulb. By taking this small precaution, you enjoy the brilliant, long-lasting light of an LED without sacrificing the convenience of your wireless remote.
Have you successfully upgraded your garage door opener light? Share your experience or this guide with your friends and neighbors on Facebook, X (Twitter), or Pinterest to help them avoid the dreaded remote interference trap!
Disclaimer: Always consult your specific garage door opener’s user manual for wattage limits and safety warnings before performing any maintenance.
Leave a Reply