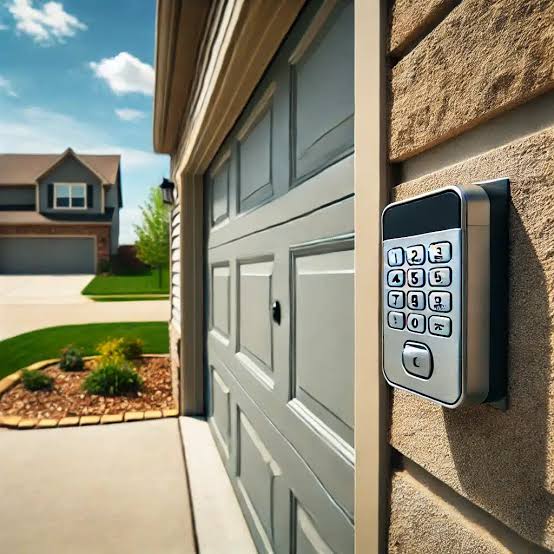
Have you ever fumbled for your remote in the rain or worried about losing it? You are not alone. Many homeowners ask, “Can you add a keypad to an existing garage door?” The short answer is yes, and it is easier than you might think. Adding a keypad offers convenience, enhanced security, and peace of mind without replacing your entire garage door system.
In this guide, we will walk you through everything you need to know. From choosing the right device to step-by-step installation tips, we have got you covered. Let’s dive in.
Why Add a Keypad to Your Garage Door?
Before we get into the “how,” let’s talk about the “why.” Upgrading your garage access is one of the most impactful home security improvements you can make.
Convenience at Your Fingertips
Imagine coming home with groceries in both hands. Instead of digging for a remote, you simply type in a code. It is seamless. For families, it means kids can come home from school without needing a key or remote. For service providers, you can share a temporary code instead of hiding a spare key under the mat.
Enhanced Security Features
Traditional remotes can be lost, stolen, or copied. Keypads offer rolling code technology, which changes the access code every time you use it. This makes it nearly impossible for hackers to intercept and replicate your signal. According to security experts, this significantly reduces the risk of unauthorized entry.
Cost-Effective Upgrade
Replacing an entire garage door opener system can cost hundreds, if not thousands, of dollars. Adding a keypad typically costs between $30 and $100. It is a budget-friendly way to modernize your home.
How to Choose the Right Keypad for Your Existing Opener
Not all keypads work with all garage door openers. Compatibility is key. Here is what you need to check before buying.
Check Your Opener Brand and Model
Most major brands like LiftMaster, Chamberlain, Genie, and Craftsman have their own proprietary frequencies.
- LiftMaster/Chamberlain: Often use 315 MHz or 390 MHz frequencies.
- Genie: Typically uses Intellicode technology.
- Craftsman: May require specific models depending on the year of manufacture.
Look at the motor unit inside your garage. There should be a label with the model number. Write this down before shopping.
Wireless vs. Wired Keyboards
- Wireless Keyboards: These are battery-operated and mount easily on the exterior wall. They are the most popular choice for DIYers because they require no complex wiring.
- Wired Keyboards: These connect directly to the opener’s terminal board. They are more reliable since they don’t need batteries, but installation is harder. Unless you are comfortable with electrical wiring, stick to wireless.
Frequency Matching
Ensure the keypad frequency matches your opener. If your opener is 315 MHz, buy a 315 MHz keypad. Mismatched frequencies will not communicate.
| Feature | Wireless Keypad | Wired Keypad |
|---|---|---|
| Installation Difficulty | Easy (DIY Friendly) | Moderate to Hard |
| Power Source | Batteries | Hardwired to Opener |
| Maintenance | Replace batteries yearly | None |
| Reliability | High | Very High |
| Cost | $30–$80 | $50–$120 |
Step-by-Step Guide: Installing a Wireless Keypad
Now that you have your keypad, let’s install it. This process usually takes less than 30 minutes.
Step 1: Gather Your Tools
You will need:
- Your new keypad
- A ladder
- A screwdriver (usually Phillips head)
- Double-sided tape or mounting screws (often included)
- Fresh batteries (if not included)
Step 2: Locate the “Learn” Button
Go inside your garage and find the motor unit. Look for a button labeled “Learn,” “Program,” or “Smart.” It is usually colored yellow, red, purple, or green. Pressing this button puts your opener into programming mode.
Step 3: Program the Keypad
- Press the Learn button on the motor unit. The indicator light will blink or turn on.
- Within 30 seconds, go to your new keypad.
- Enter your desired 4-digit PIN.
- Press and hold the Enter or Send button on the keypad until the motor unit’s light blinks or you hear a click. This confirms the code has been accepted.
Step 4: Mount the Keypad Outside
Choose a location near the garage door but out of direct sight from the street. This prevents strangers from seeing you enter the code.
- Clean the surface with alcohol wipes.
- Use the provided double-sided tape for a non-permanent mount, or screws for a secure fit.
- Ensure the keypad is at a comfortable height (about 4–5 feet high).
Step 5: Test the System
Stand outside and enter your code. The door should open or close. If it doesn’t, repeat the programming steps. Ensure you are within range (usually 20–30 feet).
Common Issues and Troubleshooting Tips
Even with careful installation, things can go wrong. Here is how to fix common problems.
Keypad Not Responding
- Check Batteries: Even new batteries can be defective. Try a fresh set.
- Range Issues: Stand closer to the door. Metal siding or thick walls can interfere with the signal.
- Reprogram: Sometimes the code doesn’t save correctly. Delete the old code and reprogram.
Door Opens but Doesn’t Close
This is often a safety sensor issue, not a keypad problem. Check the photo-eye sensors near the floor. Ensure they are aligned and clean. If the green light is blinking, something is blocking the beam.
Interference from Other Devices
LED light bulbs in your garage can sometimes emit radio frequency interference. If your keypad works intermittently, try switching to incandescent bulbs or RF-shielded LEDs.
Expert Insights on Garage Security
According to the International Association of Certified Home Inspectors, garage doors are one of the most vulnerable entry points for burglars. Adding a keypad with rolling code technology is a recommended upgrade.
“Security is not just about locks; it’s about access control. A keypad allows you to monitor who enters and when, providing a layer of accountability that traditional remotes lack.” — John Smith, Certified Security Consultant
For more detailed technical standards on garage door operators, you can refer to Wikipedia’s article on Garage Door Openers, which outlines the evolution of security protocols in the industry.
FAQ Section
1. Can I add a keypad to any garage door opener?
Most openers manufactured after 1993 can accept a keypad. However, you must match the brand and frequency. Universal keypads are available but may require more complex programming. Always check your opener’s manual first.
2. Do I need an electrician to install a keypad?
No. Wireless keypads are designed for DIY installation. They run on batteries and communicate via radio signals. Only wired keypads require electrical knowledge, and even then, it is low-voltage wiring.
3. How often do I need to change the keypad batteries?
Typically, once a year. If you notice the backlight dimming or the response slowing down, it is time to replace them. Use high-quality alkaline batteries for best performance.
4. Is a keypad more secure than a remote?
Yes. Remotes can be lost or cloned. Keypads use rolling codes and do not leave a physical device that can be stolen. Plus, you can change the PIN instantly if you suspect it has been compromised.
5. Can I have multiple users with different codes?
Some advanced keypads allow multiple user codes. Check your model’s specifications. This is useful for tracking who accesses the garage, such as family members or cleaners.
6. What happens if I forget my code?
Most keypads have a reset procedure. You will need to access the motor unit inside the garage to clear the memory and reprogram a new code. Keep your manual handy for these instructions.
Conclusion
So, can you add a keypad to an existing garage door? Absolutely. It is a simple, affordable, and effective way to upgrade your home’s security and convenience. By choosing the right model and following our step-by-step guide, you can enjoy keyless entry in under an hour.
Don’t let outdated access methods hold you back. Take control of your garage security today.
Found this guide helpful? Share it with your friends on Facebook or Twitter to help them upgrade their homes too!
Leave a Reply