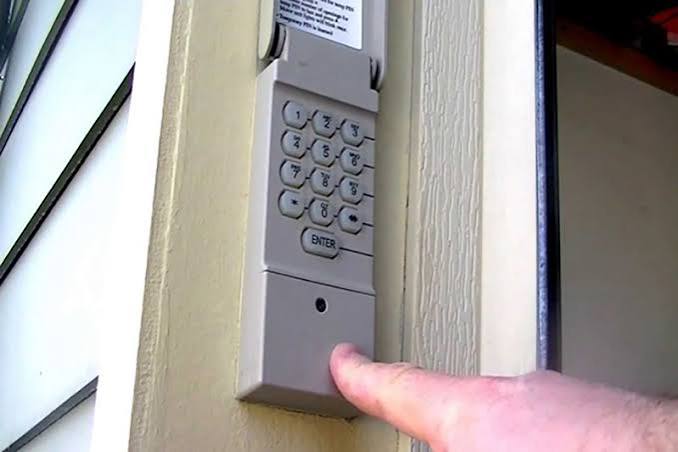
Have you ever fumbled for your garage door remote in the rain or worried about losing it? You’re not alone. Many homeowners ask, “Can you add a keypad to a garage door opener?” The answer is a resounding yes—and it’s easier than you think. Adding a keypad not only simplifies access but also enhances security by eliminating the need for physical remotes. In this guide, we’ll walk you through everything you need to know, from choosing the right keypad to installing it like a pro.
Why Add a Keypad to Your Garage Door Opener?
Before diving into the “how,” let’s explore the “why.” A garage door keypad offers several compelling benefits:
- Convenience: No more searching for remotes or worrying about dead batteries.
- Security: Unique PIN codes reduce the risk of unauthorized access compared to universal remotes.
- Accessibility: Ideal for family members, guests, or service providers who need temporary access.
- Cost-Effective: Keypads are generally affordable, ranging from $20 to $50, making them a budget-friendly upgrade.
According to a 2023 survey by the National Association of Home Builders, 68% of homeowners prioritize smart security features when upgrading their homes. A garage door keypad fits perfectly into this trend.
How to Choose the Right Garage Door Keypad
Not all keypads are created equal. Here’s what to consider before making a purchase:
Compatibility
Ensure the keypad is compatible with your garage door opener brand (e.g., Chamberlain, LiftMaster, Genie). Most modern openers use rolling code technology, which enhances security by changing the code with each use.
Power Source
Keypads typically run on batteries (AA or 9V). Look for models with low-battery indicators to avoid unexpected lockouts.
Weather Resistance
Since keypads are installed outdoors, choose one with an IP65 rating or higher to withstand rain, snow, and extreme temperatures.
Additional Features
Some keypads offer:
- Backlit keys for nighttime use
- Multiple user codes
- Integration with smart home systems (e.g., Alexa, Google Home)
| Feature | Basic Keypad | Smart Keypad |
|---|---|---|
| Price | $20–$30 | $40–$60 |
| Smart Home Integration | No | Yes |
| User Codes | 1–4 | 10+ |
| Battery Life | 6–12 months | 3–6 months |
Step-by-Step Guide: How to Install a Garage Door Keypad
Installing a keypad is a straightforward DIY project. Follow these steps for a hassle-free experience:
Tools You’ll Need
- Screwdriver (Phillips head)
- Drill with appropriate bits
- Ladder
- Wire strippers (if wiring is required)
Installation Steps
- Turn Off Power: Locate the garage door opener’s power source and unplug it to ensure safety during installation.
- Choose the Location: Mount the keypad 4–5 feet above the ground, near the garage door but away from direct sunlight or heavy rain exposure.
- Mount the Bracket: Use the provided screws to attach the mounting bracket to the wall. Ensure it’s level and secure.
- Connect Wires (If Applicable): For wired keypads, connect the wires to the opener’s terminal block. Refer to your opener’s manual for specific wire colors (typically red and white).
- Attach the Keypad: Slide the keypad onto the mounted bracket and secure it with the provided screws.
- Program the Keypad: Follow the manufacturer’s instructions to sync the keypad with your opener. This usually involves pressing a “Learn” button on the opener and entering a PIN on the keypad.
- Test the System: Plug the opener back in and test the keypad by entering your PIN. The door should open or close accordingly.
Pro Tip: If you’re unsure about wiring, consult a professional. Incorrect connections can damage your opener or void the warranty.
Common Mistakes to Avoid
Even simple installations can go wrong. Here are pitfalls to watch out for:
- Ignoring Compatibility: Always verify that the keypad works with your opener model.
- Poor Placement: Installing the keypad too high or in a shaded area can make it difficult to use.
- Weak Batteries: Replace batteries annually to prevent malfunctions.
- Skipping the Manual: Each brand has unique programming steps. Don’t guess—read the instructions.
FAQ: Everything You Need to Know About Garage Door Keypads
Q1: Can I add a keypad to any garage door opener?
Most modern openers support keypad additions, but compatibility varies by brand and model. Check your opener’s manual or manufacturer website for specifics. Older models (pre-1990s) may require a receiver upgrade.
Q2: How do I program a new keypad to my garage door opener?
Programming steps differ by brand. Generally, you’ll press the “Learn” button on the opener, then enter a PIN on the keypad within 30 seconds. Consult your manual for exact instructions.
Q3: Are wireless keypads secure?
Yes, especially those using rolling code technology. This feature changes the code with each use, preventing hackers from intercepting signals. For added security, choose a keypad with encryption.
Q4: What if my keypad stops working?
First, check the batteries. If they’re fine, reprogram the keypad or reset the opener. If issues persist, contact the manufacturer or a professional technician.
Q5: Can I use a keypad with a smart garage door opener?
Absolutely! Many smart openers (e.g., MyQ, Chamberlain) support keypad integration. Some even allow you to manage access via smartphone apps.
Q6: How long does a garage door keypad last?
With proper maintenance, a keypad can last 5–10 years. Regular battery replacements and weatherproofing extend its lifespan.
Final Thoughts: Upgrade Your Garage Security Today
So, can you add a keypad to a garage door opener? Absolutely—and it’s one of the simplest upgrades you can make to enhance convenience and security. Whether you’re tired of losing remotes or want to grant easy access to family members, a keypad is a smart investment.
Ready to take the plunge? Choose a compatible model, follow our installation guide, and enjoy seamless garage access. Don’t forget to share this article with friends who might benefit from a keypad upgrade!
For more information on garage door safety standards, visit Wikipedia’s Garage Door Opener page.
Leave a Reply