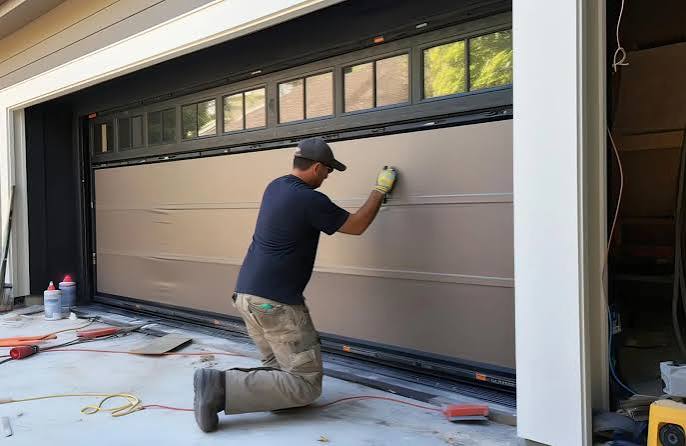
Have you ever stared at a dented or cracked section of your garage door and wondered if you need to shell out thousands for a brand-new unit? It is a frustrating scenario that many homeowners face, especially after a minor backing-into accident or severe weather event. The good news is that you often do not need a full replacement. If you are asking, “Can I replace just one panel on my garage door?” the answer is frequently yes, provided you understand the specific constraints of your door’s model and age.
Understanding the Feasibility of Single-Panel Replacement
Before you pick up a wrench, it is crucial to determine if your garage door is even capable of supporting a single-panel swap. Not all doors are created equal, and the construction method plays a significant role in whether this repair is viable.
Sectional vs. One-Piece Doors
Most modern homes utilize sectional garage doors, which consist of multiple horizontal panels hinged together. These are the primary candidates for single-panel replacement. Because each section operates somewhat independently while connected by hinges and rollers, removing one damaged section is mechanically possible.
In contrast, older homes might have one-piece (tilt-up) doors. These are constructed from a single solid sheet of material. If you have this type, replacing just one “panel” is impossible because the entire structure is unified. In such cases, you would need to replace the whole door or attempt a cosmetic patch, which rarely restores structural integrity.
The Importance of Model Availability
Even if you have a sectional door, the biggest hurdle is finding a matching panel. Garage door manufacturers change designs, colors, and dimensions frequently. A door installed ten years ago may no longer be in production.
- Current Models: If your door is less than 5–7 years old, there is a high probability the manufacturer still produces the exact panel.
- Discontinued Models: For older doors, you may need to search for surplus inventory or consider replacing two adjacent panels to blend the wear and tear better.
According to industry standards, maintaining the structural balance of the door is critical. Mixing panels from different manufacturers or vastly different ages can lead to operational issues, such as the door getting stuck or coming off the tracks. For more detailed information on garage door construction standards, you can refer to resources like Wikipedia’s entry on Garage Doors, which outlines the historical evolution and mechanical principles of these systems.
Cost Comparison: One Panel vs. Full Door Replacement
One of the main drivers behind this repair choice is cost. Homeowners naturally want to avoid the expense of a full installation if a cheaper alternative exists. Let’s break down the financial implications.
| Feature | Single Panel Replacement | Full Door Replacement |
|---|---|---|
| Average Cost | $250 – $800 | $1,200 – $4,500+ |
| Time Required | 2 – 4 hours | 1 – 2 days |
| Aesthetic Match | Perfect (if available) | New look entirely |
| Insulation Value | Unchanged | Can be upgraded |
| Labor Intensity | Moderate | High |
As the table illustrates, replacing a single panel can save you up to 70% compared to buying a new door. However, this cost efficiency depends heavily on labor. If you hire a professional, you are paying for their expertise in safely handling the high-tension springs and heavy panels. If you choose the DIY route, you save on labor but assume the risk.
Signs You Should Replace Only One Panel
How do you know if a single-panel repair is the right call? Look for these specific indicators:
- Localized Damage: The dent, crack, or hole is confined to one specific horizontal section.
- Structural Integrity: The surrounding panels, hinges, and rollers are in good condition.
- No Track Alignment Issues: The door opens and closes smoothly, indicating the tracks are not bent.
- Matching Inventory Exists: You have confirmed with the manufacturer or a dealer that the specific panel is in stock.
If the damage extends across multiple panels, or if the door is sagging and making grinding noises, a single panel fix will likely be a temporary band-aid rather than a solution. In those cases, the underlying mechanical issues suggest a broader failure.
Step-by-Step Guide to Replacing a Garage Door Panel
If you are handy with tools and have confirmed that a replacement panel is available, you might consider doing this yourself. However, please note that garage doors are under extreme tension. If you are uncomfortable working with torsion springs, hire a professional.
Here is a general overview of the process:
Step 1: Safety First
Disconnect the garage door opener and close the door completely. Secure the door with locking pliers on the track below the bottom roller to prevent it from moving unexpectedly.
Step 2: Remove the Damaged Panel
Using a socket wrench, remove the bolts connecting the hinges of the damaged panel to the adjacent panels. You will need to support the weight of the panel above the damaged one using a clamp or a helper. Carefully lift the damaged panel out of the tracks.
Step 3: Prepare the New Panel
Unbox the new panel and ensure it matches the width and height of the existing ones. Transfer any hardware, such as hinges or handles, from the old panel to the new one if they are not pre-installed.
Step 4: Install the New Panel
Slide the new panel into the tracks. Align the hinges with the adjacent panels. Insert the bolts and tighten them securely, but do not overtighten, as this can strip the threads. Ensure the panel sits flush with its neighbors.
Step 5: Test and Lubricate
Remove the locking pliers. Manually open and close the door to check for smooth operation. Listen for any unusual noises. Apply a silicone-based lubricant to the rollers and hinges to ensure long-term performance.
Common Challenges and How to Overcome Them
Even with the best intentions, you may encounter roadblocks. Here are two common issues and their solutions.
Color Mismatch Over Time
Even if you buy the exact same model number, sun exposure can fade your existing panels. A brand-new panel might look noticeably brighter or darker than the rest of the door.
- Solution: Consider painting the entire door after installing the new panel. This ensures a uniform appearance and allows you to refresh the home’s curb appeal.
Bent Tracks or Rollers
Sometimes, the impact that damaged the panel also bent the vertical tracks or crushed the rollers.
- Solution: Inspect the tracks closely. If they are slightly bent, you may be able to hammer them back into place using a rubber mallet. If the rollers are cracked, replace them simultaneously with the panel to prevent future jams.
FAQ Section
Q1: Is it safe to replace a garage door panel myself?
A: It can be safe if you strictly follow safety protocols and avoid touching the torsion springs. The springs hold enough energy to cause serious injury. If your door uses torsion springs (mounted above the door), it is highly recommended to hire a professional. If it uses extension springs (on the sides), DIY is more feasible but still requires caution.
Q2: How long does it take to replace one panel?
A: For a professional technician, the job typically takes 2 to 4 hours. For a DIYer with moderate experience, it may take 4 to 6 hours, including time for sourcing tools and troubleshooting alignment issues.
Q3: Will replacing one panel affect my warranty?
A: It depends on your original warranty terms. Many manufacturers void the warranty if non-certified technicians perform repairs. Check your warranty documentation before proceeding. However, using an authorized dealer for the part and installation usually preserves coverage.
Q4: Can I replace a panel on an insulated garage door?
A: Yes, but it is more complex. Insulated panels are thicker and heavier. You must ensure the new panel has the same R-value (insulation rating) as the rest of the door to maintain energy efficiency. Additionally, sealing the edges properly is crucial to prevent moisture from entering the insulation core.
Q5: What if I cannot find the exact panel?
A: If the exact match is discontinued, you have two options. First, search for “new old stock” from specialized online retailers. Second, consider replacing two adjacent panels to create a symmetrical look, or opt for a full door replacement if the aesthetic mismatch is too distracting.
Conclusion
So, can I replace just one panel on my garage door? In most cases involving modern sectional doors, the answer is a resounding yes. It is a cost-effective, efficient solution that restores both function and curb appeal without the hefty price tag of a full replacement. By verifying model availability, assessing the extent of the damage, and prioritizing safety, you can make an informed decision that saves you money and hassle.
If you found this guide helpful, please share it with your friends and neighbors on social media. You never know who else might be staring at a dented garage door wondering about their next move!
Leave a Reply