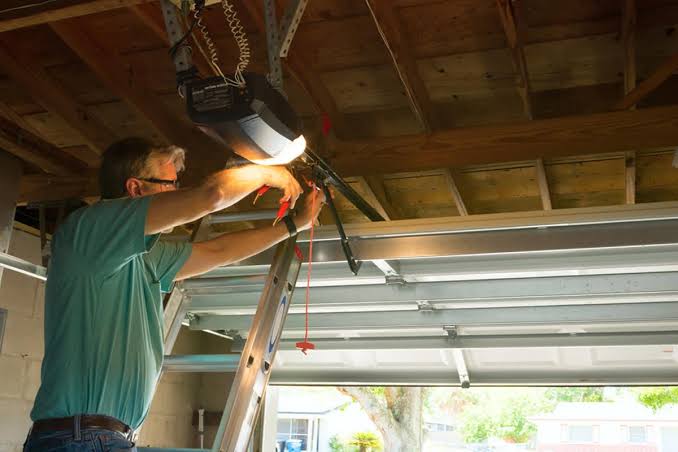
Have you ever stood in your driveway during a rainstorm, fumbling with a manual lock while trying to get into your house? It is a frustrating experience that many homeowners face when their old opener fails or when they move into a home without one. Understanding what is the cost to install a garage door opener is the first step toward regaining convenience, security, and peace of mind for your daily routine.
In this comprehensive guide, we will break down the exact costs involved, from budget-friendly chain-drive models to high-tech smart systems. We will also explore whether you should tackle this project yourself or hire a professional, ensuring you make the best financial decision for your home.
Understanding the Average Installation Costs
When planning your budget, it is essential to look at the national averages. As of 2026, the total cost to install a new garage door opener typically ranges between $300 and $650. However, this figure can vary significantly based on the type of opener, the complexity of the installation, and your geographic location.
The cost is generally split into two main categories:
- Hardware Cost: The price of the unit itself.
- Labor Cost: The fee charged by a professional technician for installation.
For a standard replacement where the wiring and mounting brackets are already in place, you might pay on the lower end of the spectrum. However, if you are installing an opener for the first time or upgrading to a heavy-duty model for a double-car garage, expect costs to rise. According to industry data, labor alone can account for $150 to $300 of the total bill, depending on the hourly rates in your area.
How Different Types of Openers Affect Price
Not all garage door openers are created equal. The mechanism used to lift the door plays a massive role in the final price tag. Here is a breakdown of the most common types available in the US market today.
Chain-Drive Openers
- Cost Range: $150 – $250 (unit only)
- Best For: Budget-conscious homeowners and detached garages.
- Pros: Most affordable option; durable and widely available.
- Cons: Noisy operation due to metal-on-metal contact.
Chain-drive openers use a metal chain similar to a bicycle chain to pull the trolley that moves the door. They are the workhorses of the industry but are not ideal if your garage is attached to your living space, as the noise can be disruptive.
Belt-Drive Openers
- Cost Range: $250 – $400 (unit only)
- Best For: Attached garages and noise-sensitive environments.
- Pros: Extremely quiet operation; smooth performance.
- Cons: Higher initial cost than chain drives.
Belt-drive systems use a steel-reinforced rubber belt. This design eliminates the clanking sound associated with chain drives, making them a favorite for homes where the garage shares a wall with bedrooms or living rooms.
Screw-Drive Openers
- Cost Range: $200 – $350 (unit only)
- Best For: Areas with extreme temperature fluctuations.
- Pros: Fewer moving parts; requires less maintenance.
- Cons: Can be noisy; may struggle in very cold climates without lubrication.
Screw-drive openers use a threaded steel rod to move the trolley. They are known for their reliability but have lost some popularity to belt drives due to noise levels.
Direct-Drive (Jackshaft) Openers
- Cost Range: $400 – $600+ (unit only)
- Best For: Garages with high ceilings or limited headroom.
- Pros: Mounts on the wall beside the door, freeing up ceiling space; very quiet.
- Cons: Most expensive option; complex installation.
These units mount directly to the torsion bar of the garage door. They are ideal for modern homes with specific architectural constraints but require precise professional installation.
| Opener Type | Avg. Unit Cost | Noise Level | Maintenance Needs |
|---|---|---|---|
| Chain-Drive | $150 – $250 | High | Moderate |
| Belt-Drive | $250 – $400 | Low | Low |
| Screw-Drive | $200 – $350 | Medium | Low |
| Direct-Drive | $400 – $600+ | Very Low | Low |
Additional Factors That Influence Installation Costs
While the type of opener is the primary cost driver, several other factors can impact your final bill. Being aware of these can help you avoid unexpected surprises.
Horsepower Requirements
Most residential openers come in ½ HP, ¾ HP, or 1+ HP variants.
- ½ HP: Suitable for single, lightweight wooden or aluminum doors.
- ¾ HP: The standard for most double-car steel doors.
- 1+ HP: Required for heavy wooden doors or oversized custom doors.
Upgrading from ½ HP to ¾ HP typically adds $50 to $100 to the hardware cost. If you have a heavy custom door, do not skimp on horsepower, as an underpowered motor will wear out quickly.
Smart Features and Connectivity
In 2026, smart home integration is no longer a luxury—it is an expectation. Openers with Wi-Fi connectivity, battery backups, and smartphone app control cost more upfront.
- Basic Model: No smart features.
- Smart Model: Adds $50 to $150 to the unit price.
These features allow you to monitor your garage status remotely, receive alerts if the door is left open, and integrate with voice assistants like Alexa or Google Home. For more details on how smart home technology impacts household efficiency, you can refer to general information on home automation systems.
Structural Modifications
If your garage lacks existing electrical outlets near the ceiling, an electrician may need to run new wiring. This can add $100 to $250 to the project. Similarly, if the existing mounting brackets are rusted or incompatible with the new unit, replacement parts will increase the cost.
DIY vs. Professional Installation: Which Is Right for You?
One of the biggest questions homeowners ask is whether they can save money by installing the opener themselves. Let’s weigh the pros and cons.
DIY Installation
- Potential Savings: $150 – $300 in labor costs.
- Time Commitment: 4–6 hours for a beginner.
- Risk Factor: Moderate to High.
If you are handy with tools and have a helper, DIY is feasible. Most modern openers come with detailed manuals and pre-assembled rails. However, garage doors are under high tension, and improper installation can lead to safety hazards or voided warranties. You will need a ladder, power drill, wrenches, and possibly a second pair of hands to hold the motor unit in place.
Professional Installation
- Cost: $150 – $300 for labor.
- Time Commitment: 2–3 hours.
- Benefits: Warranty protection, safety assurance, and proper calibration.
Professionals ensure that the safety sensors are aligned correctly, the force settings are adjusted to prevent injury, and the unit is securely mounted. Many manufacturers require professional installation to validate the warranty. Given the relatively low labor cost compared to the risk, hiring a pro is often the smarter choice for most homeowners.
Step-by-Step Overview of the Installation Process
Whether you hire a pro or do it yourself, understanding the process helps you know what to expect. Here is a simplified overview:
- Preparation: Disconnect the old opener and release the tension from the garage door spring system (caution: this is dangerous). Remove the old rail and motor unit.
- Assembly: Assemble the new rail according to the manufacturer’s instructions. Attach the trolley and connect the drive mechanism (chain, belt, or screw).
- Mounting: Install the header bracket above the garage door and the motor unit bracket on the ceiling joists. Ensure the motor is level.
- Connection: Attach the rail to the header bracket and the motor unit. Connect the emergency release cord.
- Wiring: Connect the power cord to the outlet and wire the wall control panel and safety sensors. Sensors must be installed no higher than 6 inches from the floor.
- Programming: Sync the remote controls and set the travel limits (how far the door goes up and down) and force settings.
- Testing: Test the auto-reverse feature by placing a 2×4 piece of wood on the ground in the door’s path. The door should reverse immediately upon contact.
Frequently Asked Questions (FAQ)
1. How long does a garage door opener last?
Most high-quality garage door openers last between 10 to 15 years. Regular maintenance, such as lubricating the chain or screw and checking the safety sensors, can extend this lifespan. Belt-drive models often last longer because they have less friction and wear than chain-drive models.
2. Can I install a garage door opener on any door?
Not necessarily. Your garage door must be in good working condition before installing an opener. If the springs are broken or the tracks are bent, these issues must be fixed first. Additionally, the door must be balanced properly; if it doesn’t stay in place when manually lifted halfway, an opener will struggle to operate it safely.
3. Is it worth paying extra for a battery backup?
Yes, especially if you live in an area prone to power outages. A battery backup allows you to open and close your garage door even when the power is out. This is crucial for security and convenience, preventing you from being locked out or unable to secure your vehicle during a storm.
4. What is the most expensive part of garage door opener installation?
The motor unit itself is usually the most expensive component. However, if structural changes are needed, such as running new electrical lines or reinforcing ceiling joists, labor costs can surpass the cost of the hardware. Always get a detailed quote that separates parts and labor.
5. Do I need a permit to install a garage door opener?
In most US jurisdictions, you do not need a permit to replace an existing garage door opener. However, if you are adding new electrical wiring or installing an opener for the first time in a newly built garage, local building codes may require a permit. Check with your local building department to be sure.
Conclusion
Understanding what is the cost to install a garage door opener empowers you to make a smart investment in your home’s functionality and security. With average costs ranging from $300 to $650, you have options for every budget, from basic chain-drive models to sophisticated smart systems.
Remember, the cheapest option isn’t always the best value. Consider the noise level, horsepower, and smart features that match your lifestyle. Whether you choose DIY or professional installation, prioritizing safety and proper calibration will ensure your opener serves you reliably for years to come.
If you found this guide helpful, please share it with your friends and family on social media who might be considering a similar upgrade. Have you recently installed a garage door opener? Share your experience in the comments below!
Leave a Reply