Have you ever pulled into your driveway, exhausted after a long day, only to struggle with a heavy, manual garage door? It is a common frustration for many homeowners who dream of the convenience of automatic access. If you are ready to upgrade your home’s functionality, you might be asking yourself, what do you need to install a garage door opener? This guide breaks down everything from essential tools to safety checks, ensuring you feel confident and prepared before you start drilling.
Essential Tools and Equipment Checklist
Before you even unbox your new garage door opener, you need to gather the right tools. Having everything within arm’s reach prevents frustration and ensures the installation process flows smoothly. Most modern openers come with a basic hardware kit, but they rarely include the specialized tools required for a professional-grade installation.
Here is the definitive list of what you will need:
- Power Drill and Bits: You will need a cordless drill with both standard and masonry bits (if drilling into concrete).
- Socket Set and Wrenches: Adjustable wrenches and a socket set (typically 7/16″ and 9/16″) are crucial for tightening bolts on the rail and motor unit.
- Stepladder: A sturdy, 6-foot stepladder is necessary to reach the ceiling mounting points safely.
- Measuring Tape: Accuracy is key when centering the opener above the door.
- Level: A 4-foot level ensures your rail is perfectly straight, preventing premature wear on the trolley.
- Pliers and Wire Strippers: Needed for connecting the safety sensors and wall control wires.
- Assistant: While not a “tool,” having a second person is highly recommended to help lift the heavy motor unit and hold the rail in place.
Pro Tip: Check your garage door’s balance before starting. Disconnect the opener (if you have an old one) and manually lift the door halfway. If it doesn’t stay in place, your springs may need adjustment by a professional before installing a new opener.
Understanding the Components of a Garage Door Opener
To understand what do you need to install a garage door opener, you must first understand what goes into the box. Modern openers are sophisticated machines designed for safety and durability. Familiarizing yourself with these parts will make the assembly process much less intimidating.
The Power Head (Motor Unit)
This is the brain and brawn of the system. It houses the motor, logic board, and light bulbs. Depending on the model, it may use a chain, belt, or screw drive to move the door. For residential areas, belt-drive openers are often preferred due to their quiet operation, while chain drives are known for their durability and lower cost.
The Rail and Trolley
The rail is the long metal track that extends from the motor to the garage door. The trolley slides along this rail, connected to the door via an arm. Ensuring this rail is aligned correctly is critical for smooth operation.
Safety Sensors and Wall Control
Modern regulations require non-contact reversing devices. These are the small eyes installed near the floor on either side of the door. They emit an invisible beam; if anything breaks this beam while the door is closing, the door immediately reverses. The wall control panel allows you to operate the door from inside the garage and often includes a lock feature for security.
Step-by-Step Installation Guide
Installing a garage door opener is a manageable DIY project if you follow a logical sequence. Here is a streamlined approach to getting your system up and running.
Step 1: Assemble the Rail
Lay the rail sections out on the floor. Connect them according to the manufacturer’s instructions, ensuring all bolts are tightened securely. Attach the trolley to the rail and slide it to the center. This is also the time to attach the idler pulley at the end of the rail opposite the motor.
Step 2: Mount the Header Bracket
Locate the center of your garage door opening. Measure up approximately 2–4 inches above the top of the door frame to find the ideal height for the header bracket. Use your level to ensure it is perfectly horizontal. Secure the bracket into the wood framing above the door using lag screws. Do not rely on drywall anchors alone; this bracket bears significant tension.
Step 3: Install the Motor Unit
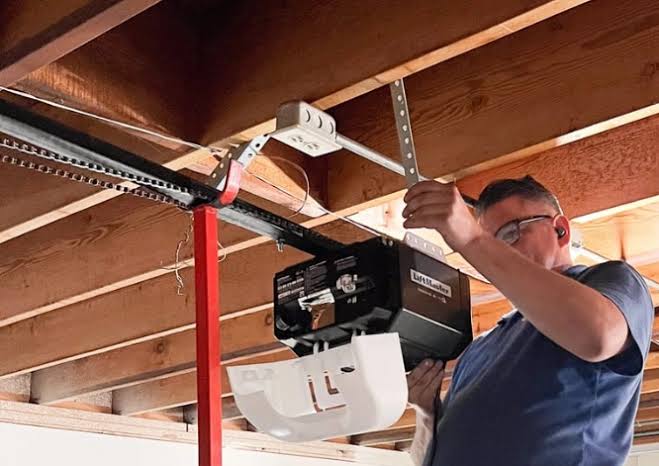
With the help of your assistant, lift the motor unit onto your stepladder or a temporary support structure. Attach the front of the rail to the header bracket you just installed. Then, secure the rear of the motor unit to the ceiling joists using the provided hanging straps. Ensure the motor is level and centered above the door.
Step 4: Connect the Door Arm
Attach the curved door arm to the trolley and the straight arm to the top section of the garage door. Use the U-bracket provided to secure it to the door. Tighten all nuts and bolts, but leave some room for final adjustments.
Step 5: Wire the Safety Sensors and Controls
Run the low-voltage wires from the motor unit to the safety sensors near the floor. Mount the sensors no higher than 6 inches off the ground. Connect the wall control panel near the entry door to the garage. Refer to the Wikipedia article on garage door openers for a deeper understanding of the historical evolution and safety standards that govern these wiring configurations.
Step 6: Program and Test
Plug in the unit. Follow the manual to set the travel limits (how far the door opens and closes) and the force settings. Test the safety reversal system by placing a 2×4 piece of wood on the floor under the door. When the door closes, it should reverse immediately upon hitting the wood.
Common Mistakes to Avoid
Even with the right tools, errors can happen. Being aware of these pitfalls can save you time and money.
| Mistake | Consequence | Solution |
|---|---|---|
| Ignoring Door Balance | Motor burns out quickly | Test spring balance before installation |
| Loose Hardware | Noisy operation and wear | Use thread-locking fluid on vibrating bolts |
| Misaligned Sensors | Door refuses to close | Ensure LED lights are solid, not blinking |
| Incorrect Force Settings | Safety hazard or door stall | Adjust force until door reverses on obstruction |
Frequently Asked Questions
Do I need a special electrical outlet for a garage door opener?
Most residential garage door openers operate on a standard 120-volt household outlet. However, the outlet should be grounded and easily accessible. If your garage lacks an outlet, you will need to hire a licensed electrician to install one, as running extension cords permanently is a fire hazard and violates code.
Can I install a garage door opener on a heavy wooden door?
Yes, but you must check the weight rating of the opener. Standard openers handle doors up to 350–400 pounds. For heavier custom wood doors, look for a heavy-duty model with a higher horsepower rating (at least 3/4 HP) and consider reinforcing the door’s top section where the arm attaches.
How long does it take to install a garage door opener?
For a homeowner with moderate DIY skills and a helper, the installation typically takes between 4 to 6 hours. This includes assembling the rail, mounting the hardware, wiring, and programming. If you encounter unexpected issues like old wiring or uneven ceilings, it may take longer.
Is it safe to install a garage door opener alone?
While technically possible, it is not recommended. The motor unit is heavy and awkward to hold in place while you try to bolt it to the ceiling. An assistant makes the job significantly safer and faster, especially when aligning the rail and securing the hanging brackets.
What maintenance is required after installation?
Regular maintenance ensures longevity. Lubricate the chain or screw drive every six months with a silicone-based lubricant. Check the safety sensors monthly to ensure they are clean and aligned. Listen for unusual noises, which may indicate loose hardware or worn rollers.
Conclusion
Knowing what do you need to install a garage door opener is the first step toward a smoother, more convenient daily routine. By gathering the right tools, understanding the components, and following a careful step-by-step process, you can successfully complete this project yourself. Remember, safety is paramount—always test the reversal mechanisms and ensure your door is balanced before relying on the new system.
If you found this guide helpful, please share it with your friends on social media who might be tackling their own home improvement projects. Your next step could be the click of a button away from effortless garage access!
Leave a Reply