Introduction
Installing a garage door opener can feel overwhelming, especially if you’re tackling this project for the first time. Many homeowners struggle with understanding exactly what do I need to install garage door opener before they even begin, leading to frustrating mid-project trips to the hardware store. This comprehensive guide will walk you through everything required—from essential tools to safety equipment—so you can complete your installation smoothly and confidently.
Whether you’re replacing an old unit or installing a new system in a newly built home, having the right preparation makes all the difference between a smooth weekend project and a multi-day headache.
Essential Tools You’ll Need
Before diving into the installation process, gathering the proper tools is crucial for efficiency and safety. Here’s your complete toolkit:
Power Tools
- Cordless drill/driver with assorted bits (1/4″, 5/16″, and 3/8″)
- Impact driver for heavy-duty fastening
- Reciprocating saw (if cutting metal brackets)
Hand Tools
- Adjustable wrenches (6-inch and 10-inch)
- Socket set with ratchet
- Screwdrivers (Phillips and flathead, multiple sizes)
- Pliers (needle-nose and locking)
- Level (4-foot minimum)
- Tape measure (25-foot recommended)
- Wire strippers and crimpers
- Utility knife
Safety Equipment
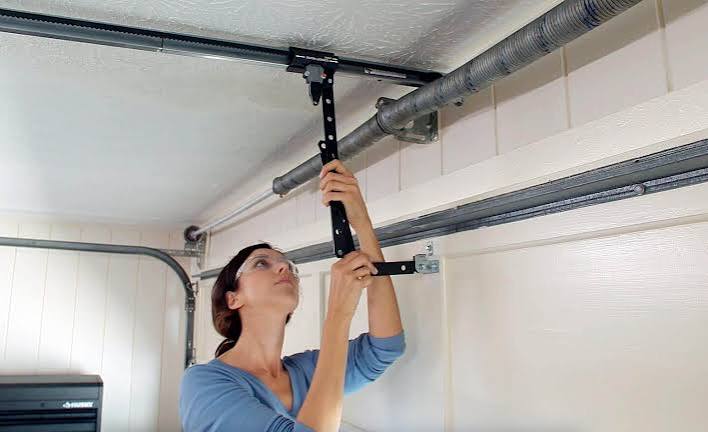
- Safety glasses
- Work gloves
- Stepladder (6-foot minimum, rated for your weight)
- Hard hat (recommended for overhead work)
Having these tools ready before starting prevents unnecessary interruptions and ensures you can work efficiently throughout the installation process.
Required Hardware and Components
Understanding what hardware comes with your opener versus what you need to purchase separately is essential for proper planning.
Typically Included with Opener
Most modern garage door openers include:
- Motor unit with mounting bracket
- Rail assembly
- Trolley and carriage
- Basic remote controls (1-2 units)
- Wall-mounted control panel
- Safety sensors with wiring
- Installation manual and hardware pack
Additional Items You May Need
| Item | Purpose | Estimated Cost |
|---|---|---|
| Lag screws (1/4″ x 3″) | Ceiling mounting | $5-10 |
| Steel angle brackets | Reinforcement | $15-25 |
| Electrical box | Power connection | $10-15 |
| Romex wire (14/2) | Electrical wiring | $20-30 |
| Conduit | Wire protection | $15-20 |
| Toggle bolts | Drywall ceiling mounting | $8-12 |
Important note: If your garage ceiling has drywall without exposed joists, you’ll need toggle bolts or must locate and mount directly to ceiling joists for proper support. The motor unit typically weighs 30-50 pounds, requiring secure mounting.
Understanding Your Garage Door Compatibility
Not all garage doors work with every opener type. Before purchasing, verify compatibility:
Door Type Considerations
- Sectional doors: Compatible with most openers
- Single-panel tilt-up doors: Require specific rail systems
- Roll-up doors: Need specialized commercial-grade openers
- Custom or oversized doors: May require heavy-duty models (3/4 HP or higher)
Weight and Size Requirements
Standard residential garage doors weigh between 130-400 pounds. Check your door’s specifications:
- Doors under 7 feet tall: Standard 1/2 HP opener sufficient
- Doors 7-8 feet tall: 1/2 to 3/4 HP recommended
- Doors over 8 feet or insulated: 3/4 HP or higher required
According to the International Door Association, improperly matched openers account for nearly 40% of premature garage door system failures.
Electrical Requirements and Safety
Proper electrical setup is non-negotiable for safe operation.
Power Source Specifications
- Voltage: Standard 120V household current
- Outlet location: Within 6 feet of motor unit
- Circuit: Dedicated 15-amp circuit recommended
- GFCI protection: Required by most building codes
Wiring Guidelines
If you need to run new electrical lines:
- Turn off power at the breaker box
- Use 14-gauge wire for runs under 50 feet
- Install conduit where wires are exposed
- Ensure all connections are in approved electrical boxes
- Have work inspected if local codes require permits
For detailed electrical safety standards, refer to the National Electrical Code guidelines available through Wikipedia’s NEC overview.
Step-by-Step Installation Overview
While specific steps vary by manufacturer, here’s the general process:
Phase 1: Preparation (30-45 minutes)
- Disconnect existing opener (if applicable)
- Clear workspace and ensure adequate lighting
- Verify all parts against inventory list
- Read entire manual before beginning
Phase 2: Mounting the Header Bracket (20-30 minutes)
- Locate center of garage door
- Measure 2-4 inches above door height
- Secure bracket to wall studs or reinforced header
- Verify level and tightness
Phase 3: Installing the Rail Assembly (45-60 minutes)
- Assemble rail sections per instructions
- Attach trolley and carriage
- Connect rail to header bracket
- Support opposite end temporarily
Phase 4: Mounting the Motor Unit (30-45 minutes)
- Position motor on ceiling joists
- Use angle iron brackets if needed for clearance
- Secure with lag screws (minimum 3/8″ diameter)
- Connect motor to rail assembly
Phase 5: Electrical and Safety Setup (30-45 minutes)
- Install wall control panel (4-5 feet high)
- Mount safety sensors (6 inches above floor)
- Run and connect all wiring
- Program remotes and test operation
Phase 6: Final Adjustments (20-30 minutes)
- Set travel limits (open/close positions)
- Adjust force settings
- Test safety reversal feature
- Lubricate moving parts
Total estimated time: 3-5 hours for first-time installers
Common Mistakes to Avoid
Learning from others’ errors can save you time and frustration:
- Skipping the manual: Each brand has unique requirements
- Improper bracket mounting: Must hit structural supports, not just drywall
- Incorrect sensor alignment: Even 1/4 inch misalignment causes failure
- Over-tightening bolts: Can strip threads or crack components
- Ignoring balance testing: Door should stay in place when manually lifted halfway
Maintenance Tips for Longevity
Once installed, proper maintenance extends your opener’s lifespan significantly:
- Monthly: Test safety reversal feature
- Quarterly: Lubricate chain/belt and rollers
- Annually: Inspect cables, springs, and hardware
- Every 5 years: Consider professional inspection
A well-maintained garage door opener typically lasts 10-15 years, according to industry data from major manufacturers.
When to Call a Professional
While DIY installation is feasible for many homeowners, consider professional help if:
- Your garage has unusual ceiling structures
- You’re uncomfortable working with electrical systems
- The door is oversized or unusually heavy
- Local codes require licensed installation
- You encounter unexpected complications
Professional installation typically costs $200-400 but provides warranty coverage and peace of mind.
FAQ Section
How much does it cost to install a garage door opener myself?
DIY installation costs typically range from $150-400 for the opener unit plus $20-50 for additional hardware if needed. This compares favorably to professional installation, which averages $400-800 total including labor and materials.
Can I install a garage door opener alone?
Yes, most installations can be completed solo, though having a helper makes mounting the motor unit and holding rails in place significantly easier. Budget an extra hour if working alone versus with assistance.
Do I need a permit to install a garage door opener?
Permit requirements vary by location. Most jurisdictions don’t require permits for simple opener replacements, but new electrical work or structural modifications may need approval. Check with your local building department before starting.
How long does garage door opener installation take?
First-time installers should budget 4-6 hours. Experienced DIYers typically complete the job in 2-3 hours. Rushing increases error risk, so plan for a full afternoon or weekend morning.
What happens if I install the safety sensors incorrectly?
Improperly installed sensors prevent the door from closing—a built-in safety feature. The door will reverse immediately upon attempting to close. Realign sensors so their indicator lights show solid (not blinking) and test thoroughly before regular use.
Can I use my old remote controls with a new opener?
Generally no. Modern openers use rolling code technology for security, making older remotes incompatible. However, some brands offer universal remotes or conversion kits. Check with the manufacturer about compatibility options.
Conclusion
Now that you know exactly what do I need to install garage door opener, you’re well-prepared to tackle this rewarding DIY project. With the right tools, proper planning, and attention to safety details, you can successfully install your garage door opener while saving hundreds compared to professional installation.
Remember to prioritize safety throughout the process, double-check all connections, and test thoroughly before relying on your new system. The satisfaction of completing this project yourself—and the convenience of automated garage access—makes the effort worthwhile.
Did you find this guide helpful? Share it with friends who might be considering their own garage door opener installation! Follow us on social media for more home improvement tips and DIY guides.
Leave a Reply