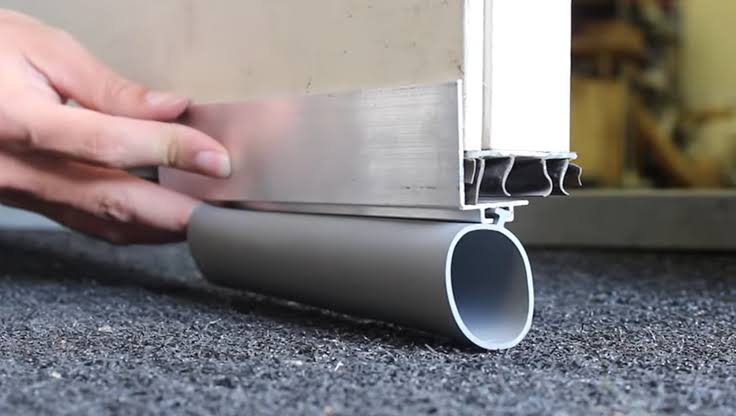
Have you ever noticed a chilly draft sneaking into your garage during winter, or perhaps spotted small insects marching across your concrete floor? These common annoyances often stem from one overlooked component: the seal at the base of your door. Understanding what are the different types of garage door bottom seals is the first step toward creating a tighter, more energy-efficient, and pest-free space for your home.
A worn-out or incorrect seal can compromise your home’s insulation, allow water damage during heavy rains, and let unwanted critters make themselves at home. Whether you are a seasoned DIY enthusiast or a homeowner looking to understand maintenance basics, choosing the right bottom seal is crucial for long-term comfort and protection.
Why Does Your Garage Door Need a Bottom Seal?
Before diving into the specific types, it is essential to understand the critical role this component plays. The bottom seal, often referred to as a threshold seal or weatherstrip, acts as the primary barrier between the interior of your garage and the outside elements.
According to energy efficiency experts, gaps around garage doors can account for significant heat loss in colder climates. A proper seal ensures that your heated or cooled air stays inside, reducing strain on your HVAC system. Furthermore, it prevents rainwater from pooling inside, which can lead to mold growth and structural damage over time.
For a deeper technical understanding of how weatherization impacts residential structures, you can refer to general building science principles outlined on Wikipedia.
What Are the Different Types of Garage Door Bottom Seals?
When shopping for replacements or upgrades, you will generally encounter four main categories. Each type has unique characteristics suited for specific door conditions and environmental needs.
1. Rubber T-Seals (The Industry Standard)
Rubber T-seals are the most common type found in residential garages. They are named for their “T” shape, where the top part inserts into a channel (groove) at the bottom of the door, and the bottom part compresses against the floor.
Key Features:
- Material: High-density rubber or thermoplastic elastomer.
- Installation: Slides into an existing aluminum retainer channel at the door’s base.
- Best For: Doors with a pre-existing channel; moderate unevenness in the floor.
Pros:
- Excellent durability and resistance to cracking.
- Provides a tight seal against wind and rain.
- Relatively easy to replace if the channel is intact.
Cons:
- Requires a specific channel size; not universal.
- Can become stiff in extreme cold, reducing effectiveness temporarily.
2. Vinyl Bulb Seals
Vinyl seals are similar to rubber T-seals but are made from softer vinyl material. They often feature a bulbous shape that compresses easily when the door closes.
Key Features:
- Material: Flexible PVC or vinyl.
- Installation: Similar to T-seals, fits into a retainer channel.
- Best For: Older doors or areas with mild weather conditions.
Pros:
- Very affordable and widely available.
- Soft material conforms well to minor floor irregularities.
- Quiet operation when the door closes.
Cons:
- Less durable than rubber; prone to tearing over time.
- Can degrade faster under direct UV sunlight.
- May not provide a tight enough seal for severe weather.
3. Brush Seals (Sweep Seals)
Brush seals consist of dense bristles attached to a metal or plastic strip. Instead of compressing against the floor, the bristles sweep across the surface as the door moves.
Key Features:
- Material: Nylon or polypropylene bristles.
- Installation: Screwed or adhered to the bottom edge of the door.
- Best For: Uneven concrete floors, driveways with slopes, or areas with debris.
Pros:
- Highly effective at keeping out leaves, dirt, and small pests.
- Works well on uneven surfaces where compression seals fail.
- Low friction reduces wear on the garage door opener.
Cons:
- Does not provide a complete air-tight seal (drafts may still pass through).
- Bristles can trap moisture if not cleaned regularly.
- Less effective against heavy driving rain compared to rubber.
4. Top-Mount or Retrofit Seals
If your garage door does not have a channel for a T-seal, or if the existing channel is damaged, retrofit seals are the solution. These attach directly to the exterior face of the door bottom.
Key Features:
- Material: Usually heavy-duty rubber.
- Installation: Uses screws or strong adhesive to mount on the outside.
- Best For: Doors without channels, damaged channels, or custom doors.
Pros:
- Universal fit; works on almost any door type.
- Creates a robust barrier against water and wind.
- No need to replace the entire bottom panel section.
Cons:
- Installation is slightly more complex (drilling required).
- Visible from the outside, which may affect aesthetics.
- Must be aligned perfectly to avoid dragging.
Comparison Table: Choosing the Right Seal
To help you decide, here is a quick comparison of the primary options:
| Feature | Rubber T-Seal | Vinyl Bulb Seal | Brush Seal | Retrofit Seal |
|---|---|---|---|---|
| Durability | High | Medium | High | High |
| Weather Resistance | Excellent | Good | Fair | Excellent |
| Pest Prevention | Good | Good | Excellent | Good |
| Floor Compatibility | Flat/Slightly Uneven | Flat | Very Uneven | Flat/Slightly Uneven |
| Installation Difficulty | Easy | Easy | Medium | Medium/Hard |
| Cost | Moderate | Low | Moderate | Moderate |
How to Measure and Install a New Bottom Seal
Replacing your garage door bottom seal is a manageable DIY project. Follow these steps to ensure a perfect fit.
Step 1: Identify Your Current Seal Type
Inspect the bottom of your garage door. Look for an aluminum channel holding the seal. If present, measure the width of the opening. Common sizes are 1.5 inches, 2 inches, or 2.5 inches. If there is no channel, you will need a retrofit seal.
Step 2: Measure the Width
Measure the exact width of your garage door from left to right. Add 2–3 inches to this measurement to allow for trimming and error. Standard doors are usually 8, 9, or 16 feet wide.
Step 3: Remove the Old Seal
- For T-Seals: Pull the old rubber strip out of the channel. If it is stuck, use a flathead screwdriver to gently pry it loose. Clean the channel thoroughly with a brush to remove rust and debris.
- For Retrofit Seals: Unscrew the old seal or carefully cut the adhesive backing.
Step 4: Install the New Seal
- Insertion: Start at one end of the door. Push the new seal into the channel. You may need to use a rubber mallet to tap it gently into place. Work your way across the door.
- Trimming: Once inserted, trim any excess material with a utility knife so it fits flush with the door edges.
- Testing: Close the door slowly. Check for gaps by shining a flashlight from the inside while someone watches from the outside. Adjust if necessary.
FAQ: Common Questions About Garage Door Seals
1. How often should I replace my garage door bottom seal?
Generally, you should inspect your seal annually. Replacement is typically needed every 3–5 years, depending on climate and usage. If you notice visible cracks, tears, or persistent drafts, replace it immediately regardless of age.
2. Can I use silicone lubricant on my rubber seal?
Yes, applying a silicone-based lubricant twice a year can keep rubber seals flexible and prevent them from drying out or cracking in extreme temperatures. Avoid petroleum-based products, as they can degrade rubber over time.
3. Which seal is best for keeping mice out?
While all seals help, brush seals are particularly effective at blocking entry points for small rodents because the dense bristles fill gaps that rigid rubber might miss on uneven floors. However, ensuring there are no other gaps in the side tracks is equally important.
4. My garage floor is very uneven. Which seal should I choose?
For significantly uneven concrete or sloped driveways, a brush seal or a heavy-duty retrofit rubber seal is your best option. Standard T-seals may leave gaps on high spots, allowing water and pests to enter.
5. Does a better seal really save money on energy bills?
Absolutely. A tightly sealed garage acts as a buffer zone for your home. If your garage is attached, preventing air exchange with the outside reduces the workload on your home’s heating and cooling systems, leading to measurable savings over time.
Conclusion
Understanding what are the different types of garage door bottom seals empowers you to make informed decisions about your home’s maintenance. Whether you opt for the durability of rubber T-seals, the flexibility of vinyl, or the versatility of brush sweeps, the right choice will protect your garage from water, pests, and energy loss.
Don’t let a small gap cause big problems. Take a moment this weekend to inspect your garage door bottom. If it looks worn, consider replacing it using the steps outlined above. Your home—and your wallet—will thank you.
Found this guide helpful? Share it with your neighbors or on social media to help others keep their garages dry and efficient!
Leave a Reply