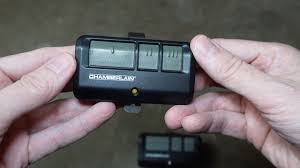
Have you ever stood in your driveway, staring at your garage door remote, wondering which button does what? You are not alone. Many homeowners struggle with what are the 3 buttons on a garage door opener, especially when one seems to work while the others remain mysterious. Understanding these buttons is crucial for convenience, security, and efficient daily use of your garage system.
In this comprehensive guide, we will break down exactly what each button does, why your opener might have three buttons instead of two or four, and how to maximize their functionality. Whether you are a new homeowner or simply curious about your existing setup, this article will provide clear, actionable answers.
Understanding the Standard Three-Button Layout
Most modern garage door openers feature a remote control with multiple buttons. While configurations vary by brand and model, the three-button layout is among the most common. Typically, these buttons serve distinct purposes designed to enhance user convenience and security.
The primary function of having multiple buttons is to allow control over more than one garage door or to activate additional features such as lighting or gate access. However, the exact configuration depends on your specific opener model and how it was programmed during installation.
Button 1: Primary Garage Door Control
The first button is almost always dedicated to your main garage door. This is the button you will use most frequently. When pressed, it sends a signal to the opener motor to either open or close the door, depending on its current position.
Key characteristics:
- Controls the primary garage door attached to the opener
- Often marked with a house icon or labeled “Door 1”
- May also activate the garage light if configured to do so
- Typically has the strongest signal range since it is used most often
This button is usually pre-programmed at the factory or during professional installation. If you have only one garage door, this is likely the only button you need to use regularly.
Button 2: Secondary Door or Accessory Control
The second button serves a flexible role. Its function depends on your home setup and programming preferences. Common uses include:
| Possible Function | Description |
|---|---|
| Second Garage Door | Controls a separate garage door if you have a multi-car garage with dual openers |
| Gate Access | Opens an exterior gate or fence door connected to a secondary receiver |
| Workshop Door | Operates a detached workshop or shed door with its own opener unit |
| Unused/Blank | May remain unprogrammed if you only have one garage door |
If you do not have a second door or accessory to control, this button may appear non-functional. However, it can often be programmed later if your needs change.
Button 3: Lighting or Auxiliary Function
The third button frequently controls auxiliary features rather than door movement. The most common function is activating the garage door opener’s built-in light without moving the door itself.
Typical uses for Button 3:
- Light Control: Turns the garage light on or off independently of door operation
- Lock Mode: Engages or disengages a lock feature on certain advanced models
- Vacation Mode: Activates a security mode that disables remote access temporarily
- Additional Door: Controls a third garage door in homes with extensive garage setups
Some newer smart openers allow customization of this button through mobile apps, giving homeowners flexibility to assign functions based on their specific needs.
Why Do Some Openers Have More or Fewer Buttons?
Not all garage door remotes follow the three-button standard. Understanding why variations exist can help you choose the right replacement or upgrade.
Two-Button Remotes
Simpler models may feature only two buttons: one for the door and one for the light. These are common in older systems or basic entry-level openers. They lack the flexibility of three-button models but are sufficient for single-door garages.
Four-Button Remotes
Premium remotes often include four buttons, providing control for up to four separate doors or accessories. These are ideal for large properties with multiple structures, such as a main garage, workshop, guest house, and exterior gate.
Single-Button Remotes
Compact keychain remotes typically have just one button, controlling only the primary garage door. These are convenient for portability but offer limited functionality.
According to industry data from major manufacturers like Chamberlain and LiftMaster, three-button remotes represent approximately 45% of all residential garage door opener sales, making them the most popular choice for average homeowners.[^1]
[^1]: Garage door opener – Wikipedia provides comprehensive technical background on garage door opener evolution and standards.
How to Program Additional Buttons
If your second or third button is not working, it may simply need programming. Most modern openers use a straightforward learning process.
Step-by-Step Programming Guide
- Locate the Learn Button: Find the “Learn” or “Smart” button on your garage door opener motor unit. It is usually located on the back or side panel and may be colored yellow, purple, red, or green.
- Clear Existing Codes (Optional): Press and hold the Learn button for 6–10 seconds until the indicator light blinks or turns off. This clears all previously programmed remotes. Skip this step if you want to keep existing codes.
- Initiate Learning Mode: Press the Learn button once briefly. The indicator light should illuminate or blink, signaling that the opener is ready to receive a new code. You typically have 30 seconds to complete the next step.
- Program the Remote: Within 30 seconds, press and hold the desired button on your remote control for 2–3 seconds. Release the button when the opener’s light blinks or you hear a click sound.
- Test the Button: Press the newly programmed button to verify it operates the intended door or feature. If it does not work, repeat steps 2–4.
- Repeat for Additional Buttons: If programming multiple buttons, repeat the process for each one, ensuring you press the correct button on the remote each time.
Important Safety Note: Always ensure the garage door area is clear of people and obstacles before testing newly programmed buttons. Keep children and pets away during the programming process.
Troubleshooting Common Button Issues
Even with proper programming, buttons may occasionally malfunction. Here are solutions to frequent problems.
Button Does Not Respond
- Check Batteries: Replace remote batteries with fresh ones. Weak batteries are the most common cause of unresponsive buttons.
- Reprogram the Button: Follow the programming steps above to re-establish the connection.
- Inspect for Damage: Check if the button is physically stuck or damaged. Clean around the button with a soft cloth.
Button Controls Wrong Door
- Reprogram All Buttons: Clear all codes and reprogram each button systematically to ensure correct assignment.
- Check Receiver Settings: Some openers allow channel assignment adjustments through dip switches or digital settings.
Intermittent Functionality
- Signal Interference: LED bulbs, wireless routers, or nearby electronics can interfere with remote signals. Try relocating potential sources of interference.
- Range Limitations: Ensure you are within the effective range of the opener, typically 100–150 feet for standard models.
Maximizing Your Three-Button Remote
To get the most out of your garage door opener remote, consider these expert tips.
Label Your Buttons: Use small labels or markers to identify what each button controls, especially if you have multiple doors or accessories. This prevents confusion for family members or guests.
Regular Maintenance: Test all buttons monthly to ensure they remain functional. Replace batteries proactively every 6–12 months, even if they appear to be working.
Upgrade to Smart Controls: Modern smart garage door openers allow smartphone control, eliminating reliance on physical buttons. However, keeping a traditional remote as a backup is recommended for power outages or technical issues.
Security Best Practices: Change your opener codes periodically, especially if you lose a remote or move into a new home. This prevents unauthorized access to your garage.
Frequently Asked Questions
What if my garage door opener remote has only two buttons?
Two-button remotes typically control one garage door and one light function. If you need to control additional doors, consider upgrading to a three or four-button remote compatible with your opener model. Most major brands offer universal remotes that can be programmed to work with existing systems.
Can I reprogram the third button to control a second garage door?
Yes, in most cases. If your opener supports multiple doors and you have a second receiver installed, you can program the third button to control the second door. Consult your opener’s manual for specific instructions, as programming procedures vary by manufacturer.
Why does pressing one button sometimes activate the light instead of opening the door?
This usually indicates a programming error or accidental reconfiguration. Reprogram the button following the manufacturer’s instructions. If the problem persists, check whether your opener has a “light delay” feature that activates the light briefly when the door operates.
Are three-button remotes compatible with all garage door openers?
Compatibility depends on the frequency and technology used by your opener. Most modern openers use rolling code technology operating at 315 MHz or 390 MHz frequencies. Check your opener’s manual or consult the manufacturer to ensure remote compatibility before purchasing a replacement.
How often should I replace my garage door remote batteries?
Replace batteries every 6–12 months as preventive maintenance, or immediately when you notice reduced range or intermittent functionality. Use high-quality alkaline batteries for optimal performance and longevity. Avoid rechargeable batteries, as they may not provide consistent voltage levels required by garage door remotes.
Conclusion
Understanding what are the 3 buttons on a garage door opener empowers you to use your system efficiently and securely. The first button typically controls your main garage door, the second manages a secondary door or accessory, and the third often handles lighting or auxiliary functions. By knowing each button’s purpose and how to program them correctly, you can streamline your daily routine and troubleshoot issues with confidence.
Remember to maintain your remote regularly, keep spare batteries on hand, and consider upgrading to smart controls if you want enhanced convenience. If you found this guide helpful, please share it with friends or family who might benefit from understanding their garage door opener better. Knowledge is the key to a smoothly functioning home!
Leave a Reply