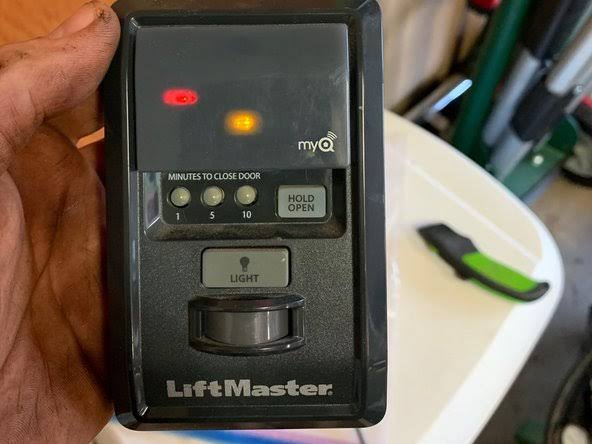
Is your Liftmaster garage door will open but not close with remote, leaving you frustrated and potentially unsafe? You are not alone; this is one of the most common issues homeowners face with modern garage door openers, often caused by simple misalignments or minor setting errors rather than major mechanical failures. In this guide, we will walk you through clear, step-by-step solutions to get your door closing smoothly again without calling a technician.
Why Does My Liftmaster Open But Refuse to Close?
When your garage door responds perfectly to the “open” command but stalls or reverses immediately upon trying to close, it is usually a safety feature kicking in. Modern Liftmaster openers are designed with sophisticated obstruction detection systems. If the system perceives any risk—whether from a blocked beam, a misaligned track, or a programming glitch—it will default to keeping the door open to prevent injury or damage.
Understanding the root cause is half the battle. According to industry data, nearly 60% of “won’t close” issues are related to photo-eye sensors, while another 20% stem from travel limit settings. Only a small percentage involve actual motor failure. By systematically checking these areas, you can often resolve the issue in under 30 minutes.
Check the Safety Photo-Eye Sensors First
The most frequent culprit behind a Liftmaster garage door that opens but won’t close is the safety photo-eye sensors. These small devices, located near the bottom of your garage door tracks, emit an invisible infrared beam. If this beam is interrupted or misaligned, the opener assumes an object (or person) is in the way and refuses to close.
How to Inspect and Align Your Sensors
- Check the LED Lights: Look at the sensors on both sides of the door. One should have a steady green light (power), and the other should have a steady amber or red light (alignment). If the light is blinking or off, the sensors are misaligned or obstructed.
- Clean the Lenses: Wipe the small plastic lenses with a soft, dry cloth. Dust, spiderwebs, or dirt can block the infrared signal.
- Realign the Brackets: Loosen the wing nuts on the sensor brackets slightly. Gently adjust the sensors until both LED lights turn solid. Tighten the nuts carefully without shifting the position.
- Check for Sunlight Interference: Direct sunlight hitting the receiver sensor can sometimes overwhelm the infrared signal. If this happens in the late afternoon, consider installing a small shade or hood over the sensor.
For more detailed technical specifications on how infrared safety systems work, you can refer to the general principles outlined on Wikipedia’s page on Garage Door Openers.
Adjust the Travel Limit Settings
If your sensors are aligned and clean, the next likely issue is the travel limit settings. These settings tell the motor how far to move the door up and down. If the “down” limit is set incorrectly, the door may think it has hit an obstacle before it actually reaches the floor.
Step-by-Step Adjustment Guide
Most newer Liftmaster models use arrow buttons on the back of the motor unit, while older models use screw drivers.
For Models with Arrow Buttons:
- Locate the “UP” and “DOWN” arrow buttons on the motor head.
- Press the “DOWN” arrow once to enter adjustment mode. The lights will flash.
- Use the “DOWN” arrow to increase the travel distance if the door stops short, or the “UP” arrow to decrease it if the door strains against the floor.
- Press the “STOP” button to save the setting.
For Older Models with Screws:
- Find the two screws labeled “Up Limit” and “Down Limit.”
- Turn the “Down Limit” screw in small increments (1/8th of a turn). Clockwise usually increases travel, counter-clockwise decreases it.
- Test the door after each adjustment.
Pro Tip: Make adjustments in tiny increments. Over-adjusting can cause the door to slam into the ground, damaging the seals and the opener itself.
Inspect the Remote Control Battery and Signal
Sometimes the issue isn’t the door at all, but the remote itself. A weak battery may have enough power to send the “open” signal (which often requires less precision) but fails to transmit the “close” command reliably, especially if there is interference.
Quick Remote Diagnostics
- Replace the Battery: Even if the LED on the remote lights up, the voltage may be too low for consistent operation. Use a fresh CR2032 or similar battery as specified in your manual.
- Test the Wall Console: Try closing the door using the wired wall console inside the garage. If it closes properly with the wall button but not the remote, the issue is definitely with the remote or its programming.
- Reprogram the Remote: Clear the remote’s memory and re-sync it with the opener. This refreshes the security code and can eliminate signal corruption.
Look for Physical Obstructions and Track Issues
A garage door is a heavy mechanical system. If the rollers are stuck, the tracks are bent, or the springs are unbalanced, the motor will detect excess resistance and reverse direction to prevent burnout.
What to Check
- Track Alignment: Visually inspect the metal tracks on both sides. They should be parallel and securely bolted to the wall. Look for any dents or gaps.
- Roller Condition: Check if the rollers are cracked or chipped. Nylon rollers can wear out over time, causing friction.
- Lubrication: Apply a silicone-based lubricant to the rollers, hinges, and springs. Avoid WD-40 as it attracts dust and can gum up the mechanism over time.
- Manual Operation: Disconnect the opener by pulling the red emergency release cord. Try lifting and lowering the door manually. It should move smoothly with minimal effort. If it feels heavy or sticks, the problem is mechanical, not electronic.
Reset the Liftmaster Opener System
If none of the above steps work, a full system reset can clear any internal software glitches. This is similar to rebooting your computer when it acts strangely.
How to Perform a Hard Reset
- Unplug the garage door opener from the power outlet.
- If you have a backup battery, disconnect it as well.
- Wait for at least 60 seconds. This allows the capacitors to discharge fully.
- Plug the opener back in.
- Reprogram your remotes and keypad entries, as a hard reset may clear stored codes.
- Test the door operation.
FAQ: Common Questions About Liftmaster Closing Issues
Q: Why does my garage door close when I hold the wall button but not with the remote?
A: This indicates the safety sensors are likely misaligned or blocked. Holding the wall button bypasses the safety sensors, allowing the door to close despite the error. Check and realign your photo-eye sensors immediately.
Q: Can cold weather affect my Liftmaster’s ability to close?
A: Yes. Cold temperatures can cause metal tracks to contract and lubricants to thicken, increasing resistance. Additionally, extreme cold can drain remote batteries faster. Ensure your door is properly lubricated with cold-weather grease if you live in a chilly climate.
Q: My door starts to close then immediately goes back up. What is wrong?
A: This is a classic sign of sensor misalignment or an obstruction in the path. It can also indicate that the “force” setting is too low, causing the motor to perceive normal resistance as an obstacle. Check sensors first, then adjust the force settings slightly higher if needed.
Q: Is it safe to disable the safety sensors to make the door close?
A: No. Never disable your safety sensors. They are a critical legal requirement designed to prevent serious injury or death, particularly to children and pets. If the sensors are faulty, replace them immediately rather than bypassing them.
Q: How often should I maintain my Liftmaster opener?
A: Perform a basic visual inspection and lubrication every six months. Test the safety reversal feature monthly by placing a 2×4 piece of wood on the floor in the door’s path. The door should reverse immediately upon contact.
Conclusion
Dealing with a Liftmaster garage door will open but not close with remote issue can be stressful, but it is rarely a catastrophic failure. By methodically checking your safety sensors, adjusting travel limits, inspecting for physical obstructions, and ensuring your remote is functioning correctly, you can restore your garage door’s functionality quickly and safely.
Remember, regular maintenance is key to preventing these issues in the future. Keep your tracks clean, your sensors aligned, and your batteries fresh. If you have tried all these steps and the problem persists, it may be time to consult a certified Liftmaster technician to inspect the motor board or springs.
Did this guide help you fix your garage door? Share this article with friends or family who might be struggling with similar opener issues, and let us know in the comments which solution worked for you!
Leave a Reply