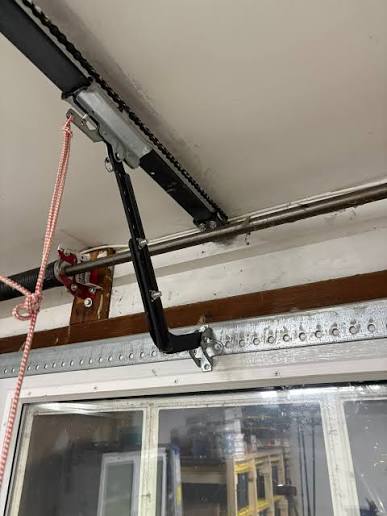
Have you ever pressed the button to close your garage door, only to watch it stop halfway or reverse back up in frustration? You are not alone. Dealing with a Chamberlain garage door opener not closing all the way is one of the most common issues homeowners face, often stemming from simple sensor misalignments or limit switch errors rather than major mechanical failures.
In this guide, we will walk you through the exact steps to diagnose and fix this problem safely. By understanding how your opener communicates with the door, you can save time, money, and the hassle of calling a technician for minor adjustments.
Why Does My Chamberlain Garage Door Stop Before Closing?
Before diving into tools and screws, it is crucial to understand why this happens. Modern garage door openers are designed with safety as their primary directive. If the system detects any resistance, obstruction, or signal interruption, it will immediately halt or reverse the door to prevent injury or damage.
According to industry standards, over 80% of “incomplete closing” issues are related to safety sensors or travel limit settings rather than motor failure. When your Chamberlain garage door opener not closing all the way, it is usually trying to tell you that something is wrong with its environment or configuration.
Common culprits include:
- Misaligned safety eyes (sensors).
- Dirty lenses blocking the infrared beam.
- Incorrectly set down-limit switches.
- Obstructions in the track or rollers.
Understanding these root causes helps you approach the repair with confidence rather than guesswork.
Check and Align the Safety Sensors First
The most frequent reason for a garage door refusing to close completely is the safety sensor system. These small devices, located near the floor on either side of the door, emit an invisible infrared beam. If this beam is broken or interrupted, the door will not close.
Step-by-Step Sensor Inspection
- Check the Indicator Lights: Look at the small LED lights on each sensor. Typically, one sensor has a green light (power) and the other has an amber or red light (beam alignment). If the amber light is blinking or off, the sensors are misaligned.
- Clean the Lenses: Use a soft, dry cloth to wipe away dust, spiderwebs, or dirt from the sensor lenses. Even a thin layer of grime can block the infrared signal.
- Verify Alignment: Ensure both sensors are facing each other directly. They should be at the same height and angle. If one has been bumped by a car or lawn mower, gently adjust it until the indicator light turns solid.
- Remove Obstructions: Check for any objects between the sensors, such as boxes, bikes, or even tall grass growing in front of them.
For more detailed technical specifications on how infrared safety systems work in residential automation, you can refer to general principles outlined on Wikipedia’s page on Garage Door Openers.
Adjust the Down-Limit Switch Correctly
If your sensors are working perfectly (solid lights) but the door still stops short of the ground, the issue likely lies with the down-limit switch. This setting tells the motor exactly how far to travel before stopping. Over time, vibrations can cause this setting to drift.
How to Adjust the Limit Settings
Most modern Chamberlain models use dial-based or screw-based limit adjustments located on the side of the motor unit.
- Locate the Limit Dials: Find the dials labeled “Up” and “Down.” The down-limit dial controls how far the door closes.
- Make Small Adjustments: Turn the down-limit dial slightly in the direction indicated by the arrow (usually clockwise to increase travel distance). Do not turn it more than one full rotation at a time.
- Test the Door: Press the wall button to close the door. Watch carefully. If it still stops too high, make another small adjustment.
- Avoid Over-Closing: Be careful not to set the limit too low. If the door pushes hard against the ground, it can strain the motor and damage the seals. The door should rest gently on the weather stripping.
Pro Tip: If your model uses screw-driven limits instead of dials, use a flathead screwdriver to turn the adjustment screw. Always mark the original position with a marker so you can return to it if needed.
Inspect Tracks and Rollers for Obstructions
Sometimes, the problem is physical rather than electronic. If the door encounters resistance while moving down, the opener’s force-sensing technology will trigger a reversal to prevent damage.
What to Look For
- Debris in Tracks: Check the metal tracks on both sides for rocks, leaves, or hardened grease. Clean them with a damp cloth and a mild degreaser.
- Damaged Rollers: Inspect the rollers that move along the track. If they are cracked, chipped, or seized, they can cause the door to jerk or stop. Replace any damaged rollers immediately.
- Loose Hardware: Tighten any loose bolts or brackets on the track system. Vibration from daily use can loosen these over time, causing misalignment.
| Component | Common Issue | Quick Fix |
|---|---|---|
| Safety Sensors | Misaligned or dirty | Clean lenses and realign brackets |
| Down-Limit Switch | Set too high | Adjust dial incrementally |
| Tracks | Debris or dents | Clean tracks and remove obstructions |
| Rollers | Worn or seized | Lubricate or replace rollers |
Test the Force Settings for Safe Operation
If the door closes partially but then reverses without hitting an obstacle, the close-force setting may be too low. This setting determines how much power the motor uses to push the door down. If it is set too low, the motor interprets normal friction as an obstruction.
Adjusting Close Force
- Find the Force Dial: Locate the dial labeled “Close Force” or similar on the motor unit.
- Increase Slightly: Turn the dial one notch higher. Do not max it out immediately, as excessive force can be dangerous.
- Test with Obstruction: Place a 2×4 piece of wood flat on the ground under the center of the door. Close the door. It should reverse upon hitting the wood. If it does not reverse, the force is too high and must be decreased for safety.
- Balance Sensitivity: Find the sweet spot where the door closes fully under normal conditions but still reverses when it hits a genuine obstacle.
When to Call a Professional Technician
While many issues with a Chamberlain garage door opener not closing all the way can be fixed DIY, some situations require professional expertise. If you notice snapping sounds, broken springs, or if the door feels excessively heavy to lift manually, do not attempt repairs yourself.
Garage door springs are under extreme tension and can cause serious injury if handled incorrectly. Additionally, if you have adjusted limits and sensors multiple times without success, there may be an internal circuit board failure requiring specialized diagnostics.
FAQ Section
Q: Why does my Chamberlain garage door close halfway and then go back up?
A: This is typically caused by misaligned safety sensors or an obstructed infrared beam. Check that the sensor lights are solid and not blinking. If they are aligned, inspect the tracks for debris causing resistance.
Q: Can weather affect my garage door’s ability to close?
A: Yes. Extreme cold can cause metal tracks to contract, increasing friction. Humidity can also fog up sensor lenses. Regular maintenance and cleaning can mitigate these environmental effects.
Q: How often should I adjust the limit switches?
A: Limit switches generally do not need frequent adjustment. However, if you notice the door not sealing properly against the ground or stopping too high, check the settings. Annual maintenance checks are recommended.
Q: Is it safe to bypass the safety sensors to force the door closed?
A: No. Bypassing safety sensors is extremely dangerous and violates safety standards. The sensors are designed to prevent the door from crushing people, pets, or objects. Always fix the underlying issue instead of bypassing safety features.
Q: What does it mean if the sensor light is blinking?
A: A blinking light on the receiving sensor usually indicates misalignment. Ensure both sensors are pointing directly at each other and are securely mounted. If the light continues to blink after alignment, check for wiring damage.
Conclusion
Dealing with a Chamberlain garage door opener not closing all the way can be frustrating, but it is rarely a catastrophic failure. By systematically checking your safety sensors, adjusting the down-limit switch, and ensuring your tracks are clean, you can resolve most issues quickly and safely.
Remember, regular maintenance is key to preventing future problems. Take a few minutes each season to inspect your system, and you will enjoy reliable operation for years to come. If you found this guide helpful, please share it with friends or neighbors who might be struggling with their garage doors. Your simple tip could save them a costly service call!
Leave a Reply