Introduction
There’s nothing more frustrating than pressing your LiftMaster garage door opener wall control and getting absolutely no response — especially when you’re rushing out the door or trying to secure your home at night. If your LiftMaster garage door opener is not responding to wall control, you’re not alone; this is one of the most common issues homeowners face with automatic garage doors. The good news? Most causes are simple, inexpensive, and can be resolved in under 30 minutes with basic tools and a little know-how. Let’s walk through every possible reason and fix so you can get your garage door working again — fast.
Why Is My LiftMaster Garage Door Opener Not Responding to Wall Control?
Before diving into solutions, it helps to understand what’s actually happening behind the scenes. Your wall control panel sends an electrical signal through low-voltage wiring to the motor unit (the “head”) mounted on your garage ceiling. When that signal breaks down anywhere along the chain — whether due to loose wires, a dead control panel, or a faulty logic board — your LiftMaster garage door opener stops responding to wall control commands.
According to industry data from the International Door Association (IDA), approximately 1 in 5 garage door service calls each year involve wall control or remote communication failures. That means millions of homeowners deal with this exact problem annually.
Here are the most common culprits:
| Possible Cause | Likelihood | Difficulty to Fix |
|---|---|---|
| Loose or damaged wiring | High | Easy |
| Dead wall control panel | Medium | Easy |
| Tripped GFCI outlet or breaker | Medium | Easy |
| Locked/vacation mode activated | Medium | Very Easy |
| Faulty logic board | Low | Moderate–Hard |
| Motor unit capacitor failure | Low | Moderate |
Step-by-Step Fixes for a LiftMaster Garage Door Opener Not Responding to Wall Control
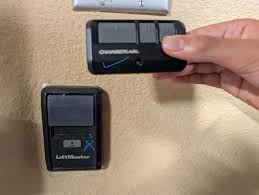
1. Check if Vacation Lock Mode Is Activated
This is the #1 overlooked cause. Many LiftMaster models feature a “Lock” or “Vacation” mode that disables the wall control to prevent unauthorized use.
How to check and disable it:
- Look at your wall control panel for a small lock icon or LED indicator light.
- If the lock light is glowing or flashing, press and hold the Lock button for 3–5 seconds.
- The light should turn off, and normal operation should resume immediately.
💡 Pro Tip: On LiftMaster 8500W and 8550W models, the lock button is often located on the side of the wall panel. On older models like the 3265 or 3240, it may be integrated into the main button area.
2. Inspect the Wiring Between the Wall Control and Motor Unit
Loose, corroded, or pinched wires are responsible for roughly 40% of wall control failures, based on technician surveys from major garage door repair companies.
Step-by-step inspection:
- Turn off power to the garage door opener by unplugging it or switching off the circuit breaker. Safety first!
- Remove the wall control panel from its mounting bracket. You’ll typically find 2 thin wires (often red and white) connected to terminal screws on the back.
- Check that both wires are firmly seated under their respective screws. Tighten any loose connections with a small Phillips-head screwdriver.
- Follow the wire run from the wall control up to the motor head. Look for:
- Staples that have been driven too tightly (pinching the wire)
- Areas where the wire passes through sharp metal edges
- Signs of rodent chewing or corrosion
- At the motor unit, locate the terminal block (usually labeled with numbers or colors) and confirm both wires are securely connected.
- Restore power and test the wall control.
⚠️ Warning: Never work on wiring while the unit is powered. Garage door openers operate on 120V AC, which can cause serious injury.
3. Test and Replace the Wall Control Panel
Wall control panels do wear out over time. The average lifespan of a LiftMaster wall control is 7–12 years, depending on usage frequency and environmental conditions (humidity, temperature swings).
How to test if the panel itself is faulty:
- Disconnect the two wires from the back of the wall control.
- Touch the bare ends of the two wires together briefly (this simulates a button press).
- If the garage door activates, the wall control panel is defective and needs replacement.
- If nothing happens, the issue lies elsewhere (wiring, motor unit, or power supply).
Compatible replacement panels include:
- LiftMaster 882LMW (for Security+ 2.0 systems)
- LiftMaster 883LMW (multi-function panel with timer)
- LiftMaster 041A5434-1C (universal single-button panel)
Replacement panels typically cost between $25–$65 and can be installed in under 10 minutes.
4. Verify Power Supply and Circuit Breaker
Sometimes the problem isn’t the wall control at all — it’s that the motor unit has lost power entirely.
Quick power check:
- Look at the motor unit on your ceiling. Is there an LED status light illuminated?
- If there’s no light, check the electrical outlet the opener is plugged into. Plug in a lamp or phone charger to confirm the outlet works.
- Check your home’s circuit breaker panel for a tripped breaker labeled “garage” or “garage door.”
- If your garage has a GFCI outlet, press the “Reset” button on the outlet face.
If the motor unit has power but still won’t respond to the wall control, move on to the next step.
5. Reset the Logic Board
The logic board is essentially the “brain” of your garage door opener. Electrical surges, power outages, or age can cause it to malfunction.
How to perform a hard reset:
- Unplug the garage door opener from the power source.
- Wait a full 60 seconds to allow residual charge to dissipate.
- While unplugged, press and hold the “Learn” button on the motor unit for 10 seconds (this clears stored codes).
- Plug the unit back in.
- Wait 30 seconds for the system to boot up.
- Test the wall control.
If the wall control responds after a reset, a temporary glitch was likely the cause. If not, the logic board may need professional replacement (costs range from $80–$200 for parts, plus labor).
6. Check for Sensor Alignment Issues
While safety sensors primarily affect remote and auto-close functions, some LiftMaster models will also ignore wall control commands if the photo-eye sensors are misaligned or obstructed.
- Locate the two small sensor units near the floor on either side of the garage door track.
- Ensure both sensors have a steady green or amber light (not blinking).
- Clean the sensor lenses with a soft cloth.
- Realign them so they face each other directly. Even a ¼-inch offset can break the beam.
When to Call a Professional
While most wall control issues are DIY-friendly, consider calling a certified LiftMaster dealer if:
- You’ve tried all steps above and the opener still doesn’t respond
- You notice burnt smells, sparking, or unusual noises from the motor unit
- The logic board shows visible damage (scorch marks, swollen capacitors)
- Your opener is still under warranty (DIY repairs may void coverage)
The average cost for a professional diagnostic visit ranges from $75–$150, with most repairs completed in a single appointment.
Frequently Asked Questions (FAQ)
Q1: Why does my LiftMaster wall control light blink but the door won’t move?
A blinking light usually indicates that the lock/vacation mode is active, or the system is in a fault state. Try holding the lock button for 3–5 seconds. If that doesn’t work, perform a hard reset by unplugging the unit for 60 seconds.
Q2: Can I use any wall control panel with my LiftMaster opener?
Not all panels are universally compatible. LiftMaster uses different communication protocols across generations. Security+ 2.0 models (manufactured after 2012) require compatible 882LMW or 883LMW panels. Older models may use different terminals. Always check your opener’s model number before purchasing a replacement.
Q3: How much does it cost to replace a LiftMaster wall control?
A replacement wall control panel costs between $25 and $65 for the part alone. If you hire a professional to install it, expect to pay an additional $50–$100 in labor. DIY installation takes about 10 minutes and requires only a screwdriver.
Q4: Will resetting my LiftMaster opener erase my remote controls?
Yes, performing a full reset by holding the Learn button for 10 seconds will erase all paired remotes and keypads. You’ll need to reprogram each device afterward. Refer to your owner’s manual for specific pairing instructions for your model.
Q5: How long do LiftMaster garage door openers last?
The average lifespan of a LiftMaster garage door opener is 10–15 years with regular maintenance. Wall control panels tend to fail sooner, typically around the 7–12 year mark. Regular lubrication, sensor cleaning, and annual inspections can extend the life of your entire system.
Q6: Is it safe to bypass the wall control and operate the door manually?
You can always disengage the opener using the emergency release cord (the red handle hanging from the rail) and operate the door manually. However, this should only be a temporary solution. A malfunctioning wall control could indicate deeper electrical issues that should be addressed promptly for safety.
Conclusion
Dealing with a LiftMaster garage door opener not responding to wall control can feel overwhelming, but as we’ve shown, the vast majority of cases come down to a handful of straightforward fixes — from checking vacation lock mode and inspecting wiring to replacing a worn-out wall panel or resetting the logic board. By following the step-by-step guide above, you can diagnose and resolve the issue yourself, saving both time and money.
Remember: safety always comes first. If you’re ever unsure about working with electrical components, don’t hesitate to call a licensed professional. Your garage door is one of the heaviest moving objects in your home, and proper function is essential for your family’s security.
Leave a Reply