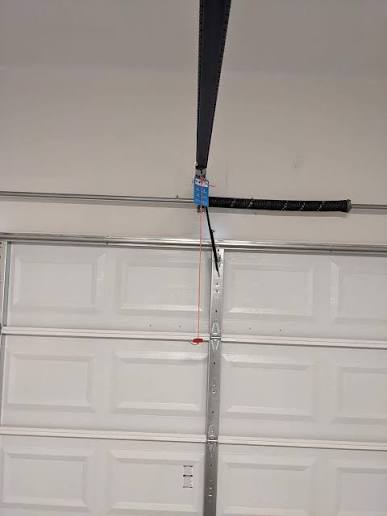
Have you ever stood in your driveway, remote in hand, wishing you didn’t have to get out of your car to open the garage? You are not alone. Many homeowners consider upgrading to an automatic system but hesitate due to fears of complexity. If you are asking yourself, “Is it difficult to install a garage door opener?”, the answer is nuanced: it is challenging but entirely manageable for a handy homeowner with the right preparation.
This guide will walk you through the reality of the task, helping you decide whether to pick up the wrench or pick up the phone to call a professional.
Understanding the Complexity: What Makes It Hard?
Before diving into the toolbox, it is essential to understand what makes this project tick. Installing a garage door opener is not just about hanging a motor on the ceiling. It involves mechanical alignment, electrical wiring, and most importantly, safety calibration.
The difficulty level largely depends on three factors:
- Your existing setup: Do you have a pre-installed bracket? Is the wiring already in place?
- The type of opener: Chain-drive models are heavier and noisier but often simpler mechanically. Belt-drive systems are quieter but may require more precise tension adjustments.
- Your comfort level with tools: If you can confidently use a drill, ladder, and wire strippers, you are halfway there.
According to industry standards, a typical installation takes between 4 to 6 hours for a first-timer. This includes unboxing, assembly, mounting, wiring, and testing. While this might seem daunting, breaking it down into smaller steps makes it much less intimidating.
Essential Tools and Preparation
Success in any DIY project begins with preparation. Trying to install an opener without the right tools is like trying to bake a cake without an oven—it simply won’t work well.
The Must-Have Toolkit
- Power Drill & Bits: For securing brackets to wood and metal.
- Wrench Set & Socket Set: Typically metric and standard sizes (1/2″, 9/16″, 7/16″).
- Level: Crucial for ensuring the rail is straight.
- Ladder: A sturdy stepladder that reaches your ceiling height comfortably.
- Wire Strippers & Electrical Tape: For safe connection of power units.
- Assistant: Highly recommended. Having a second person to hold the motor unit while you secure it can prevent injury and frustration.
Safety First
Garage doors are heavy, and the springs under tension are dangerous. Never attempt to adjust or repair the torsion springs yourself. This part of the job should always be left to certified professionals. Our focus here is strictly on the opener unit installation.
For more detailed information on garage door mechanics and safety standards, you can refer to the comprehensive overview on Wikipedia.
Step-by-Step Installation Guide
If you have gathered your tools and enlisted a helper, you are ready to begin. Follow these steps carefully to ensure a smooth process.
Step 1: Assemble the Rail
Most modern openers come with a rail that needs to be assembled. Lay the pieces out on the floor according to the manual. Connect the sections using the provided bolts. Ensure the chain or belt is threaded correctly through the trolley mechanism. Tip: Keep the packaging until the end; you may need it for returns if parts are missing.
Step 2: Mount the Header Bracket
Locate the center of your garage door opening. Measure up from the top of the door to find the ideal spot for the header bracket. This bracket holds the end of the rail. Use a level to ensure it is perfectly horizontal. Secure it firmly into the structural framing above the door, not just the drywall.
Step 3: Install the Motor Unit
This is the heaviest part of the job. With your assistant’s help, lift the motor unit and attach it to the ceiling joists using the provided mounting brackets. Do not hang it from the drywall alone. It must be anchored into solid wood or metal beams. Ensure the unit is level and secure.
Step 4: Connect the Rail to the Motor
Attach the assembled rail to the motor unit. Then, connect the other end of the rail to the header bracket you installed earlier. The rail should have a slight downward slope toward the door (about 1/4 inch per foot) to ensure smooth operation.
Step 5: Install the Door Bracket
Attach the J-bracket to the top section of your garage door. Use the provided hardware to secure it tightly. Connect the arm from the trolley on the rail to this bracket. This arm is what physically pulls the door up and pushes it down.
Step 6: Wiring and Power
Run the power cord from the motor unit to a nearby outlet. If your garage lacks an outlet near the ceiling, you may need to hire an electrician to install one. Connect the wall control panel and safety sensors. The sensors must be aligned perfectly; if the beam between them is broken, the door will not close.
Step 7: Programming and Testing
Plug in the unit. Follow the manufacturer’s instructions to program the remote controls and keypad. Test the door’s movement. Adjust the “force” and “travel” limits so the door opens fully and closes gently without slamming.
Common Challenges and How to Overcome Them
Even with a plan, hurdles can appear. Here are the most common issues DIYers face:
| Challenge | Solution |
|---|---|
| Misaligned Sensors | Clean the lenses and ensure they are at the same height. The indicator lights should be solid, not blinking. |
| Noisy Operation | Lubricate the chain or belt with garage door-specific lubricant. Check that all bolts are tight. |
| Door Reverses Unexpectedly | The force settings may be too low. Increase the force slightly via the motor unit’s adjustment screws. |
| Remote Not Working | Reprogram the remote. Ensure the battery is fresh and the antenna on the motor is hanging down. |
When to Call a Professional
While many homeowners successfully install their own openers, there are scenarios where calling a pro is the smarter choice:
- Old or Damaged Doors: If your door is warped, unbalanced, or has broken springs, fix those issues first.
- Complex Wiring: If you need new electrical circuits installed, a licensed electrician is required by code in many areas.
- Lack of Confidence: If reading the manual makes you anxious, there is no shame in hiring an expert. Safety is paramount.
FAQ Section
1. Can I install a garage door opener by myself?
Yes, but it is significantly easier with a helper. The motor unit is heavy and awkward to hold while drilling. Having a second person ensures accuracy and safety.
2. How long does it take to install a garage door opener?
For a beginner, expect to spend 4 to 6 hours. Experienced DIYers might finish in 2–3 hours. Rushing can lead to misalignment and safety hazards.
3. Do I need special electrical knowledge?
Basic understanding of plugging in a device is usually enough. Most openers plug into a standard 120V outlet. However, if you need to install a new outlet, consult an electrician.
4. What is the most difficult part of the installation?
Aligning the safety sensors and adjusting the travel limits is often the trickiest part. It requires patience and fine-tuning to ensure the door stops exactly where it should.
5. Is it cheaper to install it myself?
Yes. Professional installation typically costs between $150 and $300 on top of the unit price. Doing it yourself saves this labor cost, allowing you to invest in a higher-quality opener.
Conclusion
So, is it difficult to install a garage door opener? It is a moderate-difficulty project that rewards patience and preparation. By following the steps outlined above, using the right tools, and prioritizing safety, you can successfully complete this upgrade.
Not only will you save money on labor, but you will also gain the satisfaction of a job well done. Imagine the convenience of never having to leave your car in the rain again!
If you found this guide helpful, please share it with your friends on social media who might be considering the same project. Your next DIY victory could be just a weekend away!
Leave a Reply