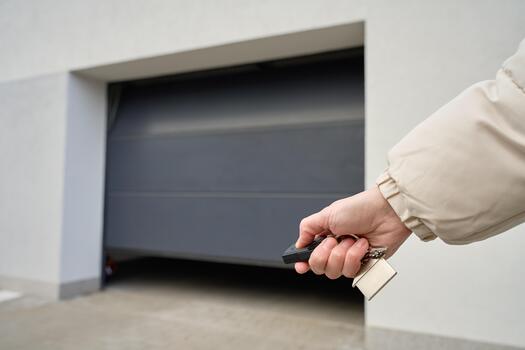
Dealing with a stubborn garage door is incredibly frustrating, especially when you realize, “I have to hold my garage door button to close” it every single time you leave for work. Don’t worry, you aren’t alone in this predicament, and this common issue is usually a quick fix that you can handle yourself without calling an expensive technician. Let’s dive into exactly why this is happening and how you can resolve it today.
Why Do I Have To Hold My Garage Door Button To Close It?
If you find yourself constantly pressing the wall button, your garage door opener has likely entered a safety fallback mode.
Modern residential garage door openers are equipped with mandatory auto-reverse mechanisms. According to the Wikipedia entry on garage doors, these systems evolved to include infrared sensors in the early 1990s to prevent entrapment.
When the opener’s logic board detects an anomaly—such as a blocked infrared beam, a misaligned sensor, or an obstruction in the door’s path—it disables the automatic remote closing feature. The system essentially says, “I am not sure if the path is clear, so the human must manually verify it by holding the button.”
While this keeps your family and pets safe, it is highly inconvenient. Fortunately, identifying the root cause is usually straightforward.
The 3 Main Culprits Behind This Issue
Before we grab our tools, let’s understand what triggers this safety mode. As certified garage door technicians often note, 90% of “hold-the-button” issues are simply caused by slightly bumped sensor eyes.
Here are the primary suspects:
- Misaligned Photo-Eye Sensors: The small black cameras near the floor on both sides of the door track. If they aren’t looking directly at each other, the door won’t close automatically.
- Dirty or Obstructed Sensor Lenses: Spiderwebs, mud, or even heavy fog can block the infrared beam.
- Incorrect Travel Limit Settings: If the door doesn’t close all the way to the floor before reversing, the system assumes it hit an object.
Step-by-Step Guide to Fixing the Problem
Ready to get your automatic convenience back? Follow this concrete, step-by-step tutorial to troubleshoot and fix the issue.
Step 1: Inspect and Realign the Safety Sensors
Look at the small LED lights on both sensors. Usually, one has a steady green light (the sending unit) and the other has a steady red or amber light (the receiving unit).
- Check the receiving sensor. If its LED is blinking or completely off, the beam is broken.
- Loosen the wingnut on the bracket of the blinking sensor just enough to allow movement.
- Slowly rotate the sensor until the blinking LED turns solid.
- Pro Tip: Use a small bubble level to ensure both sensors are exactly 6 inches off the ground and perfectly parallel. Tighten the wingnut securely.
Step 2: Clean the Sensor Lenses and Check for Sunlight
Sometimes the alignment is perfect, but the beam is still blocked.
- Take a clean microfiber cloth and gently wipe the plastic lenses on both sensors. Do not use harsh chemical glass cleaners, as they can leave a residue that attracts dust.
- Check for physical obstructions like trash cans, broom handles, or overgrown weeds.
- Note on sunlight: If your garage faces direct east or west, the late afternoon sun can actually overpower the infrared beam. If this is the issue, try building a small cardboard shield around the sensors to block direct sunlight.
Step 3: Adjust the Down Limit Switch
If your sensors are perfectly aligned and glowing solidly, but the door still reverses before hitting the floor, your travel limit switch needs adjustment.
- Locate the limit adjustment dials on the back or side of the garage door motor head. Look for the dial labeled “Down Limit” or “Close”.
- Using a flathead screwdriver, turn the dial in small 1/4-inch increments in the direction of the arrow marked “Increase” or “Down”.
- Test the door using the wall button.
- Repeat this process until the door closes completely and the weather seal compresses slightly against the concrete floor without the motor straining.
DIY Repair vs. Hiring a Professional
Not sure if you should tackle this yourself or call in the pros? Here is a quick comparison to help you decide.
| Feature | DIY Troubleshooting | Hiring a Professional |
|---|---|---|
| Cost | $0 (Just your time) | $100 – $250 (Service call + labor) |
| Time Required | 15 – 30 minutes | 1 – 3 days (Waiting for appointment) |
| Best For… | Sensor alignment, cleaning, limit adjustments. | Broken springs, frayed internal wiring, dead logic boards. |
| Risk Level | Very Low (Safe for beginners) | Zero (Handled by certified experts) |
Expert Insight: If you have checked the sensors and adjusted the limits, but the door still requires you to hold the button, the issue might be a frayed wire between the wall button and the motor. At this stage, calling a professional is the safest and most efficient route.
Frequently Asked Questions (FAQ)
1. Can I bypass the garage door sensors to stop holding the button?
No, you should never bypass the safety sensors. Doing so disables the auto-reverse feature, creating a severe crushing hazard for children and pets. Furthermore, bypassing them violates US Consumer Product Safety Commission (CPSC) regulations. The only legal way to close the door when the sensors are malfunctioning is to hold the wall button.
2. Why is my garage door remote working, but the wall button requires holding?
This is a rare but possible scenario. If the remote closes the door normally but the wall button requires holding, the issue is likely a short circuit in the wall button wiring. Check the thin wires connecting the button to the motor head for pinches or staples that might be causing a partial short.
3. How much does it cost to fix a garage door that won’t close automatically?
If the issue is simply misaligned sensors or dirty lenses, it will cost you nothing to fix it yourself. If a sensor is physically broken and needs replacement, expect to pay between $50 and $100 for the part, or around $150 if a technician installs it for you.
4. Does extreme weather affect garage door sensors?
Yes, absolutely. Extreme cold can cause condensation to freeze on the sensor lenses, blocking the infrared beam. Additionally, heavy rain or thick fog can scatter the beam. If this happens during a storm, simply wipe the lenses dry. Once the weather clears, the door should function normally.
5. What if the door closes halfway and then goes back up?
This is almost always a travel limit issue or an issue with the force setting. If the door meets resistance (like a sticky track or a stiff spring) before reaching the floor, it will reverse. First, lubricate the metal tracks and rollers with a silicone-based spray. If that fails, adjust the “Down Limit” dial as described in Step 3.
Conclusion
Realizing “I have to hold my garage door button to close” the door is a massive headache, but it is rarely a sign of a catastrophic failure. In most cases, a quick realignment of your photo-eye sensors or a minor adjustment to the travel limit switch will restore your garage door to perfect working order. By following these steps, you save time, money, and the frustration of standing in the driveway pressing a button
Leave a Reply