Is your car stuck in the driveway because your clicker suddenly stopped working? Don’t worry, learning how to sync remote to Liftmaster garage door opener is actually a quick and easy DIY fix that will get your door rolling again in minutes.
Grab a step stool, and let’s get your garage door back in working order together.
How To Sync Remote To Liftmaster Garage Door Opener: Step-by-Step
Before we dive in, it is important to know that modern Liftmaster openers use a rolling code system for enhanced security. This means the code changes every time you use the remote, preventing hackers from copying your signal. Because of this, the syncing process requires you to communicate directly with the motor unit.
Here is the exact step-by-step process to program your new or unresponsive remote.
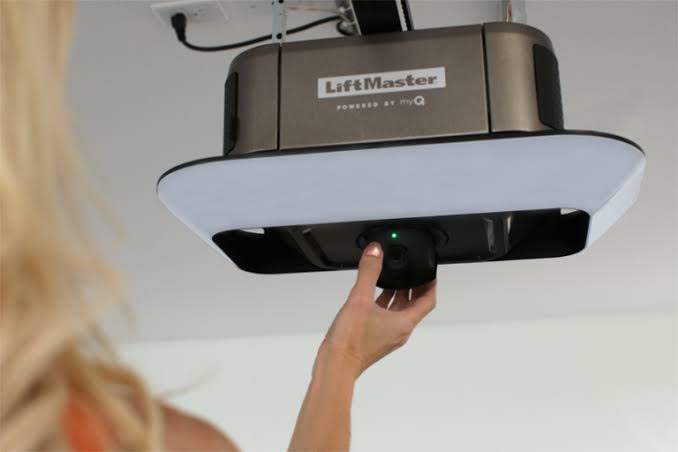
Step 1: Locate the “Learn” Button
First, you need to find the motor unit hanging from your garage ceiling. Look for a small, colored button on the back or side of the unit, usually near the white antenna wire. The color of this button dictates your specific programming sequence:
- Yellow: Security+ 2.0 (Most common in models from 2011 to present)
- Purple: Security+ (Models from 2005 to 2011)
- Red/Orange or Green: Older legacy models
Step 2: Clear the Old Memory (Crucial Step)
If your remote is acting glitchy, you must clear the old memory first.
- Press and hold the colored Learn button for about 6 to 10 seconds.
- Release the button when the small LED indicator light next to it turns off.
- Note: This will erase all previously paired remotes and keypads. You will need to re-sync all of them in the next steps.
Step 3: Program the Remote
Now that the system is reset, it is time to pair your clicker.
- Stand about 5 to 10 feet away from the motor unit.
- Press and release the colored Learn button once. The LED light will turn on or start blinking. You have exactly 30 seconds to complete the next step.
- On your handheld remote, press and hold the button you want to use to open the door.
- Hold it for 3 to 5 seconds.
- Watch the motor unit. When you see the overhead lights flash or hear a distinct “click,” release the remote button. Your remote is now successfully synced!
How Do I Reset My Liftmaster Garage Door Opener Before Syncing?
Many users ask, “How do I reset my Liftmaster garage door opener?” Resetting is often the secret to fixing an unresponsive remote.
According to the International Door Association (IDA), nearly 70% of homeowners use their garage door as their primary entrance. A malfunctioning remote isn’t just an inconvenience; it’s a daily disruption to your routine. When the internal memory gets corrupted, a hard reset clears the digital slate.
To perform a hard reset, simply locate the Learn button on the back of the motor head. Press and hold it down until the indicator LED completely turns off (usually takes about 6 to 10 seconds). Once the light goes out, the opener has been reset to factory settings. Remember, this wipes all paired devices, so have all your family remotes and keyless entry pads ready to reprogram immediately after.
What If My Liftmaster Remote Still Won’t Sync? (Troubleshooting)
If you followed the steps above and the door still isn’t responding, don’t panic. Let’s look at some common troubleshooting steps.
Check the Battery First
It sounds simple, but it is the most common culprit. Most Liftmaster remotes use a 3V CR2032 coin cell battery. If your remote has a small LED light that blinks weakly or doesn’t light up at all when you press the button, swap out the battery.
Check for LED Interference
Interestingly, certain LED light bulbs can emit radio frequency interference that blocks your remote’s signal. If you recently changed the bulbs in your garage door opener to generic LEDs, try unscrewing them temporarily. If the remote starts working, you need to buy “garage door specific” LED bulbs that are shielded against interference.
DIY Syncing vs. Calling a Professional
Sometimes, hardware issues go beyond a simple sync. Here is a quick comparison to help you decide if you should keep troubleshooting or call for backup.
| Feature | DIY Syncing & Troubleshooting | Calling a Professional Technician |
|---|---|---|
| Cost | $0 (Free) | $75 – $150+ per visit |
| Time Required | 10 to 15 minutes | 1 to 2 hours (plus scheduling) |
| Skill Level | Beginner (No tools required) | Expert (Diagnoses logic board issues) |
| Best For | New remotes, dead batteries, lost codes | Broken logic boards, stripped gears, motor failure |
If your motor unit hums but the door doesn’t move, or if the Learn button light refuses to turn on at all, you likely have a hardware failure. At that point, it is time to call a certified technician.
Can I Use My Car’s HomeLink With a Liftmaster Opener?
Absolutely! Syncing your car’s built-in HomeLink system is highly convenient. The process is slightly different depending on the age of your vehicle and your Liftmaster model.
For most modern vehicles and Liftmaster openers with a Yellow Learn button:
- Turn your car’s ignition to the “On” or “Accessory” position.
- Go to your garage motor unit and press the Yellow Learn button once.
- Return to your car within 30 seconds.
- Press and hold the desired HomeLink button in your car until the garage door opener lights flash or you hear a click.
For older vehicles (rolling code cars) with Purple/Red buttons: You will need to press the HomeLink button and your handheld remote button at the same time until the HomeLink indicator light flashes rapidly, then immediately press the Learn button on the motor unit to finalize the sync.
Frequently Asked Questions
1. How do I know if my Liftmaster remote is compatible?
Compatibility is determined by the color of the Learn button on your motor unit. If your opener has a Yellow button, you need a Security+ 2.0 remote (usually yellow or purple with a photo eye icon). If it has a Purple button, you need a Security+ remote. Always match the remote’s learning color to the opener’s Learn button color.
2. Why is my Liftmaster remote blinking but not working?
A blinking light on your remote usually indicates one of two things: a dying battery or a loss of synchronization. First, replace the CR2032 battery. If the light remains solid or blinks rapidly but the door won’t move, the remote has likely lost its programming and needs to be re-synced using the Learn button.
3. How many remotes can I sync to one Liftmaster opener?
Most modern Liftmaster garage door openers can hold up to 8 remote controls or keyless entry pads in their memory. However, if you are using a myQ smart home setup, some Wi-Fi-enabled models can support even more devices through the cloud app.
4. Do I need a ladder to sync a Liftmaster remote?
In most cases, yes. You need physical access to the motor unit hanging from the ceiling to press the Learn button. However, if you have a specific Liftmaster wall control console (like the 882LMW) that features a small Learn button on the wall plate, you can sync remotes directly from the wall without a ladder.
Conclusion
Learning how to sync remote to Liftmaster garage door opener is an empowering skill that saves you time, money, and the frustration of being locked out of your own garage. By understanding your Learn button colors, performing a quick memory reset, and checking for simple issues like dead batteries, you can solve 90% of remote issues in under ten minutes.
Keep this guide handy in your digital bookmarks for the next time a new remote needs programming or an old clicker acts up.
Leave a Reply